Repairing Drywall: DIY Tips & Tricks
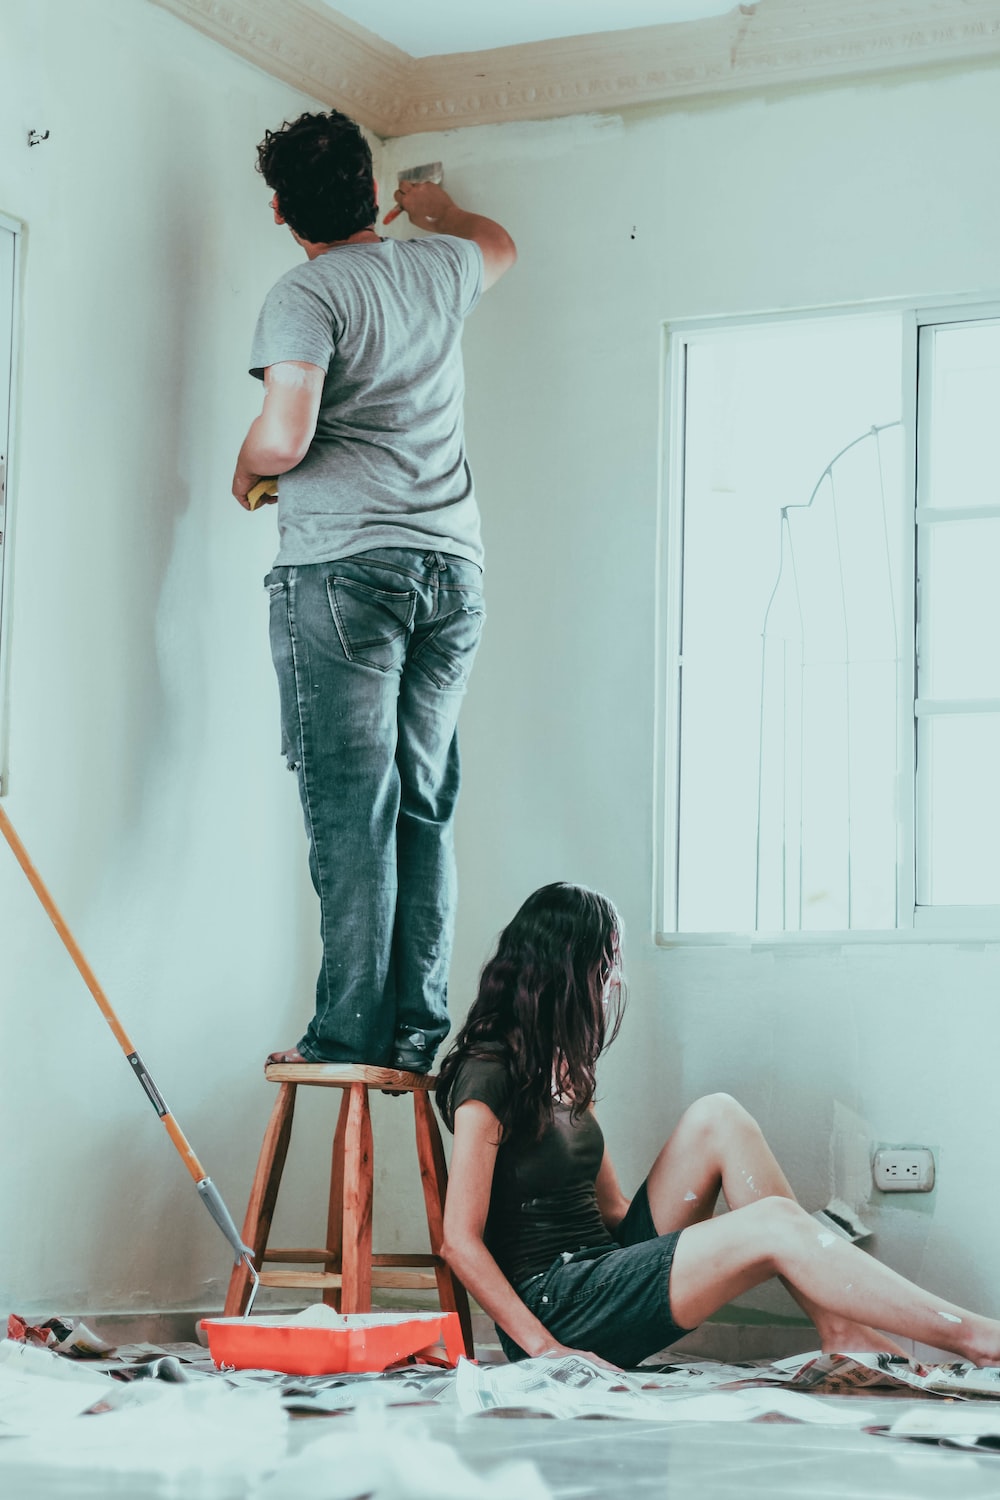
Got a crack or nail pops on your ceilings or walls?
Don’t worry; repairing drywall is easier than you might think.
Whether caused by an accident or wear and tear, drywall damage is a common issue many homeowners face.
Apply the compound to the affected area and wait until the compound dries.
From moisture damage to impact damage, nail holes to cracks, there are several factors that can cause ceilings and drywall to need repair. But with the right tools and techniques, you can fix it up like new using compound dries.
To repair a crack in drywall, you’ll need a few key items: a drywall saw, a drywall knife, and some sheets of inch drywall to replace the damaged section.
First, install a furring strip behind the damaged area for support.
Then, cut out the damaged section and replace it with the new drywall sheets.
Apply a second coat of drywall compound and sand it smoothly for a seamless finish.
But what if you’re dealing with ceiling damage?
Don’t worry – repairing drywall on your ceiling follows the same process as repairing walls.
To repair the damage, you must add a second coat of joint compound after applying the first coat and smoothing it out. You may also need furring strips to attach new drywall sheets to the damaged area.
If you’re wondering how to fix your drywall or looking for ways to repair the ceiling more efficiently, keep reading.
In this post, we’ll cover everything from basic repairs to more complex issues with sheets so you can tackle any problem that comes your way.
We have also included an image of the process to make it easier.
If you need to attach the drywall to a furring strip, we’ve got you covered too.
Step-by-step guide for a drywall repair project
Gather the necessary tools and materials for the drywall project
Before repairing your drywall, you must have all the necessary tools and materials.
You’ll need a putty knife, sandpaper, joint compound, screws or adhesive, a drill or screwdriver, a saw or utility knife, and a piece of drywall to replace the damaged area.
Remove any damaged or loose drywall from the area.
The first step in repairing your drywall is removing any damaged or loose pieces.
Use a utility knife to cut away any frayed edges around the hole. Take care not to cut too far into the undamaged wallboard.
Once you’ve removed all damaged parts of the wallboard, take a photo of the hole for reference.
Clean up any debris left behind.
Cut a new piece of drywall to fit the hole or damaged area
Step 1: Now that you’ve removed all the damaged parts of your wallboard, it’s time to cut a new piece of drywall to fit into the hole.
Step 2: Use a saw or utility knife to cut out a square shape around the hole in your wallboard.
Step 3: Take a photo of the hole and the square shape you cut out for reference.
Step 4: Measure this opening and use these dimensions to cut out an identical square from your replacement piece of drywall.
Secure the new piece of drywall in place with screws or adhesive.
Once your new piece of inch drywall is ready for your drywall project, it’s time to secure it in place.
First, apply drywall compound along each edge of your replacement board before inserting it into its respective spot on top of where you just removed the old material using screws.
Apply joint compound and sand until smooth.
After securing your new piece of wallboard with either adhesive or screws (depending on which method you choose), the next step is to apply a joint compound.
Use a putty knife to spread an even layer of joint compound over the seams where your new piece of drywall meets the old material.
Allow this layer to dry completely before proceeding to the next step and sanding it down with fine-grit sandpaper.
Tips for Fixing Gouges in Gypsum Board
Repairing Gouges with Joint Compound
Drywall damage, such as gouges in the gypsum board, can be a common problem during a drywall project. However, it can be easily fixed with a joint compound.
Start by cleaning the area around the drywall damage to remove any dirt or debris. Then, apply a putty knife to the joint compound to the inch drywall patch.
Apply enough joint compound to fill the drywall damage, but avoid applying too much as it will require more sanding later on.
After applying the joint compound to your drywall project, let it dry completely before sanding. The drying time may vary depending on the size of the gouge and humidity levels, so check the manufacturer’s instructions for guidance.
Use a drywall knife to apply the compound evenly over any holes or gaps up to 1/4 inch in your inch of drywall.
Once dry, locate the wall stud and gently sand down any rough edges or bumps until smooth.
Filling Deeper Gouges with a Drywall Patch
For deeper gouges, the first step is to fill them with a drywall patch before applying joint compound. Cut a piece of drywall patch slightly larger than the hole and place it over the hole.
Use a putty knife to spread the joint compound over the patch until it is flush with the surrounding wall surface.
Step 1: Apply a layer of joint compound to the inch drywall. Allow ample time for this layer of joint compound to dry completely before proceeding with another layer if needed.
Step 2: Repeat the process until you achieve the desired result.
Step 3: Sand down any rough edges or bumps after each layer has dried. Don’t forget to take a photo of your progress!
Painting Over Repaired Areas
Once you’ve repaired your gouged wall surface using joint compound and/or drywall patches, you’ll want to take a photo of the repaired area to ensure it seamlessly matches your surrounding wall surface.
For best results, prime your repaired area first before painting.
Step 1: Choose a primer compatible with your gypsum board and paint type (latex or oil-based).
Step 2: Apply one coat of primer using a brush or roller on the drywall compound and allow ample drying time before painting over it with a paint color that matches your existing wall surface.
When selecting a paint color for touch-ups or repairs, the first step is to ensure you have drywall compound ready. Make sure you choose a paint color that matches the existing wall surface.
If you’re unsure of the exact color, take a sample of your wall surface to a paint store and have them match it.
Fixing Cracked Corners and Loose Tape
Removing Loose Tape and Debris
To start fixing cracked corners and loose tape. Use a utility knife to cut away any loose tape and remove any debris from the area.
This is an important step to ensure that the joint compound adheres properly.
Applying a Furring Strip
Next, in this step, apply a furring strip to the corner using screws to help secure the corner bead. A furring strip is a thin piece of wood or metal supporting the corner bead.
Measure the length of your corner bead and cut your furring strip accordingly.
Place it on one side of the corner, ensuring it’s level with the wall surface, then screw it in place every few inches. Afterward, apply drywall compound to fill gaps or holes in the corner bead.
Applying Joint Compound
Once you’ve completed the previous step of securing your furring strip, you can move on to the next step of applying joint compound to fill in the crack.
Use a putty knife or trowel to spread the joint compound over the crack in a smooth layer. Make sure to apply enough pressure to fill in all cracks and crevices.
After the first step of applying joint compound on both sides of your corner bead, press it tight against the wall and hold it there for several seconds until it sticks firmly into place.
Then move on to the next step and apply more joint compounds in the center of your corner bead.
Smoothing Out Joint Compound
Step 1: Use a wide putty knife or drywall trowel to smooth out the joint compound along each side of your repaired area.
Step 2: Start at one end of your repair job and work towards another end until everything looks even again.
Repeat this step until you’re satisfied with how everything looks before sanding down any rough areas or bumps left behind by excess joint compound. We recommend taking your time with each step to ensure a smooth and even finish.
Importance of Using Drywall Tape and Inspection
Drywall Tape Helps to Reinforce Joints and Prevent Cracking
Drywall tape is an essential step for repairing drywall. It helps to reinforce joints, prevent cracking, and create a smooth surface for painting or wallpapering.
Without it, the seams between the drywall sheets would be vulnerable to damage from shifting or settling the building’s foundation.
Choosing the right kind for your project is important when applying drywall tape.
There are two main types: paper and mesh.
Paper tape is more commonly used and is ideal for inside corners because it can be folded easily.
Mesh tape is better suited for outside corners because it has a self-adhesive backing that makes it easier to apply. However, if you want to learn more about drywall installation, you can check out tutorials online.
To apply drywall tape properly, you will need a joint compound, a taping knife, sandpaper, and a steady hand. First, spread a thin layer of joint compound over the seam with your taping knife.
Then lay the drywall tape on top of the joint compound and use your knife to smooth out any wrinkles or bubbles in the tape.
Finally, let it dry completely before sanding down any rough spots.
Proper Inspection of Drywall Tape Ensures a Smooth and Seamless Finish
After applying drywall tape, proper inspection is crucial to ensure that everything looks seamless and there are no visible seams or cracks.
This step should not be skipped, as even small imperfections can become noticeable once painted or wallpapered.
Inspecting your drywall tape involves looking closely at each seam after applying joint compound but before sanding begins.
Check for any bubbles under the tape or areas where the joint compound has not adhered correctly to either side of the seam. Make sure to pay attention to these details.
If you find any issues during the inspection, fix them immediately by removing any loose material with your taping knife before reapplying new joint compound over those areas until they’re level with surrounding surfaces.
Once the joint compound has dried, sand it to create a smooth surface.
Without Drywall Tape, Joints Can Become Weak and Prone to Damage
Drywall tape is essential for reinforcing joints between drywall sheets. Without it, the seams would be vulnerable to damage from shifting or settling the building’s foundation.
Over time, this can cause cracks and other issues that require costly repairs.
When drywall tape is not used properly or at all, it can lead to weak joints prone to damage. This can result in unsightly gaps or cracks in your walls that are difficult and expensive to repair.
To avoid this problem, always use high-quality drywall tape and apply it carefully with precision.
Inspect your work regularly during each step of the process to ensure that everything looks seamless and there are no visible seams or cracks.
Using the Right Type of Drywall Tape is Crucial for a Successful Repair
As mentioned earlier, there are two main types of drywall tape: paper and mesh.
Choosing the right type of tape for your project is crucial for a successful repair.
Paper tape is ideal for inside corners because it can be folded easily without tearing. Mesh tape is better suited for outside corners because it has a self-adhesive backing that makes it easier to apply.
When choosing which drywall tape to use, consider factors such as ease of application, strength, durability, and cost.
If you’re unsure which type of tape would work best for your project, consult with an expert or do some research online before making a purchase.
Drywall Tape Should Be Applied with Care and Precision for Optimal Results
Applying drywall tape requires care and precision to achieve optimal results. It’s important not to rush through this process, as even small mistakes can lead to unsightly gaps or cracks in your walls.
When applying drywall tape, spread a thin layer of joint compound over the seam with your taping knife. Then lay the drywall tape on top of the joint compound and use your knife to smooth out any wrinkles or bubbles in the tape.
Finally, let it dry completely before sanding down any rough spots.
Inspect your work regularly during each step of the process to ensure that everything looks seamless and there are no visible seams or cracks.
If you find any issues, fix them immediately by removing any loose material with your taping knife before reapplying new joint compound over those areas until they’re level with surrounding surfaces.
Using Drywall Patches for Larger Holes
What are drywall patches?
Drywall patches are a quick and easy way to repair larger holes in the wall. They come in various sizes and shapes, making it easy to find one that fits your needs.
How to patch a large hole in drywall: Overview
When repairing a larger hole in the wall, a drywall patch is often the best solution.
Here are the steps you need to follow:
- Cut the patch to size: Measure the hole and cut the patch so it’s slightly larger than the hole.
- Attach it to the wall studs: Securely attach the patch to the wall studs using drywall screws.
- Apply drywall mud over the patch: Use a putty knife to apply drywall mud over the patch, ensuring it covers all edges.
- Once you’ve applied enough mud, let it dry completely before sanding it down until smooth.
Using Drywall Screws
When attaching a drywall patch, screws instead of nails is recommended since they hold better and won’t pop out as easily over time.
Make sure you use screws long enough to go through both layers of drywall and into the wall stud behind them.
Applying Drywall Mud
After attaching your drywall patch with screws, cover it with several thin layers of joint compound or “mud.” Be sure not to apply too much at once; otherwise, you may create more work for yourself when sanding later.
Use a wide taping knife or putty knife to apply mud smoothly and evenly.
Start by applying mud around all four edges of your new piece of drywall tape (if necessary), then fill in any gaps between this tape and existing pieces already on your wall.
Once an even layer of mud covers your patch, let it dry completely before sanding it down.
Inserting Backer Boards
For larger holes in the wall, you may need to insert backer boards behind your drywall patch. These boards give the patch something to attach to and help prevent it from sagging or falling out over time.
To install backer boards, cut two pieces of wood slightly longer than the hole’s width. Then, place them inside the hole so that they’re perpendicular to each other (like a “T” shape). Finally, screw them into place using drywall screws.
Once your backer boards are securely in place, you can attach your drywall patch as usual.
Fixing Nail Pops
Nail pops are small bumps or cracks on walls when nails push through the surface of the drywall. To fix these issues:
- Remove any loose material around the nail pop.
- Fill in the hole with the joint compound.
- Sand it down until smooth.
- Repeat steps 2 and 3 until the nail pop is no longer visible.
Using a 20-Minute Setting Compound
If you need to repair a hole in your wall quickly, consider using a 20-minute setting compound instead of a traditional joint compound. This type of mud dries much faster and allows you to complete repairs faster than other types of mud.
However, remember that this type of mud is more difficult to work with since it sets so quickly; therefore, be sure to have all the necessary tools and materials ready before mixing up a batch.
Applying Joint Compound for Professional Results
What is Joint Compound, and Why is it Important in Repairing Drywall?
A joint compound is used to repair drywall and create a smooth surface. It’s made of gypsum powder, water, and various additives that give it a creamy consistency.
The compound dries hard and can be sanded down to create a seamless finish on walls or ceilings.
When repairing drywall, joint compound is essential in achieving professional results. It fills in gaps between the drywall sheets, covers up screw holes, and creates a smooth surface for painting or wallpapering.
How to Apply Joint Compound for Professional Results
Applying the first coat of joint compound is a crucial step in the repair process.
Here are the steps to follow when applying joint compound:
- Use a putty knife to apply the first coat of joint compound over the damaged area.
- Spread the compound evenly over the surface, covering any gaps or holes.
- Use light pressure when applying the compound to avoid creating air pockets or bubbles.
- As you go along, smooth out any bumps or ridges with your putty knife.
- Allow the first coat of joint compound to dry completely before applying subsequent coats.
The pro tip is to apply at least three coats of joint compound, allowing each layer to dry before applying the next. This ensures that all gaps and imperfections are filled properly, resulting in a smooth finish.
When applying subsequent coats of joint compound, feather each layer slightly beyond the previous one. This will help blend each layer seamlessly.
It’s also important not to sand down each layer too aggressively, as this can damage the joint compound and underlying drywall.
Additional Tips for Applying Joint Compound
Here are some additional tips for applying joint compound like a pro:
- Before starting any repairs, ensure all screws or nails are screwed down tightly into the stud. This will ensure the drywall is flush against the wall and won’t shift during repairs.
- Use a sanding block for sanding down any rough spots or bumps on the surface of the joint compound. This will help create an even smoother finish.
- Wear protective gear such as gloves and a mask when applying joint compound. Joint compounds can irritate the skin and lungs if inhaled or exposed for prolonged periods.
- If you’re repairing large areas of drywall, consider using a taping knife instead of a putty knife. Taping knives are wider and can cover more surface area at once, making the repair process quicker and more efficient.
Following these tips, you can apply joint compound like a pro and achieve professional results when repairing drywall. Remember, patience is key.
So take your time, and don’t rush the process!
How to Repair Large Holes: Check for Wires
Look for wires before repairing large holes in drywall.
Repairing large holes in drywall can be daunting, and it’s important to ensure that you take all the necessary precautions to avoid any accidents or damage.
One of the most crucial steps is checking for wires behind the wall before you start any repairs. Electrical wires can be hidden behind walls and cause danger if not handled properly.
To check for wires, use a stud finder to locate any electrical wiring or pipes behind the wall.
This will help you avoid accidentally cutting into them while making repairs.
If your stud finder doesn’t have a wire detection feature, you can purchase a separate tool specifically designed for this purpose.
Use protective gear when cutting into the wall.
Once you’ve located any wires or pipes behind the wall, proceed cautiously and wear protective gear when cutting into the wall.
This includes gloves, safety glasses, and a dust mask to protect yourself from any debris that may be released during the repair process.
Cut out damaged drywall around any wires or pipes rather than through them. If you need to cut through wiring or piping, turn off the power supply or shut off the water supply beforehand.
Turn off the power supply before working on electrical wiring
If you are working on electrical wiring during your repair process, you must turn off the power supply to that area first. This will prevent any potential electric shocks or fires while making repairs.
Before turning off your power supply, ensure all appliances and electronics in that area are unplugged and turned off.
You should also mark your breaker box with tape indicating which breaker controls that area so that no one accidentally turns it back on while you’re working.
Proceed with caution when repairing large holes.
When repairing large holes in drywall, it’s important to proceed cautiously. Make sure to follow all safety guidelines and take your time to ensure that the repair is done properly.
Cut out any damaged drywall using a utility knife, or drywall saw. Once you’ve removed the damaged section, cut a new piece of drywall to fit the hole.
Secure it using drywall screws or nails, making sure to sink them slightly below the surface of the drywall.
Next, apply joint compound over the seams and screw/nail holes using a putty knife.
Allow it to dry completely before sanding it smooth, and apply a second coat if necessary.
Don’t skimp on sanding after patching large holes
Sanding is crucial after patching large holes to ensure a smooth surface.
When repairing drywall, it’s essential not to skimp on the sanding process. After patching large holes, you need to sand the area thoroughly to achieve a smooth and even surface.
Sanding helps remove any excess joint compound that may have been applied during the repair process, ensuring that the surface is level and free of bumps or ridges.
To begin sanding, use 120-grit sandpaper and work in circular motions over the patched area. Take your time and apply even pressure throughout the process.
Once you’ve sanded down any high spots or rough areas, switch to 220-grit sandpaper for a finer finish. Be sure to wipe away any dust particles with a clean cloth before moving on to painting or priming.
Use a screwdriver or hammer to secure the patch to the stud before applying mud.
Before applying joint compound (also known as mud) over your drywall patch, it’s essential to ensure it’s securely fastened in place.
Attach screws through the drywall into the stud behind it using a screwdriver or hammer. This will provide stability for your patch and prevent it from shifting or cracking during application.
After securing your patch in place, apply joint compound over it using a putty knife. Start with a thin layer of mud and gradually build up until you have achieved an even surface across the entire area.
Allow this coat of mud to dry completely before moving on to the next step.
Apply a second coat of mud after the first coat dries completely.
Once your first coat of joint compound has dried completely (usually overnight), you can apply additional coats until you achieve your desired finish. It’s important not to rush this process – applying too much mud at once can cause cracking or bubbling.
Use a wider putty knife for your second coat and apply the mud in a crisscross pattern. This will help to fill any gaps or imperfections left from the first coat.
Be sure to feather out the edges of the mud to blend it seamlessly with the surrounding drywall.
After each subsequent coat of mud, be sure to sand down any high spots or rough areas before applying another layer. Remember that patience is key.
Be sure to wear a dust mask while sanding to avoid inhaling dust particles.
Sanding drywall can create a significant amount of dust, which can be harmful if inhaled over long periods. To protect yourself from these particles, always wear a dust mask while sanding or working with a joint compound.
A disposable N95 respirator mask is an excellent choice for this task, as it provides superior filtration against airborne particles. These masks are relatively inexpensive and widely available at hardware stores and online retailers.
In addition to wearing a mask, consider using a shop vacuum equipped with a HEPA filter to capture any excess dust generated during sanding.
This will help keep your workspace clean and free of debris while protecting your lungs from harmful particles.
Remember that proper preparation and attention to detail are crucial when repairing drywall. By following these tips and taking time throughout the process, you can achieve professional-looking results without breaking the bank!
Taping the Joints for Seamless Repairs
The Importance of Taping the Joints
Repairing drywall is a common task that many homeowners face. Whether it’s due to damage caused by hanging pictures or furniture or wear and tear over time, repairing drywall can be daunting.
However, taping the joints is crucial for seamless repairs.
When done correctly, taping will ensure that your repaired drywall looks as good as new.
Types of Tape to Use
There are two main types of tape: mesh tape and paper tape.
Mesh tape is ideal for larger repairs because it has an adhesive backing that allows you to stick it directly onto the damaged area without applying the joint compound first.
Paper tape works well for smaller repairs because it requires a joint compound to adhere properly.
Securing the New Piece of Drywall in Place
Before you tap the joints, you must ensure that the new piece of drywall is securely in place. To do this, use fasteners such as screws or nails to secure the sheet of drywall firmly against the existing wall studs.
Applying Joint Compound and Letting It Dry
Once your new piece of drywall is secured in place, it’s time to start applying joint compound over the tape. Begin by applying a thin coat of joint compound over each strip of tape using a putty knife or trowel.
Make sure you spread the joint compound evenly and smoothly so there are no bumps or ridges.
After you’ve applied your first coat of joint compound, let it dry completely before adding subsequent coats.
Depending on how thickly you applied your first coat and how quickly it dries in your specific environment (humidity levels can impact drying times), this may take several hours or even overnight.
Sinking Nail Heads Below Surface Before Third Coat Application
Before you can apply your third coat of joint compound, you need to ensure that the nail heads are sunk below the surface of the drywall.
To do this, use a nail set to gently tap each nail head until it is flush with the surrounding drywall.
Applying a Third Coat and Additional Coats as Needed
Now that your nail heads are sunk below the surface, you can apply your third coat of joint compound. Apply this coat in the same way as the previous coats, but make sure that it is slightly wider than your previous coats so that it blends seamlessly with the surrounding wall texture.
Depending on how thickly you applied each coat and how smooth or textured you want your repaired area to be, you may need to apply additional coats.
Remember that each subsequent coat should be wider than the previous one to ensure a seamless repair.
Conclusion: Mastering the Art of Repairing Drywall
Congratulations! You are now equipped with the knowledge and skills to tackle any drywall repair project confidently.
With our step-by-step guide, tips for fixing gouges in gypsum board, and techniques for fixing cracked corners and loose tape, you can handle any minor repair job quickly and easily.
Remember that drywall tape is essential for a seamless finish, and inspecting your work is crucial to ensure it is up to standard.
For larger holes, use drywall patches, and apply joint compound like a pro for professional results.
Always check for wires when repairing large holes, don’t skimp on sanding after patching them up, and use taping techniques for seamless repairs.
By following these guidelines, you can master the art of repairing drywall like a pro.
Don’t forget to practice your skills regularly to improve your technique further.
So why wait? Get started on your next drywall repair project today!
FAQs
Q1. Can I use spackling paste instead of the joint compound?
A1. While spackling paste can be used for small nail holes or cracks in the wall surface, it’s not recommended for larger repairs as it doesn’t have enough strength or bonding power compared to a joint compound.
Q2. How long should I wait before painting over repaired drywall?
A2. It’s best to wait at least 24 hours after applying joint compound before painting over repaired drywall. This allows sufficient time for the compound to fully dry.
Q3. Can I reuse old pieces of drywall?
A3. No, reusing old pieces of drywall is not recommended as they may have lost their structural integrity due to exposure or damage.
Q4. Do I need special tools for repairing drywall?
A4. Basic tools such as a utility knife, putty knife, sandpaper, and drywall saw are sufficient for minor repairs. For larger projects, additional tools such as a drywall lift or power sander may be necessary.
Q5. Can I repair water-damaged drywall?
A5. Water-damaged drywall can be repaired using the same techniques as regular drywall repair. However, it’s important to identify and fix the source of the water damage before repairing the drywall to prevent further damage.
Q6. How do I know if my repaired drywall is up to standard?
A6. Inspect your repaired drywall by running your hand over it to check for smoothness and firmness. If you can feel any bumps or soft spots, you may need to apply more joint compound or sand it down further.
Q7. Can I paint directly over a patched hole without primer?
A7. While it’s possible to paint directly over a patched hole without primer, it’s not recommended as this may result in uneven color and texture compared to the surrounding wall surface. It’s best to prime the area first before painting for better results.