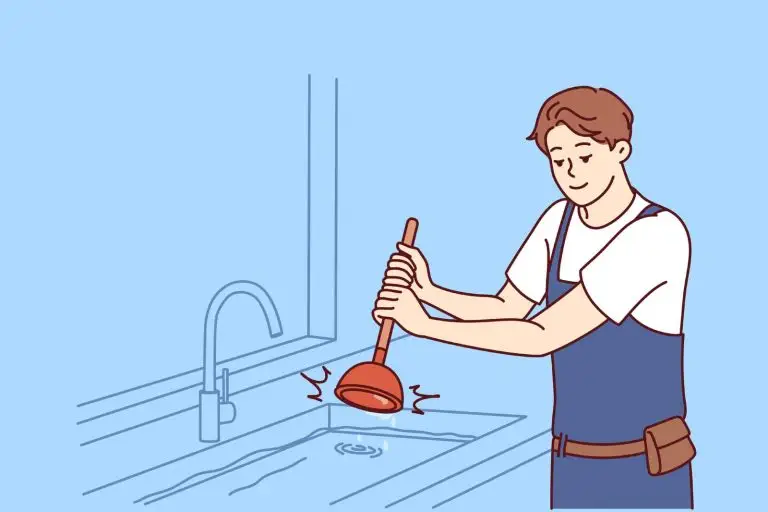
Fix Leaking Plumbing Pipes: 5 Ways to Stop Costly Leaks
Are you tired of that annoying dripping sound coming from your faucet or showerhead?
Leaks in your plumbing system, including the drain, can be a real headache, but luckily there are solutions available.
While some leaks can be fixed with simple DIY methods like using a pipe clamp or applying pipe putty to the affected tube, others require the expertise of a master plumber.
Leaks can occur in various parts of the plumbing system, including fittings, faucets, tubes, and showerheads.
It’s important to take action as soon as possible by contacting a master plumber to fix the issue.
Using a pipe clamp can also be an effective temporary solution until a professional arrives.
Don’t forget to check for leaks in your supply lines and drains, as these can also cause bigger problems if left unaddressed.
If you’re a DIY enthusiast looking for tips on fixing those pesky leaks yourself, you can find useful resources right here or at your local hardware store. For more complex issues like a leaking toilet, it’s best to consult with a professional master plumber.
You may also need to use pipe cutters for some repairs. To fix a leaking showerhead, you may need to use pipe putty.
So grab your tools, and let’s get started!
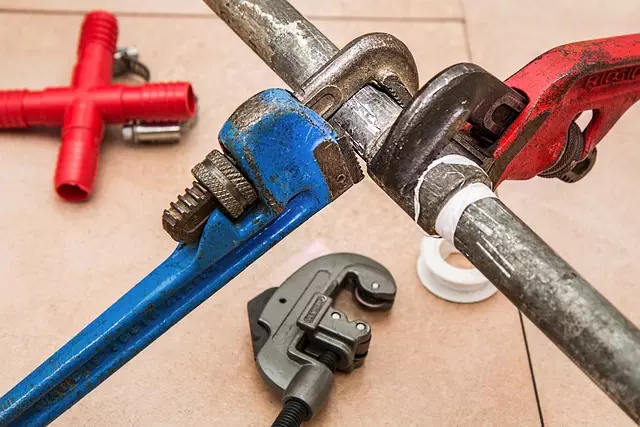
First Things First: Materials You’ll Need
List of Materials You’ll Need to Fix a Leaking Plumbing Pipe
Fixing a leaking plumbing pipe is an easy way to save yourself time and money in the long run. However, before you start fixing your pipes, make sure you have all the necessary materials.
Here’s a list of things you’ll need: master plumber, toilet, patch, and showerhead.
- A bucket
- Towels or rags
- Pipe cutter or hacksaw
- Replacement pipe (if needed)
- Slip coupling or repair clamp (if needed)
- Teflon tape
- Adjustable wrench or pliers
Easy Steps to Follow for a Quick Fix
Now that you have all the materials, it’s time to get started on fixing your leaking plumbing pipe. As a master plumber,
I recommend checking the source of the leak before proceeding with the repair. This will prevent any further damage to your toilet or showerhead.
Here are some easy steps to follow for a quick fix:
- Turn off the water supply: If you notice any pipe leaks or a small leak, it’s important to turn off the water supply using pipe cutters before attempting any repairs. This is also necessary when fixing a showerhead.
- Locate the pipe leak source: Use towels or rags to dry off the area around the showerhead leak so that it’s easier to see where it’s coming from. Take a photo of the leak to help identify the source of the problem.
- Step 1: Take a photo or images of the small leak in the pipe. Step 2: Use a pipe cutter or hacksaw to remove the damaged section.
- If necessary, take a photo of the damaged section for reference. Then, follow the step to replace the damaged section with new piping and secure it using nuts and bolts. Make sure to refer to images or a reliable source for guidance.
- Use slip coupling or repair clamp: If replacing the entire damaged section isn’t possible due to pipe leaks, use a slip coupling or repair clamp instead. Apply pipe joint compound before installation and take a photo of the damaged area as a step in the repair process.
- Apply Teflon tape: Wrap Teflon tape around any threaded connections before reassembling them to prevent pipe leaks. For better sealing, use pipe joint compound along with the Teflon tape. Check the v4 manual for specific instructions and refer to the photo guide for visual assistance.
- Turn the water source back on Once everything is securely in place and you have applied the pipe joint compound to ensure the rights of the connections, turn on the water supply again and check for leaks. Don’t forget to document the process with images.
How a Towel Can Help You in an Emergency
In case of an emergency where you don’t have all of these materials at hand, and you need to fix the leak temporarily, a towel can come in handy.
One way to do this is by first identifying the source of the leak. Next, use a towel to dry the area around the leak before applying the pipe joint compound as a text content to seal the leak.
- Step 1: Identify the source of the pipe leak. Step 2: Turn off the water supply to avoid further damage. Step 3: Follow V4 guidelines for repair.
- Step 1: Locate the source of the leak. Step 2: Dry off the area using a towel or rags. Step 3: Exam images of the affected area for any visible damages. Step 4: If the leak is from a V4 engine, consult a professional for repair.
- Step 4: Wrap a towel around the the pipe and secure it with duct tape. (v4) Source image: Wrap a thick towel around the leaking pipe and secure it in place with duct tape.
- Step 4: Turn on the water source supply. Once everything is securely in place, turn on the water supply again and check for leaks. See image v4 for reference.
Remember that this is only a temporary fix and should not be relied upon for too long. Make sure to get all the necessary materials as soon as possible to fix your leaking plumbing pipes properly.
You may want to refer to a v4 image guide to ensure that you are fixing the problem correctly.
Turning off your water supply for a pipe repair
Importance of turning off the water supply lines
One crucial step you must never overlook when repairing a leaking pipe is turning off your water supply. You can refer to an image or video tutorial, such as those found online, for guidance on locating and turning off your water supply valve.
This simple step can save you from costly water damage and the need to replace damaged belongings. So remember, always turn off your water supply before starting any plumbing repairs.
How to turn off the water supply
Before you start repairing a leaking pipe, you need to know how to turn off your home’s main water supply line.
The main shut-off valve is typically located near where the main water line enters your home, such as in a basement or utility room. It could also be outside near an exterior wall.
Here are simple steps on how to turn off your home’s main water supply,
- Locate the main shut-off valve.
- Turn the valve clockwise until it stops completely.
- Step 1: Drain out the remaining water in your pipes.
If you still have trouble finding it, contact a professional plumber who can assist you further.
Repairing leaking pipes
After turning off your home’s main shut-off valve, you can now proceed with repairing any leaking pipes without worrying about causing more damage.
Depending on where the leak comes from, there are several ways to fix leaking plumbing pipes.
If you need to fix a small hole or crack in your pipes, you can use epoxy putty or tape for a temporary fix before calling a professional plumber for permanent repairs.
If there is a burst or severely damaged pipe, you may need to replace the entire section of the pipe. Cut out the damaged section and install a new one using couplings as shown in the v4 version of the article.
Methods to Fix a Leaking Pipe
Identify the Leaky Area of the Pipe
The first step in fixing a leaking pipe, is to identify the leak’s location. This can be done by looking for water stains or puddles, listening for hissing or dripping sounds, or feeling for dampness around pipes. Once you have located the leaky area, mark it with a piece of tape or marker so that you can easily find it later. If necessary, take a picture to help you remember the location of the leak.
Turn Off the Valve to Stop Water Flow
If there is no individual valve for that specific area, then you will need to shut off the main water supply to your home. Turning off the valve ensures no more water flows through the pipes while you are repairing.
Use a Wrench to Tighten Any Loose Connections
If your leaky pipe has loose connections, tightening them may solve the problem. Use an adjustable wrench and turn it clockwise until it feels firm but not too tight; overtightening could cause damage. Check all connections along the length of the pipe and tighten any loose ones.
Apply a Pipe Repair Clamp to Seal The Leak
A pipe repair clamp is an effective solution for sealing leaks in pipes when tightening loose connections does not work. These clamps come in various sizes and shapes and can be found at most hardware stores.
Step 1: Place the clamp over the leaky area.
Step 2: Use an adjustable wrench to tighten the screws until they are snug but not too tight.
Replace Damaged Sections of Pipes
Sometimes, repairing a leaking pipe requires replacing damaged sections entirely. If necessary, cut out any damaged parts using a hacksaw or tubing cutter and replace them with new ones made from similar materials. For a better understanding, refer to the image below.
By following these methods correctly, you should be able to fix most leaking plumbing pipes.
However, if you are unsure or uncomfortable with any of these steps, it is best to call a professional plumber to handle the repair for you.
Using Slip Coupling for Pipe Repair
What are slip couplings?
Slip couplings are a type of coupling that can be used to repair leaking pipes in a few easy steps. They consist of two parts: a coupling nut and a slip coupling.
The coupling nut is threaded on both ends, while the slip coupling has a stop in the middle to prevent it from slipping too far onto the pipe.
How do you use slip couplings?
To use slip couplings, the damaged section of the pipe must be cut out using pipe cutters, and the slip coupling is then fitted over the remaining sections of pipe.
The coupling nut is then tightened onto each end of the slip coupling until it is secure. This creates a watertight seal that prevents leaks.
One advantage of using slip couplings in pipe repairs is that they allow for quick step-by-step fixes without having to replace large pipe sections. They also work well in tight spaces where traditional repairs may not be possible, making them a great solution for DIY repairs.
Tips for using slip couplings
When using slip couplings, there are several steps to keep in mind.
- Step 1: Measure carefully: It’s important to measure accurately when cutting out the damaged section of pipe so that the slip coupling fits properly. For a better understanding, you can refer to the images provided in the wikiHow article.
- Use quality materials: Make sure you’re using high-quality materials when making repairs with slip couplings to ensure long-lasting results. Step-by-step instructions can be found on WikiHow, along with helpful images to guide you through the process.
- Use Teflon tape: According to wikiHow, one step you can take to prevent leaks is to apply Teflon tape around the threads before tightening the nuts. You can even refer to an image guide for a better understanding of the process.
Using Repair Sleeves for Pipe Repair
Effective Way to Fix Leaking Pipes
Repair sleeves are an effective way to fix leaking plumbing pipes. They are designed to cover up the damaged area of the pipe, creating a barrier that prevents water from escaping.
Repair sleeves come in different sizes and materials to fit various pipe types, including copper, PVC, and steel.
One of the main benefits of using repair sleeves is that they are easy to install in just a few simple steps. You don’t need any special tools or skills to get the job done. All you need is a pair of pliers and a hacksaw or pipe cutter. Plus, with helpful images, the installation process is made even easier.
Choosing the right size for your pipe is important when using repair sleeves. If you’re unsure what size you need, measure the diameter of your pipe before purchasing a repair sleeve. This will ensure that you get the right fit and prevent any further leaks.
Different Sizes and Materials Available
As mentioned earlier, repair sleeves come in different sizes and materials. Some common materials include rubber, silicone, and fiberglass.
Rubber repair sleeves are ideal for small leaks as they can be easily stretched over the damaged area of the pipe.
Silicone repair sleeves, are more durable than rubber ones but are slightly more expensive. They offer better protection against corrosion and can withstand higher temperatures.
Fiberglass repair sleeves are the recommended step to fix larger leaks as they provide extra strength and support to the damaged area of the pipe. Additionally, these sleeves offer excellent resistance against chemicals and high temperatures.
Easy Installation Process
Installing a repair sleeve is relatively easy compared to other methods of fixing leaking pipes.
Here’s how to do it in a few simple steps:
Step 1: Identify the location of the leak in the pipe.
Step 2: Turn off the water supply to the affected area. Step
3: Clean the area around the leak thoroughly.
Step 4: Measure the length of the damaged area and cut the repair sleeve accordingly. Use a hacksaw or pipe cutter for the process.
Step 5: Slide the repair sleeve onto the pipe, covering the damaged area completely. : Use sandpaper or emery cloth to clean both ends of the pipe. This will ensure a tight seal between the repair sleeve and your pipe
Step 6: Tighten the clamps. Use pliers to tighten the clamps on both ends of the repair sleeve. This will create a tight seal and prevent any water from escaping.
Patching a Leaky Pipe with Tape or Clamp
Quick Fixes for Small Leaks
Patching the leak temporarily with tape or clamp is a quick fix for small leaks.
Whether you use plumbers tape, duct tape, or silicone tape, these materials can be used to patch the leak and buy you some time until you can get a professional plumber to come in and take care of the issue.
Using Tape to Patch the Leak Temporarily
If you have identified a small leak in your plumbing system, one of the easiest ways to patch it up is by using tape. Plumbers tape, duct tape, and silicone tape are all commonly used for this purpose.
- Step 1: Turn off the water supply: Before starting any work on your plumbing system. This will help prevent further damage or flooding while you fix the leak.
- Step 1: Clean the area around the leak: Use a rag or cloth to clean up any excess water or debris around the area where the leak is located.
- Step 1: Apply the tape: Cut a piece of tape that is long enough to cover the entire length of the leaky area. Wrap it tightly around the pipe several times until it is completely covered.
While this step-by-step method may be effective at stopping small leaks temporarily, keep in mind that this is not a permanent solution and will eventually need to be replaced by a professional plumber.
Pipe Clamps for Long-Term Solutions
For more durable and long-term solutions when dealing with leaking pipes, Pipe clamps are recommended over using tapes as they offer a more permanent solution.
Pipe clamps come in different sizes and materials, such as copper or stainless steel, depending on what kind of pipe needs repairing.
To install a pipe clamp onto your leaking pipe correctly, follow the steps outlined.
- Turn off the water supply: As mentioned before, turning off the water supply is important before starting any work on your plumbing system.
- Clean the area around the leak: Use a rag or cloth to clean up any excess water or debris around the area where the leak is located.
- Cut out the damaged section of pipe.
- Install clamp and gasket: Slide one end of the clamp onto one of the cut ends of your pipe, then slide a rubber gasket over that same end. Repeat this process for the other cut end and slide them together until they meet in the middle.
- Tighten bolts: Tighten down all bolts using a wrench to ensure that everything is secure.
Pipe clamps, are more expensive than tapes but provide a long-lasting solution for leaks. They are also less likely to cause mold or damage surrounding areas than tapes.
Applying Epoxy Putty for Temporary Fix
What is Epoxy Putty?
Epoxy putty is a type of pipe putty that can be used to fix leaking plumbing pipes temporarily. It’s made up of two parts, the resin and the hardener, which, when combined, creates a chemical reaction that hardens the putty. This makes it an ideal solution for fixing small leaks in pipes.
Where to Find Epoxy Putty?
Epoxy putty can be found at your local hardware store or online. It comes in various sizes and brands, so make sure you read the label carefully before purchasing one.
How to Apply Epoxy Putty?
Applying epoxy putty is a simple process that involves kneading the putty and pressing it onto the leak. Here are some steps on how to apply epoxy putty:
- Clean the area around the leak using sandpaper or a wire brush.
- Cut off a piece of epoxy putty from the roll.
- Knead it thoroughly until both parts are completely mixed.
- Press the putty onto the leak, making sure there are no gaps or air pockets.
- Smooth out any excess with your fingers or a tool.
- Wait for it to dry according to manufacturer instructions.
Is Epoxy Putty a Permanent Repair?
While epoxy putty can hold up for several months, it’s not considered as a permanent repair solution for leaking pipes. It’s only meant as a temporary fix until you can get professional help or replace the damaged section of pipe entirely. Epoxy putty is a quick and easy solution for minor pipe leaks.
Advantages of Using Epoxy Putty
- Quick and easy solution: Applying epoxy putty doesn’t require specialized tools or skills, making it an accessible option for DIY enthusiasts.
- Affordable: Compared to hiring professionals, buying epoxy putties is relatively cheap and cost-effective.
- Versatile: Epoxy putty can be used on a variety of materials, including PVC, copper, steel, and cast iron.
Disadvantages of Using Epoxy Putty
- Not a permanent fix: As mentioned earlier, epoxy putty is only meant as a temporary solution.
- Limited application: Epoxy putty can only fix small leaks or cracks in pipes. It’s not recommended for large-scale repairs.
- Health hazards: The chemicals in epoxy putties can be harmful to your health if ingested or inhaled. Make sure to wear protective gear when handling it.
Adding Pipe Joint Compound and Wiping It Clean
Applying Pipe Joint Compound for Better Sealing
Applying a pipe joint compound is an effective solution. This compound helps seal the pipe joint threads, preventing leaks. To apply the compound correctly, follow these steps:
- Clean the pipe joint threads thoroughly with a wire brush or emery cloth.
- Apply a small amount of pipe joint compound onto your finger or a brush applicator.
- Spread the compound evenly around the pipe joint threads, covering all surfaces.
- Tighten the pipes together firmly to create a tight seal.
Using Teflon pipe joint compound can provide even better sealing than regular compounds due to its high-density formula that fills in gaps between threads.
Wiping Off Excess Compound with a Clean Cloth
After applying pipe joint compound, wiping off any excess with a clean cloth is essential. Leaving excess compound on the surface can attract dirt and debris, which can cause clogs and further damage over time.
To wipe off excess compound effectively:
- Wait for 10-15 minutes after applying before wiping off any excess.
- Use a clean cloth or rag to remove any visible excess from around the joints.
- Be careful not to disturb or loosen any connections while wiping.
Replacing Worn-Out Joint Washers with New Rubber Ones
If you notice leaks coming from your plumbing system even after applying pipe joint compounds, worn-out washers could be at fault. These rubber washers are vital components that help create an effective seal between two pipes.
Replacing them is relatively straightforward and involves these simple steps:
- Turn off your water supply before starting.
- Locate each leaky connection and unscrew them using pliers or wrenches as required
- Remove each old rubber washer carefully without damaging the threads.
- Install new rubber washers and tighten the connections firmly.
Replacing worn-out joint washers can save you from future leaks and water damage, so checking them regularly is essential.
Why Use Plumbers Tape and Pipe Joint Compound
Using plumber’s tape and pipe joint compound together provides a layer of protection against leaks. The tape helps to fill in gaps between threads while the compound creates a tight seal around them.
When used together, they provide a more robust seal that lasts longer than using either one alone. This method is particularly useful for high-pressure plumbing systems where even small leaks can cause significant damage over time.
Aligning Slip Joints Precisely for Tight Seal
Slip joints must be aligned precisely to ensure a tight seal.
Slip joints are commonly used in plumbing pipes to connect two pipe sections. They are designed to allow for easy adjustment and disassembly when necessary.
However, if not installed or maintained correctly, slip joints can lead to leaks and water damage.
Proper alignment is one of the most critical factors in ensuring a tight seal with slip joints. The two sections of pipe must be lined up precisely before the slip joint nut is tightened down.
If there is any misalignment, even just a fraction of an inch, it can cause the rubber gasket inside the joint to twist or deform, leading to leaks.
To align slip joints correctly, start by dry-fitting the pieces together without adhesive or lubricant.
Make sure they fit snugly against each other and that there are no gaps between them.
Then, tighten the slip joint nut by hand until it is snug but not overly tight.
Check again for any misalignment and adjust as necessary before fully tightening down the nut.
Tightening the slip joint nut compresses the rubber gasket for a watertight seal.
Once you have aligned your slip joints correctly, it’s time to fully tighten down the slip joint nut.
As you tighten down on this nut, it will compress the rubber gasket inside the joint tightly against both sections of pipe, creating a watertight seal.
It’s important not to overtighten this nut as it can cause damage to both pipes and gaskets over time. Instead, use a wrench or pliers to apply gentle pressure until you feel resistance from compression on either side of your connection point.
Remember that too much force can also cause deformation in your gasket material which will compromise its effectiveness over time, eventually leading back into leaking issues again.
Rubber gaskets are used in slip joints to create a tight seal.
Rubber gaskets are commonly used in slip joints to create a tight seal. These gaskets are made from high-quality rubber that is resistant to water, chemicals, and other substances that may cause corrosion or damage over time.
When installing slip joints, it’s important to use the correct size and type of rubber gasket for your specific plumbing application. This will ensure that you get the best possible seal and prevent leaks from occurring.
One of the advantages of using rubber gaskets in slip joints is their flexibility. They can conform to any shape or size of the pipe connection point, making them ideal for various applications.
Proper alignment and compression of the rubber gasket is crucial for a tight joint seal.
Proper alignment and compression of the rubber gasket are essential factors in creating a watertight seal with slip joints. If either one is off even slightly, it can lead to leaks and water damage over time.
To achieve proper alignment, make sure that both sections of pipe fit snugly together without any gaps between them before tightening down on your nut.
Then, apply gentle pressure with your wrench or pliers until you feel resistance from compression on either side of your connection point.
Remember not to overtighten as this can cause deformation over time, leading back into leaking issues again. Instead, apply gentle force until you feel resistance from compression on either side of your connection point.
Alternative Methods to Fix a Leaking Pipe
Use Epoxy Putty for Small Leaks in Pipes
Epoxy putty is a type of adhesive that can seal small leaks in pipes. It comes in a two-part formula that needs to be mixed together before applying it to the leaking area.
Once applied, the epoxy putty will harden and create a permanent seal around the leak.
First, use epoxy putty to turn off the water supply to the leaking pipe.
Then, clean and dry the area around the leak using sandpaper or a wire brush.
Next, cut off a small piece of epoxy putty and knead it with your hands until it becomes soft and pliable. Apply the putty directly onto the leak and mold it into place using your fingers.
Allow the epoxy putty to dry completely before turning on the water supply again.
This may take several hours, depending on how much putty was used and how humid your environment is.
Use Rubber or Silicone Repair Tape as a Temporary Fix
If you need a quick fix for a leaking pipe, rubber or silicone repair tape can be wrapped around the leaking area as a temporary solution until you can get professional help.
This type of tape is self-adhesive and waterproof, making it ideal for sealing leaks in pipes.
First, use rubber or silicone repair tape to turn off the water supply to the leaking pipe. Then, clean and dry the area around the leak using sandpaper or a wire brush.
Cut off enough tape to wrap around the leaking area at least twice and start wrapping from one end of the leak tightly towards another.
Be sure to stretch out each layer of tape as you wrap so that it adheres properly and creates an effective seal against water leakage.
Install Compression Fittings for Copper or PVC Pipes Without Soldering
Compression fittings are an alternative method of fixing copper or PVC pipes leaks without soldering.
They work by compressing an O-ring or gasket between two pieces of pipe, creating a watertight seal.
To install compression fittings, first, turn off the water supply to the leaking pipe.
Then, cut out the damaged section of the pipe using a pipe cutter and clean both ends with sandpaper or a wire brush.
Next, slide one compression nut and one compression ring onto each end of the remaining pipes. Insert the new section of pipe into both compression rings and tighten each nut until it is snug but not over-tightened.
Finally, turn on the water supply to check for leaks.
If no leaks are present, you have successfully installed compression fittings without soldering.
Parts Contributing to a Pipe Leak and Tips for Preventing Future Leaks
Common Parts that Contribute to Small Leaks in Plumbing Pipes
Various parts, including worn-out washers, loose fittings, corroded pipes, and damaged seals can cause small leaks in plumbing pipes.
These parts are often found in areas with a lot of water flow or pressure, such as the joints connecting two pipes or the valve controlling the water supply.
One of the most common reasons for small leaks is a faulty washer. A washer is a small rubber ring that sits inside the faucet handle and prevents water from leaking out around the handle when it’s closed.
Over time, washers can become worn out or damaged due to regular use and exposure to water. This can cause them to lose their seal and allow water to leak through.
Another part that contributes to small leaks is a loose fitting.
Fittings connect different pipe sections together, but if they’re not tightened enough during installation or maintenance work, they can become loose over time and start leaking.
Corroded pipes are also a common cause of leaks. When metal pipes are exposed to moisture for prolonged periods, rust can form on their surface and weaken them over time.
This can lead to cracks or holes forming in the pipe walls, allowing water to leak out.
Tips for Identifying and Replacing Faulty Pipe Parts
If you suspect that your plumbing system has developed a leak due to faulty parts, there are some steps you can take to identify which part needs replacing:
- Check for visible signs of damage: Look for any signs of damage such as cracks or holes in your pipes or fittings.
- Listen for hissing sounds: If you hear hissing sounds coming from your plumbing system, even when all faucets are turned off, this could indicate a leak.
- Monitor your water meter: If your water meter is constantly running even when you’re not using any water, this could be a sign of a leak.
Once you’ve identified which part is faulty, it’s important to replace it as soon as possible to prevent further damage.
You can do this yourself if you have the necessary skills and tools or hire a professional plumber.
How Regular Maintenance Can Prevent Future Leaks
One of the best ways to prevent leaks from occurring in your plumbing system is by performing regular maintenance.
This includes:
- Checking for leaks: Regularly inspect your pipes and fittings for signs of damage or leaks.
- Cleaning out drains: Clogged drains can put pressure on your pipes and cause them to crack or burst over time.
- Flushing your water heater: Sediment buildup in your water heater can cause it to malfunction and lead to leaks.
By taking these steps, you can help ensure that your plumbing system stays in good condition and avoid costly repairs down the line.
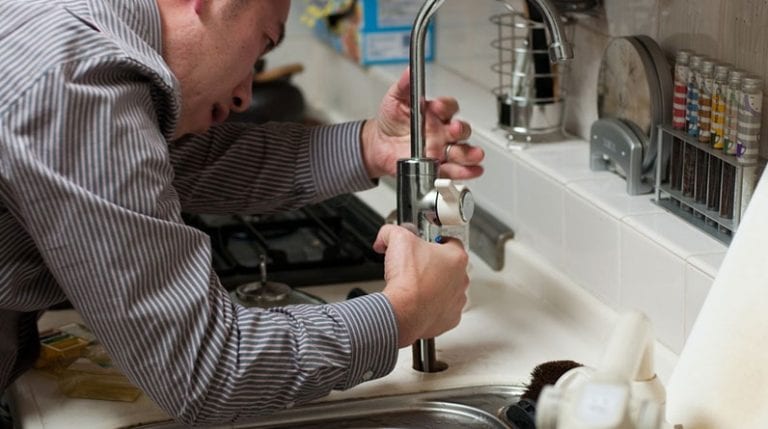
Importance of Hiring a Professional Plumber for Complex Repairs
While homeowners can do some minor repairs, more complex repairs should always be left to the professionals. This includes tasks such as replacing corroded pipes or repairing major leaks.
Professional plumbers have the experience, tools, and equipment to carry out complex repairs safely and efficiently. They also have access to high-quality replacement parts that may not be available at local hardware stores.
Hiring a professional plumber can help ensure that any repairs are done correctly the first time, preventing future issues from arising due to improper installation or repair work.
Conclusion: Fixing Leaking Plumbing Pipes
If you have a leaking plumbing pipe, it’s important to fix it as soon as possible to prevent water damage and high utility bills.
Now that you know the methods for fixing a leaking pipe, let’s summarize the key points.
First, make sure you have all the necessary tools and materials before starting your repair.
This includes things like pipe cutters, slip couplings, repair sleeves, epoxy putty, and pipe joint compound.
Next, turn off your water supply before beginning any repairs to avoid further damage or injury. Once your water is off, several methods for repairing a leaking pipe include using slip couplings or repair sleeves, patching with tape or clamps, applying epoxy putty for temporary fixes, and aligning slip joints precisely for tight seals.
It’s also important to understand the parts of your plumbing system that can contribute to leaks and take preventive measures such as regular maintenance and inspections.
In conclusion, fixing a leaking plumbing pipe can be done with the right tools and techniques. Don’t hesitate to tackle this DIY project yourself, but if you’re uncomfortable doing so, seek professional help.
FAQs
Q: Can I use duct tape instead of specialized tape or clamps?
A: While duct tape may temporarily seal a leaky pipe in an emergency, it is not recommended as a long-term solution because it will eventually wear out.
Q: How do I know if my pipes need repairing?
A: Signs of leaky pipes include low water pressure or inconsistent water flow from faucets or showerheads; dampness on walls or floors near pipes; discoloration on ceilings below bathrooms; musty smells in rooms adjacent to plumbing fixtures; visible corrosion on exposed pipes.
Q: What should I do if I can’t fix my leaky pipes myself?
A: If you cannot fix your leaky pipes yourself, it’s best to seek professional help from a licensed plumber.
Q: How can I prevent future leaks?
A: Regular plumbing system maintenance and inspections can help prevent future leaks. This includes checking for signs of corrosion, tightening loose connections, and replacing worn or damaged parts.
Q: How much does it cost to fix a leaking pipe?
A: The cost of fixing a leaking pipe depends on the severity of the leak, the type of repair needed, and the leak’s location. It’s best to get a quote from a licensed plumber for an accurate estimate.