Common DIY Plumbing Repairs
Plumbing is not the most exciting part of home ownership; it can be one of the most frustrating when something goes wrong.
Most homeowners won’t have the time or skills to tackle plumbing repairs independently.
We know that many new homeowners fear tackling plumbing repairs because they think it’s too difficult for them to do.
But don’t let that stop you from tackling the project!
There are plenty of easy DIY plumbing repairs you can do without having a professional come over every time your toilet won’t flush, or sinks begin gushing water.
Plumbing issues can be a source of inconvenience and stress for homeowners.
However, many common plumbing problems can be fixed without a professional plumber.
Here are some common DIY plumbing repairs:
- Fixing a Leaky Faucet
- A leaking faucet can be annoying and wasteful. Fortunately, this is usually caused by a worn-out washer that can be easily replaced.
- Unclogging Drains
- Clogged drains are common in both the kitchen and bathrooms. They can often be cleared with a plunger, a plumber’s snake, or a hand auger.
- Replacing a Shower Head
- If your shower head is broken or you want a new one, it’s quite easy to unscrew the old one and replace it with a new one.
- Fixing Running Toilets
- A running toilet can waste a significant amount of water. The cause is often a faulty flapper or fill valve, which are easy to replace.
- Repairing Pipe Leaks
- Small pipe leaks can often be fixed with some epoxy putty or tape. However, larger leaks may require replacing a section of pipe.
Always turn off the water supply before starting any plumbing repair to avoid any potential water damage.
If the problem seems too complicated or if you’re unsure about any step in the process, it’s best to call a professional plumber for help.
- WITHOUT ADHESIVE-Rubber grip tape has no stickiness and no residue. After stretching and winding, it self-melts and solidifies into a tight whole, which is usually used to repair leaking pipes and anti-skid treatment of handles.
- PLUGGING-Stop leaking tape is used to seal and plug leaks, and and is a frequently used tape in the home.
- HIGH FRICTION-The grip tape is wear-resistant and non-slip, and can be used as a bicycle handlebar tape and tool handles tape, etc.
- WIDELY USED-This silicon tape suitable for high and low temperature (-76°F~500°F) , suitable for outdoor work.
- PACKAGE-You will receive two rolls of black self fusing silicone tape, 1inch wide(2.5cm), 20mil thick(0.5mm), each roll is 10feet(3m) long.
Last update on 2026-07-12 / Affiliate links / Images from Amazon Product Advertising API
Basic Tools Needed for DIY Plumbing Repairs
Having the right tools can make all the difference in DIY plumbing repairs.
Here are some basic tools that are often needed:
- Plunger
- This is a must-have tool for unclogging toilets and drains.
- Wrenches
- An adjustable wrench and a pipe wrench are useful for various plumbing tasks.
- Plumber’s Snake and Hand Auger
- These tools are used for clearing clogs that a plunger can’t handle.
- Pliers
- Tongue-and-groove pliers are often used in plumbing work.
- Screwdriver Set
- A variety of screwdrivers can be handy for many plumbing tasks.
- Plumbing Tape
- Also known as Teflon tape, this is used to seal pipe threads and prevent leaks.
- Hacksaw
- This is used to cut through pipes, screws, nuts, and bolts.
- Cup Plunger
- A smaller version of a regular plunger, ideal for unclogging sinks and tubs.
- Tubing Cutter
- A handy tool for cutting copper pipe.
- Bucket
- Useful for catching water when working on pipes.
Remember, using tools safely and according to their instructions is always important. If you’re unsure how to use a tool or perform a repair, it may be best to call a professional plumber.
Fixing a Leaky Faucet
A leaky faucet can be an annoying and costly problem. Luckily, you can try a few DIY fixes before deciding on a new faucet.
First, make sure the faucet is securely attached to the sink. If it’s not properly attached, it can wiggle around and cause the washer to wear out faster.
If you have a dripping faucet, you can repair it with simple tools. Most likely, the faucet has a washer that’s worn out.
You can replace this washer yourself and save some money, or you can hire a plumber to do it for you. If you choose to do it yourself, turn off the water supply to the faucet.
There will be a valve near the faucet where the water supply line is connected. If you can’t find the valve, you can shut off the water supply at the main valve, usually in the garage or basement.
Remove the faucet handle once the water supply is off by loosening the stem with an Allen wrench.
Also, check to see if there are any cracks in the faucet. This is more common than you may think. If you find any cracks, it’s best to replace the faucet rather than try to repair it.
Another common cause of faucet leaks is the O-ring. This rubber ring is inside the faucet’s base, between the faucet and the sink. If worn out or damaged, this ring can cause a leak.
To fix this, remove the faucet and replace the O-ring.
And one last thing you can try is adjusting the faucet stem. This can often be adjusted using just an Allen wrench. Simply turn the stem clockwise to tighten it and turn it counterclockwise to loosen it.
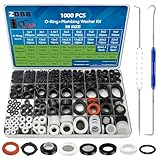
- {MULTI-STYLE}: Assortment rubber o rings washers consisting of 18 size o-ring + 9 size flat rubber washers + 9 size silicone gasket food grade with stainless steel screen filter
- {O RING APPLICATION}: Rubber o ring assortment kit used for faucets plumbing,pressure washer,hose sinks hydraulics fluid,auto engines, machinery bearings, pumps, boats, oils,gas control valve,spray,air,water fitting seal leak repair
- {O RING SIZE}: 868 PCS O ring kits 18 size ID:3mm, 4mm, 4.5mm, 5mm, 6mm, 7mm, 8mm, 9mm, 10mm, 12mm, 13mm, 14mm, 17mm, 18mm, 20mm, 22mm, 25mm, 27mm
- {WASHERS APPLICATION}: Plumbing rubber washers kit used for home kitchen/ bathroom sink nozzles faucets Aerator,bathtub shower faucet wall mount hand spray hose,garden hose bib splitter,shower hose wand,various RV faucet pipe,washing machine water supply line strainer filter,outdoor spigot elbows adapter,water heater stainless bellows,outside water tank bulkhead valves plugs replacement
- {WASHERS SIZE}: 132 PCS Assorted hose gasket rubber silicone washer assortment kit 9 size OD: 30mm, 25mm/1 inch , 24mm,21mm, 19mm, 15mm, 12mm, 9mm.used to install all standard 1″,3/4″,5/8″,1/2″,3/8″,1/4″,1/8″ pipe fittings connector
Last update on 2026-07-12 / Affiliate links / Images from Amazon Product Advertising API
Guide to Fixing Running Toilets
A running toilet can be a nuisance and a waste of water.
Here’s a step-by-step guide on how to fix this common problem:
1. Investigate the Issue
- Remove the tank lid and check the fill tube length. It should be about 1/4 inch below the overflow pipe.
2. Test the Flapper
- If the fill tube is not the problem, test the flapper by pushing it down. If the toilet stops running, your flapper is not sealing properly and needs to be cleaned or replaced.
3. Clean or Replace the Flapper
- Turn off the water supply valve, flush the toilet to drain water from the tank, then inspect the flapper. Clean it or replace it with a new one if it’s dirty or worn out.
4. Adjust the Float
- Adjust the float if cleaning or replacing the flapper doesn’t solve the problem. It should be set so that the fill valve stops adding water at about 1/2 inch to 1 inch below the top of the overflow pipe.
5. Check the Fill Valve
- If adjusting the float does not work, you might need to replace the fill valve. This involves removing the old valve and installing a new one, following the instructions provided by the manufacturer.
Remember, turning off your water supply before starting any toilet repair work is important. If you’re unsure of any steps or if these solutions don’t fix your running toilet, it’s best to call a professional plumber for assistance.
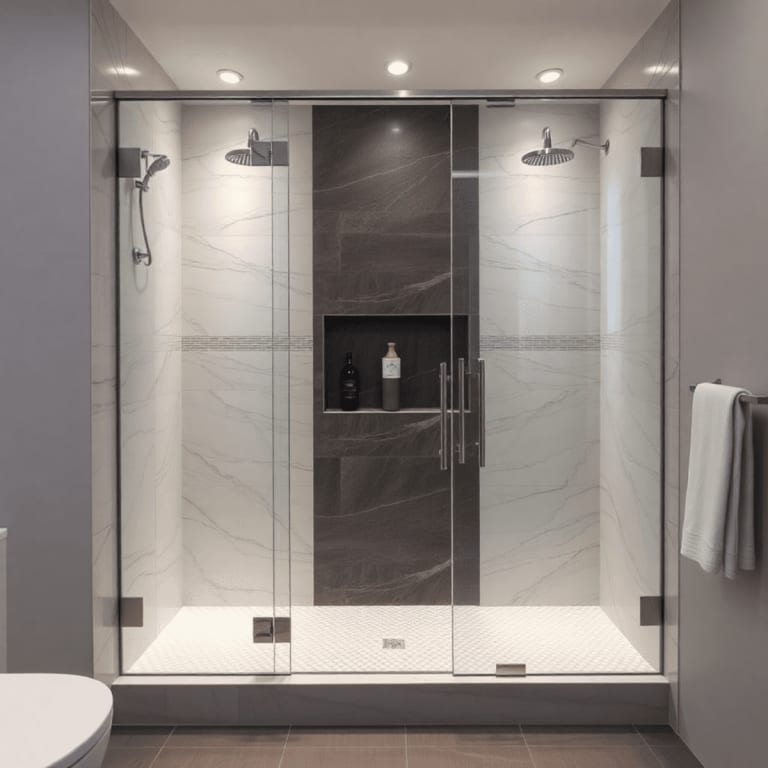
Replacing Shower Heads
If you’re unsatisfied with your shower head, you can always replace it with a new one. Naturally, you will first have to take your old shower head down before installing the new one.
You can buy new shower heads at most hardware and home improvement stores, which are fairly inexpensive.
Most showerheads have a threaded pipe you would screw onto the pipe protruding from the wall. In most cases, it takes a good hand-tightening, but a wrench may be used if needed.
If you don’t necessarily want to replace your shower head, you can clean it to restore its proper function. You can use a stiff wire brush and some vinegar to clean the inside of the shower head.
The vinegar and wire brush should loosen up any calcium or mineral deposits clogging up your shower head, and once they’re cleaned, your shower should work like new again.
If it’s very dirty and caked up, you can soak the whole head in a water/vinegar solution for a few hours to loosen up any calcium and soap.
If you want to replace the shower head, be sure to buy the right size so that the flow is maintained correctly.
Guide to Unclogging Drains
Clogged drains can be a major inconvenience.
Here’s a step-by-step guide on how to unclog a drain:
1. Use a Plunger
- First, try using a plunger. Place it over the drain and pump vigorously. If the water starts to drain, you’ve solved the problem!
2. Try a Hand Auger or Plumber’s Snake
- Use a hand auger or a plumber’s snake if the plunger doesn’t work. Insert it into the drain and turn the handle to break up the clog.
3. Use a Bent Wire Hanger
- You can use a bent wire hanger if you don’t have a hand auger or plumber’s snake. Straighten it out, bend one end to create a hook, and carefully use it to pull out the clog.
4. Try a Drain Cleaner
- Consider using a chemical drain cleaner if the above methods don’t work. Be sure to follow the instructions on the package carefully, as these chemicals can be harmful if not used correctly.
5. Call a Professional
- If none of the above methods work or you’re uncomfortable performing any of these steps, it may be time to call a professional plumber.
Always be careful when using tools or chemicals to avoid injury and damage to your pipes.
Conclusion
Being a homeowner often means dealing with unexpected issues, and plumbing repairs are no exception. However, with a basic understanding of common problems and the right tools, you can address many of these issues yourself.
Whether fixing a running toilet, unclogging a drain, or handling a leaky faucet, these DIY solutions can save you time and money.
Plumbing repairs can be scary and intimidating, but they don’t have to be!
You can do many easy DIY repairs to save money and get your plumbing system running smoothly again. If you have a plumbing issue in your home, don’t feel like the only solution is to call a plumber.
There’s a good chance you can tackle the DIY plumbing repairs yourself.
Just remember to turn off the water supply before you start any repairs and use the right tools for the job.
But always remember, if a repair seems too complicated or if you’re unsure about any part of the process, don’t hesitate to call a professional plumber.
Safety should always be your top priority when undertaking any home repair tasks.