Roof Repairs That You Can Do Yourself
There are several roof repairs you can handle yourself, provided you have the right tools, and you take safety precautions.
Remember, if a repair seems too complex or dangerous, hiring a professional is best.
The roof is one of your home’s most essential features and functions. The roof protects you from the elements, but it can also be a source of problems and leaks that need to be repaired or replaced.
In some cases, an extreme storm or heavy rainfall may cause part of your roof to cave in or leak. If you notice significant water damage to your ceilings or walls within the first few months after a big storm, chances are you have a leaking roof.
Moreover, if you see dark spots on the ceiling that seem to extend over time, you probably have a more significant problem with growing mold and mildew.
These issues are common signs that your roof needs repair or replacement as soon as possible. Luckily, there are many DIY-friendly solutions for all kinds of roof problems.
Here are some roof repairs you can do yourself:
- Replacing Damaged Shingles: Over time, shingles may get damaged due to weather conditions or wear and tear. You can remove the damaged shingle, replace it with a new one, and secure it with roofing nails and adhesive.
- Fixing Shingle Lift-Up: Sometimes, the corners or edges of shingles may lift up. You can apply roofing cement under the lifted part and press it down to stick.
- Repairing Roof Flashing: If your roof flashing is damaged, you can cut a piece of metal sheet to fit the area, place it over the damaged flashing, and secure it with roofing cement.
- Sealing Small Leaks: If you notice small leaks in your roof, you can use a sealant to block them. However, if the leak is large or you can’t find the source, consider hiring a professional.
- Cleaning Gutters: Clogged gutters can lead to roof damage. Regularly cleaning your gutters can prevent water buildup and protect your roof.
- Replacing Damaged Roof Vents: Damaged vents can cause water leaks. You can replace them by removing the old vent and installing a new one, then sealing the area with caulk to prevent leaks.
Remember always to prioritize your safety when doing these repairs.
Use a sturdy ladder, wear protective gear, and avoid working in bad weather conditions.
Tools Needed
To carry out these DIY roof repairs, you’ll need the following tools and materials:
- Ladder: To access your roof safely.
- Safety Harness: To protect you from falls while working on the roof.
- Hammer: For removing nails and securing new shingles.
- Pry Bar: To lift and remove damaged shingles.
- Utility Knife: To cut shingles or flashing to the right size.
- Roofing Nails: To secure shingles and flashing.
- Roofing Adhesive: To stick down corners or edges of shingles.
- Roofing Cement: For repairing flashing and sealing lifted shingle corners.
- Metal Sheet: For making new flashing.
- Sealant: To block small leaks.
- Replacement Shingles: To replace damaged ones.
- Replacement Roof Vents: In case your vents are damaged.
- Caulk and Caulking Gun: To seal around the new roof vent.
- Gloves: To protect your hands while working.
- Protective Eyewear: To shield your eyes from falling debris.
Having all your tools and materials ready before you start your repair is essential to make the process smoother and safer.

- INDUSTRIAL STRENGTH BITUMEN FORMULA – Create a seamless waterproof membrane on flat roofs, metal roofs, low slope roofs, foundations, gutters, concrete surfaces, planter boxes, and more. Our premium liquid rubber forms a durable barrier against water infiltration where other sealants fail. Superior alternative to traditional roof tar or patch products
- SUPERIOR FLEXIBILITY & DURABILITY – With over 950% elongation, this waterproof sealant maintains adhesion even with building movement and temperature changes. Our sealant is designed to resist cracking, peeling, and UV damage. Creates a flexible rubberized coating that delivers long-lasting protection
- PROFESSIONAL COVERAGE SPECIFICATIONS – Brush, roll or spray on – For flat/low slope roofs & standing water surfaces: 1 gallon covers 15 sq ft (3-4 heavy coats to achieve 60-80 mil membrane). For vertical surfaces like foundations: 1 gallon covers 30 sq ft (2-3 heavy coats for 30 mil membrane). Ideal for both roof repair and preventative maintenance applications
- WATER-BASED ADVANCED FORMULA – Unlike harsh roof tar or solvent-based products, our water-based formula contains no VOCs or harmful odors, making it perfect for indoor and outdoor use. Doesn’t damage foam insulation or sensitive materials. Perfect for waterproofing projects in confined spaces
- ENGINEERED WATERPROOFING SYSTEM – For maximum protection, use with Liquid Rubber Seam Tape or Geo-Textile to bridge joints, seams, vents, skylights, and protrusions where movement may occur. Creates a comprehensive waterproofing system for long-lasting leak repair and prevention on your roof, basement, or foundation
Last update on 2026-07-02 / Affiliate links / Images from Amazon Product Advertising API
Check for Damage Before Repairs
Before you start any repairs, check for signs of damage. All the above problems can cause water damage to your ceilings and walls, but they can also cause electrical issues.
If you notice a leak inside your home and can’t find the source, you should call an electrician immediately. Don’t risk exposing yourself or your loved ones to electrical shock.
If you notice other types of damage, such as missing tiles or cracked shingles, make sure you deal with them as soon as possible.
Otherwise, these issues can cause bigger problems, like leaks and water damage.
Repairing Leaky Roof Tiles
Missing or broken roof shingles or tiles are one of the most common problems homeowners face. Fortunately, repairing them is fairly simple.
The first thing you need to do is identify the type of roof shingles or tiles you have. Different roof shingles/tiles have different installation instructions, so you need to ensure you have the right type.
Once you’ve determined the type you have, you need to purchase roofing cement.
Roofing cement is a particular type of adhesive used to attach broken shingles or tiles back to the roof.
Repairing leaky roof tiles is a relatively straightforward process, but it’s essential to identify the source of the leak first.
Here’s a step-by-step guide:
- Locate the Leak: The first step is to find where the leak is coming from. This can often be done inside your attic by looking for water stains or spots.
- Inspect the Roof: Once you’ve identified the approximate location of the leak, inspect the corresponding area on your roof. Look for cracked, damaged, or missing tiles.
- Remove Damaged Tiles: If you find damaged tiles, use a pry bar to lift and remove them carefully. Be sure not to damage the surrounding tiles.
- Inspect Underlying Material: With the tile removed, inspect the underlying material for damage. If the underlayment is damaged, it will also need to be replaced.
- Replace Underlayment: Cut a piece of underlayment to fit the exposed area and nail it into place.
- Install New Tile: Slide a new tile into a place where the damaged one was removed. Secure it with roofing nails.
- Seal the Area: Apply roofing sealant around the edges of the replaced tile to prevent water from seeping in.
Remember, always prioritize safety when working on your roof. Use a sturdy ladder and safety harness, and avoid working in poor weather conditions. If the leak is extensive or hard to find, it may be best to hire a professional roofer.

Bent or Broken Roof Shingles or Tiles
If your roof shingles or tiles are bent or broken, you must replace them completely. Bent shingles or tiles can be tough to repair. Unfortunately, broken ones can cause major damage to your roof.
Missing or broken shingles or tiles can cause significant water damage and create other issues with the structure of your roof. There are various different types, but they all have very similar installation instructions.
First, you’ll need to clean the roof shingles or tiles with a water and soap solution, allowing them to dry completely before moving on to the next step. Once the tiles are clean, you can then use a roofing nailer to secure the shingles or tiles to the roof.
Cracked Roof Shingles
If your shingles are cracked, you’ll need to replace them entirely. Cracked shingles can cause leaks, as well as damage to the gutters. Cracked shingles are relatively easy to repair, but first, you need to identify your type of shingle.
You can do this by inspecting the edges of the shingle and looking for the markings that identify the manufacturer. Once you’ve determined the type of shingle you have, you’ll need to purchase a special crack repair kit.
This kit should have the necessary adhesive and shingles to repair your roof.
Start by cleaning the cracked shingles, followed by a tack-spreading operation. Finally, apply a thin line of adhesive to both the shingles and the roof.
Cleaning Blocked Guttering
If you notice that your guttering has been blocked, you’ll need to clear the gutters as soon as possible. If they are not adequately cleaned, they can cause damage to your roof and foundation.
Your roof can also suffer damage if your gutters are clogged with leaves or other debris. The water will sit in your gutters, leading to significant overflow and water damage.
Gutters can become clogged for several reasons, including too many leaves, twigs, and other debris from the environment. This can be a widespread problem in areas where there are a lot of trees or shrubs.
Cleaning blocked gutters is an essential part of maintaining your roof’s health. If left unchecked, clogged drains can cause water to back up and damage your roof, siding, and foundation.
Here’s how to do it:
- Safety First: Before you start, ensure you have a sturdy ladder. Wear gloves and safety glasses to protect yourself from debris and potential pests hiding in the gutters.
- Remove Large Debris: Start at the downspout end and use a trowel or your hands to remove leaves, twigs, and other large debris. Place the debris in a bucket or drop cloth for easy cleanup.
- Use a Hose: Once the large debris is removed, use a garden hose with a spray nozzle to flush out the smaller particles. Start at the end opposite the downspout.
- Check Downspouts: If water isn’t draining freely through the downspouts, they may be clogged. You can use a plumber’s snake or a hose to dislodge the blockage.
- Inspect for Damage: As you’re cleaning, look for signs of damage like holes, leaks, or sagging sections. These issues will need to be addressed to keep your gutters working correctly.
- Clean Up: Lastly, make sure to clean up all the debris you’ve removed. Compost it if possible, or dispose of it by your local regulations.
- Regular Maintenance: Repeat this process at least twice yearly if you have many trees near your house.
Remember, if your gutters are high off the ground or if the blockage is severe, it might be safer to hire a professional.

- Permanent seal: This Gorilla tape creates a permanent bond that instantly seals out air, water, and moisture
- All-purpose: Patch & Seal waterproof tape works wherever the work is; Indoor and out, rain or shine, or even under water
- All surface: Our specially formulated adhesive tape conforms to the surface to repair holes, cracks, gaps, and tears
- Weather resistant: The backing of this heavy duty tape is designed to withstand moisture and UV rays
- Fixes leaks: A waterproof tape for leaks in roofs, rubber, plastic or vinyl pool liners, and so much more
Last update on 2026-07-02 / Affiliate links / Images from Amazon Product Advertising API
Repairing A Shifting Facia
If you notice that the facia is starting to shift, you’ll need to call a roofing contractor as soon as possible. Facias and baseboards support the roof, preventing it from moving and sagging.
If these pieces of the roof have been damaged or have shifted, they can cause significant structural damage to your roof. You can quickly tell if the facia is going by seeing gaps between the wall and the roof.
You can also check to ensure the roof supports are still in place. If they’re missing, this could be a sign that the roof supports are shifting.
Repairing a shifting fascia involves re-securing it to the ends of the roof rafters.
Here’s how you can do it:
- Safety First: Use a sturdy ladder to reach the fascia. Always prioritize your safety and consider using a safety harness.
- Inspect the Damage: Identify the sections of the fascia that are shifting or loose. The problem could be due to rusted fasteners, wood rot, or other issues.
- Prepare Your Materials: You’ll need a pry bar, galvanized nails or screws, a hammer or drill, and possibly replacement fascia boards if the existing ones are damaged.
- Remove Loose Fascia: Use the pry bar to remove any loose sections of the fascia carefully. Be careful not to damage any intact sections.
- Inspect and Repair Rafters: If the wood rot or damage extends to the rafters, they must be repaired or replaced.
- Install New Fascia: Cut your new fascia to size if necessary, then align it with the rafters. Attach it using galvanized nails or screws, ensuring it’s secure but not overtightened (which could cause splitting).
- Seal and Paint: To protect the new fascia from weather damage, seal it with good quality paint suitable for outdoor use.
Remember, if your fascia is shifting due to more serious underlying issues like structural damage or a failing gutter system, it’s best to consult with a professional.
Repairing Dented Chimney Pots Or Flues
If you notice dents in your chimney pots, you’ll need to have them fixed as soon as possible. If the dents are not removed, they can cause significant damage to your roof and your home.
Chimney pots are used to send smoke from your chimney up and away from your roof. They are designed to withstand a significant amount of heat, but dents can cause them to weaken and break, leading to severe issues.
Dented chimney pots can cause significant damage to your roof and home by allowing smoke and other gases to enter your home.
Repairing dented chimney pots or flues requires careful handling to prevent further damage and ensure the safety of your home.
Here’s an essential guide on how to do it:
- Safety First: Use a sturdy ladder and wear a safety harness to access your chimney. Always work with a partner when possible.
- Inspect the Damage: Carefully inspect the chimney pot or flue to understand the extent of the dent. Small dents might not affect the functionality, but larger dents may impact the smoke flow.
- Prepare the Materials: You will need a rubber mallet, a piece of wood, and protective gloves.
- Gently Tap Out the Dent: Place the piece of wood over the dent and gently tap it with the rubber mallet. The wood will distribute the force and help prevent cracking or breaking. Work slowly and methodically, gradually working out the dent.
- Inspect for Cracks: After removing the dent, carefully inspect the chimney pot or flue for any cracks. If there are cracks, they must be sealed with a high-temperature-resistant sealant.
- Regular Inspections: Regularly inspect your chimney pots and flues for any signs of dents or damage to address them promptly.
Remember, if the dent is large or the pot or flue is severely damaged, it’s best to hire a professional. Incorrect repairs can lead to issues like improper ventilation or potential fire hazards.
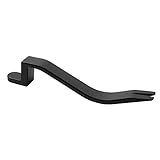
- Efficient Roof Repair: The shingle removal tool effortlessly eliminates old and worn roofing shingles without causing damage, streamlining the process and amplifying results, thereby saving valuable time and energy; A must have tool to every roofer’s toolkit
- Easy Nail Removal: The Claw-tip design of roofing tool is engineered to optimize repair efficiency while ensuring the safety of nearby shingles and protecting fingers from potential hammer-related injuries
- Safe and Convenient: The nail-slot design facilitates vertical nail insertion, enhancing efficiency without compromising the integrity of nearby shingles;This feature promotes a safer working environment, minimizing the risk of accidental finger injuries during hammer use
- Heavy-duty 4140 Steel: Our shingle removal tool is made of solid and durable 4140 steel with black paint coating, not only can withstand hard hammering but also prevent rust and corrosion and long-lasting use
- Package Included:1 roof tool: SDSNTE guarantees the quality and reliability of our Shingle Removal tool: Our dedicated customer support team is available to assist you promptly with any questions or issues, ensuring a resolution within 24 hours
Last update on 2026-07-02 / Affiliate links / Images from Amazon Product Advertising API
Fixing Sagging Roof Supports
If you notice that one or more of your roof supports is sagging, you should call a roofing contractor immediately. Hanging roof supports can lead to a collapse in the near future. This can cause extensive damage to your roof and your home.
There are many reasons why your roof supports may start to sag. This can be caused by an overload of weight, an old roof, or a poorly constructed roof.
If the supports are too far gone, the contractor can lift the roof up and secure them.
However, if they are just a bit off, you may be able to fix them yourself.
You can secure sagging roof support by using a crowbar or a hammer and nails. If you have a nail gun, that will work even better.
Fixing sagging roof supports is a critical task that ensures the structural integrity of your home.
Here’s a basic guide on how you can do this:
- Identify the Problem: Inspect the attic space and identify which roof supports are sagging. Look for signs of bowing or bending in the rafters or trusses.
- Measure the Sag: Use a level and measuring tape to determine how much the roof support is sagging.
- Prepare the Materials: You will need two 2×4 pieces of lumber, longer than your sagging roof support, and construction screws.
- Attach the 2x4s: Position the 2x4s on each side of the sagging support, ensuring they extend past the sag on both ends. Screw them into place, effectively creating a sandwich with the sagging beam in the middle.
- Slowly Correct the Sag: Over time, slowly tighten the screws to straighten the sagging support. This should be done gradually (over weeks or months) to avoid causing further damage.
- Inspect Regularly: Regularly inspect the repair to ensure it’s holding and that there’s no additional sagging.
This is a simplified guide and doesn’t account for all scenarios. If your roof supports are severely sagging or you’re uncomfortable doing this repair yourself, it’s best to consult a professional contractor.
Structural repairs can be complex and can lead to significant damage if done incorrectly.
Roof Repair Summary
If you notice any of the above problems, fix them immediately.
Professional roof repairs aren’t cheap, but they are sometimes necessary. If you notice these issues, it’s best to address them as soon as possible to minimize the damage and repair cost.
In this guide, we covered several types of roof repairs that you can do yourself.
These included:
- Replacing Damaged Shingles: Remove the old shingle, replace it with a new one, and secure it with roofing nails and adhesive.
- Fixing Shingle Lift-Up: Apply roofing cement under the lifted part of the shingle and press it down to stick.
- Repairing Roof Flashing: Cut a piece of metal sheet to fit over the damaged flashing and secure it with roofing cement.
- Sealing Small Leaks: Use a sealant to block small leaks.
- Cleaning Gutters: Regularly remove debris from your gutters to prevent water buildup and damage.
- Replacing Damaged Roof Vents: Remove the old vent, install a new one, and seal the area with caulk.
- Repairing Leaky Roof Tiles: Identify the leak, remove damaged tiles, replace the underlayment if necessary, install new tiles, and seal the area.
- Fixing Sagging Roof Supports: Identify the sagging support, attach 2x4s on each side, and gradually tighten the screws over time to straighten it.
- Repairing Dented Chimney Pots or Flues: Inspect the damage, gently tap out the dent with a rubber mallet and piece of wood, and inspect for cracks.
- Repairing A Shifting Fascia: Remove the loose fascia, repair any damage to the rafters, install new fascia, and seal and paint it for protection.
Always prioritize your safety when conducting these repairs. If you don’t have the experience or knowledge to deal with these problems, you can always hire a professional to repair you.
Ensure you have the right tools and materials before starting any repair.