DIY Flooring Repairs For Your Home
Flooring Repairs
Flooring repairs are often necessary to maintain your floors’ aesthetic appeal and functionality.
Over time, various factors such as wear and tear, moisture, or even accidental damage can result in problems that need fixing.
Common issues might include:
- Scratches or scuffs on hardwood floors
- Cracks or chips in tile flooring
- Wear spots on carpeting
- Gaps or buckling in laminate flooring
- Damage to vinyl sheets or planks
The type of repair will depend heavily on the type of flooring material. It’s essential to understand what is involved in each process, from identifying the problem to choosing the right repair techniques and materials.
Whether you’re a novice DIYer looking for guidance or considering hiring a professional contractor, this guide on floor repairs will help you understand all aspects of this home improvement task.
We’ll cover everything from how to prepare for repairs, typical repair scenarios for various types of flooring, potential costs involved, and tips for successful outcomes.
Let’s dive into everything you need to know about some of the most common types of flooring repairs!
Carpet Tiles
Carpet tiles are designed to look and feel like a luxurious rug or carpet. They’re usually made from synthetic materials like polypropylene, nylon, or polyester fibers, making them easier to clean and maintain than a regular carpet.
They’re more resistant to stains, and you can use a vacuum cleaner to clean them regularly. But they do provide a similar look and feel to a natural carpet.
Carpet tiles can be installed in many different rooms in your home, including the bedroom, bathroom, hallway, and living room.
They’re available in various colors, so you’ll find one that suits your needs. Plus, they’re easy to install and can be easily removed and replaced at any time.

- Multiple Cutting Materials: This floor cutter can cut laminate floor, vinyl plank, multi-layer flooring, wood panels, parquet, fiber cement wall panels, rubber concave base, LVT, VCT, SPC, LVP, WPC. Floor cutting up to 13” wide and 5/8” thick
- Sturdy Aluminum and Sharp Tungsten Steel Blade: ABS material cutting table and aluminum construction make the vinyl floor cutter strong and durable. With the sharp tungsten steel blade, it can cut faster and smoother
- Safe and Extra Accessories: A chain to keep you safe while not using the laminate floor cutter. The graduated scale with metric and imperial scale can meet your need for different cutting, and you can choose the angles of 22.5°, 30°, and 45°
- Labor-saving and Comfortable Handle: The telescopic rubber-covered handle allows you to use this lvp flooring cutter with less effort and a more comfortable grip
- Easy to Move: Floor cutter with wheels makes your cutting job easier, you can move it without much effort. The quiet operation of the wheels provides you with a pleasing atmosphere. Notice: The specific installation instructions for the product are in the box.
Last update on 2026-07-24 / Affiliate links / Images from Amazon Product Advertising API
Installing Carpet Tiles
Here’s a step-by-step guide to help you install carpet tiles:
- Gather Necessary Materials:
- Carpet tiles
- Tape measure
- Straight edge or square
- Utility knife
- Double-sided tape or adhesive (check what your carpet tile manufacturer recommends)
- Prepare the Floor: Clean and dry the floor thoroughly. Remove any existing flooring if necessary.
- Plan Your Layout: Find the center of the room using your tape measure. This is usually where you want to start laying your tiles.
- Apply Double-Sided Tape or Adhesive: Apply double-sided tape around the room’s edges, but don’t remove the backing just yet. If you’re using adhesive, apply it as recommended by the manufacturer.
- Start Installing Tiles: Start in the center of your room and work outwards. Follow your pre-planned layout, removing the backing from each tile before installing it and pressing down firmly to secure it.
- Cutting Tiles: Use a straight edge or square and a utility knife to cut tiles when you need to fit them around obstacles or at the edges of your room.
- Secure Edge Tiles: Once all your tiles are laid out, go back and secure any edge tiles by removing the backing from your double-sided tape.
- Check for Loose Areas: Walk on every part of your new floor to ensure that all tiles are secure; if you find any loose ones, apply more adhesive underneath them.
- Clean Up: Dispose of any leftover materials cleanly and safely according to local regulations.
Remember, always follow the manufacturer’s instructions for the best result!
Pros of Installing Carpet Tiles
These tiles are much easier to install than a traditional rug or carpet. You won’t need to hire a professional installer to get them in place — you can do it yourself in just a few hours.
You can also easily remove them when you want to clean them or when you want to change their location in the home.
This makes them an ideal option for people with families, as they won’t need to spend much money on repairs or replacements.
Cons of Installing Carpet Tiles
Carpet tiles may be cheaper than a traditional rug or carpet, but they’re not as comfortable to walk on, and they don’t provide as much warmth or insulation either.
But if you’re looking for an affordable flooring option that’s easier to install than a traditional carpet or rug, these tiles will be ideal.
These tiles don’t provide as much sound insulation as a regular rug or carpet. If you want to improve soundproofing in your home, these tiles may not be the best option.
You may also need to replace these tiles more often than a traditional carpet, as they may not last as long.
Peel And Stick Vinyl Tiles
Peel And Stick vinyl tiles are relatively inexpensive, making them a great choice for any budget. Vinyl tiles are also very durable and long-lasting.
They can withstand heavy foot traffic and resist stains, mildew, and water.
Unlike other tiles, these tiles don’t require special lighting to keep their colors vibrant. Because they’re made from vinyl, they can be used in any room of your home, including bathrooms and kitchens.
Precautions When Installing Peel and Stick Tiles
Installing Peel and Stick vinyl tiles is a relatively simple process. Ensure the room gets thoroughly cleaned before you start the installation process.
Vacuum the floor, and mop it with a disinfectant cleaner to remove dirt or dust. If you have an area that gets a lot of foot traffic, like a kitchen or entryway, you may want to choose a thicker vinyl tile that can withstand more traffic and weight.
One thing you’ll want to watch out for when installing vinyl tiles is ensuring they stick to the floor as they should. You might need additional adhesive if they aren’t sticking to the floor.
If your tiles are coming up, you may need to replace them or get new ones.
Vinyl Plank Flooring
Vinyl plank flooring is a type of flooring that is much like luxury vinyl tile. Most people use vinyl plank flooring to replace old flooring such as tile, laminate, or hardwood.
It is an affordable option that is easy to clean, waterproof, and can be used in nearly any room in your house.
If you want to install new flooring and need a durable and easy-to-clean product, vinyl plank flooring is a good option.
These floors are made with a thick vinyl material that is durable and can stand up against heavy wear and tear. The vinyl plank flooring is available in many different styles and colors to match your home’s décor and your personal style.
Tips for Installing a Vinyl Plank Floor
It is essential to make sure that the subfloor is even and level. If the subfloor is not level, the flooring will not lay flat and will show every bump, dip, and imperfection in the subfloor.
You can use shims and/or a subfloor ball leveler to level the subfloor.
If your room currently has another type of flooring, such as laminate, tile, or hardwood, you’ll want to remove it before installing your new vinyl plank flooring.
A few ways to remove old flooring include using a crowbar to pry up the flooring, removing the nails with a nail puller or hammer, or scoring the flooring with a utility knife and then breaking it off.
Be careful when removing the flooring so that you don’t cause any damage to the subfloor itself.
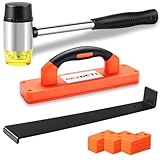
- double-faced mallet with non-slip rubber grip help absorb vibration. Constructed of cast iron with bright chrome plating, the hammer is equipped with the hardness of 90±5 HAS. Double-faced solid rubber head delivers a softened, positive strike. The mallet head is 1-3/8 inch in diameter. The length of whole mallet is 10.3inch
- pull bar is designed with enhanced strength.Made from premium A3 steel with matt coating.The soft pads on the back can well protect the floor from scratch.The length of the pull bar is 10.5inch, thickness is 3mm
- the tapping block made from polypropylene with a handle that will knock your hand at work. We improved the structure and made a new design, making this product more sturdy and practical. The approximate size of the block body is 9.4 inch x 2.4inch x 1inch
- tapping block with easy to grip handle. You can rap the splicing floor planks directly without mallet.And you can also use it with mallet, it is more powerful and faster to finish installation work
- comes with 40 pieces plastic spacers which are designed with non-slip slots. The approximate size of the spacer is 2.3inch x 1.2inch
Last update on 2026-07-25 / Affiliate links / Images from Amazon Product Advertising API
Installing Vinyl Plank Flooring
Here’s a simplified step-by-step guide to help you install vinyl plank flooring:
- Gather Necessary Materials:
- Vinyl planks
- Tape measure
- Straight edge or square
- Utility knife or vinyl cutter
- Rubber mallet and tapping block
- Spacers
- Prepare the Floor: Clear, clean, and dry the floor thoroughly. Remove any existing flooring if necessary.
- Measure Your Room: Measure the dimensions of your room to determine how many planks you’ll need.
- Plan Your Layout: Determine the direction you want your planks to lay. It’s generally recommended to run parallel to the longest wall in the room.
- Cutting Vinyl Planks: Use your straight edge and utility knife (or a vinyl cutter) to cut your first row of planks.
- Start Installing Planks: Begin in one corner of your room, factoring in expansion gaps with spacers at the edges.
- Connect The Planks: Connect subsequent rows by angling them up slightly, pushing forward, and interlocking the tongue-and-groove edges.
- Secure Planks:
Use a rubber mallet and tapping block to secure connections without damaging the locking system. - Continue Laying Planks: Continue laying planks, and stagger end joints for a more natural look.
- Install Final Row: You may need to cut these lengthwise so they fit correctly.
- Add Transitions and Baseboards: Install any transition strips where the new floor meets a different type of floor and replace baseboards.
Remember, always follow the manufacturer’s instructions for the best results!
Vinyl Sheet Flooring
If you’re looking for an affordable, durable, and easy-to-install flooring solution ideally suited to any home, new or old, large or small — consider the benefits of vinyl sheet flooring as an investment in your space.
A natural hybrid of luxury and practicality, vinyl sheet flooring offers all the functionality of tile at a fraction of the cost and installation time. In addition to being one of the most affordable flooring solutions on the market today, it’s also one of the most accessible types of flooring to install.
On top of that, it’s waterproof, non-slip, heat-resistant, and mold resistant, and it even looks good after years of constant exposure to sunlight.
What is Vinyl Sheet Flooring?
Vinyl sheet flooring is a type of synthetic, resilient flooring made of PVC (polyvinyl chloride). One of the most popular and affordable flooring options today, vinyl is widely used for indoor and outdoor applications.
It is available in multiple thicknesses and styles, including tiles, planks, and sheets. The thickness and weight of vinyl sheet flooring will depend on its grade.
The most common types are commercial grade, which is about 0.19 inches thick, and residential grade, which is about 0.16 inches thick.
While the residential grade is more durable, the commercial grade is easier to install because it has a built-in adhesive that allows it to be installed without glue.
Residential-grade vinyl sheet flooring is best suited for areas with light foot traffic, while commercial-grade vinyl can be used in areas with heavy foot traffic.
Durable and Long-Lasting
Vinyl flooring is one of the most durable types of flooring.
It’s an excellent choice for high-traffic areas and is resistant to moisture, most types of abrasion, and even chemicals. It’s also easy to clean and maintain, making it well-suited for busy households and/or high-maintenance living spaces.
Vinyl is also straightforward to replace — a huge perk if you have young kids or pets. While it’s best to clean vinyl regularly to avoid staining, it won’t scratch as easily as tile.
On top of that, it’s available in many different styles and designs, so you can easily find vinyl sheet flooring that works for your space.
Despite being a synthetic material, vinyl flooring is also eco-friendly since it does not require extra energy to produce and can be recycled.

- Excellent Materials: High-Quality PVC Floor Transition Strips, which is scratch-resistant, abrasion-resistant, dirt-resistant. Easy to clean, just use a wet cloth to wipe it off.
- Easy Installation – Just peel and stick on the flat and dry floor, use scissors to cut before installation, strong self-adhesive.
- Multi-Applications: Art3d Self Adhesive Vinyl Floor Transition Strip is perfect for covering the floor tile gap, such as covering gaps where two floor surfaces meet in bedrooms, living rooms, kitchens, and showers, and is also widely used as a divider in the transition area between the living room and the kitchen.
- Size: The size of floor cover strip is 4ft long, 1.57in. wide, 0.14in. thick.
- Kindly Reminder: Please make sure the floor is clean and dry (free of water) before installation for optimal use. In addition, Self-adhesive Floor Transition Strips may be squeezed and bent during transportation, please use a hair dryer to heat to restore the flatness, the bonding effect will be better.
Last update on 2026-06-09 / Affiliate links / Images from Amazon Product Advertising API
Installing Vinyl Sheet Flooring
here’s a simplified guide on how to install vinyl sheet flooring:
- Gather Necessary Materials:
- Vinyl sheet
- Tape measure
- Straight edge
- Utility knife
- Adhesive (as recommended by your vinyl manufacturer)
- Notched trowel
- Prepare the Floor: Remove any existing floor coverings if necessary. Clean and dry the floor thoroughly.
- Measure Your Room: Measure the room accurately to determine how much vinyl you need.
- Cutting Vinyl Sheet: Roll out and cut your vinyl sheet slightly larger than the room size, allowing for trimming accuracy and pattern matching if needed.
- Dry Fit Your Vinyl: Start in one corner of your room and unroll the vinyl across the length of the room. Trim excess material from edges using a utility knife.
- Apply Adhesive: Follow manufacturer instructions to apply the adhesive with a notched trowel half at a time, folding the back half of your flooring.
- Position Vinyl Sheet: Carefully position your vinyl sheet over the adhesive, pressing down firmly from the center towards the edges.
- Secure & Repeat Once one half is secure, fold back the second half of the flooring, apply adhesive, and repeat the previous step.
- Trim Excess Material: Go around the edges to trim any excess material for an exact fit to walls or fixtures in the room.
- Seal Edges & Joints: Seal perimeter edges and joints between sheets with a suitable sealant.
- Roll Flooring: Use a floor roller or equivalent weight to ensure good adhesion between the floor and vinyl.
- Reinstall Baseboard & Door Moldings
Remember that each product may have unique instructions, so refer to the product manual before installing!
DIY Floor Repair Overview
Here are some basic floor repair techniques based on different types of flooring:
1. Hardwood Floor:
- Scratches: Light scratches can be buffed with hardwood floor cleaner and a cloth. Deeper scratches might require wood filler, sanding, and refinishing.
- Gaps: Small gaps between planks can be filled with pre-finished wood filler. Significant gaps might need the repositioning of boards or replacement.
- Water Damage: Depending on the extent, this may involve replacing the damaged boards or, in severe cases, the whole floor.
2. Laminate Floor:
- Scratches: You can purchase a laminate floor repair kit that includes putty to match your floor color.
- Chips or Cracks: These can also be filled with putty from a repair kit.
- Warped Boards: These will likely need to be replaced entirely.
3. Vinyl Floor:
- Minor Cuts or Scratches: Use seam sealer designed for vinyl flooring to seal the scratch.
- Stains or Discoloration: Apply vinyl floor cleaning products per the manufacturer’s instructions.
- Tears or Dents: For more extensive damage, you may have to cut out the affected area and replace it with a new piece of vinyl using adhesive.
4. Tile Floor:
- Loose Tiles: Can be fixed by applying fresh adhesive and re-setting the tile.
- Cracked Tiles: Carefully remove and replace with a new tile using thin set mortar and grout.
Remember that each scenario could vary based on factors like age, condition of your floors, and type of material it’s made from – always consult professional help if you’re unsure about how to proceed!