Fix Tears in Leather & Vinyl: 8 Easy Steps
Have you ever had a favorite leather chair that suddenly started tearing or a vinyl upholstery that began to tear apart?
It can be frustrating to see your furniture damaged, but the good news is that fixing tears in leather and vinyl is possible with the use of adhesive glue and backing cloth.
Tears can be easily repaired with these materials, Whether on the seat or any other part of the furniture.
With the right repair kit and patience, you can restore your furniture’s appearance and prolong its lifespan. However, before jumping into repairs, it is essential to test the vinyl in an inconspicuous area to ensure it doesn’t react negatively with any cleaning agents or repair solutions.
If dealing with a real leather seat, make sure to use adhesive glue specifically designed for leather. Additionally, consider using a backing cloth to reinforce the repair for added durability.
While small rips or tears can be fixed using a repair kit, larger ones may require replacement. However, even larger rips can be mended using adhesive glue and backing cloth.
In some cases, leather flaps or pieces can also be added to make the repair less noticeable through the creative placement of mats or paper disks.
We’ll review the necessary guidelines and steps for repairing small rips using a kit and adhesive glue, discuss when replacement is the answer for larger tears, and provide tips for doing any damage, including leather flaps, less noticeable.
Don’t forget to check out our reviews before choosing the right kit for your repair needs.
So whether you’re dealing with a rip in your car seat or damaged office furniture, adhesive glue can be used to fix those frustrating tears in your leather and vinyl items.
To reinforce the repair, use a backing cloth and cut small pieces of it to cover the tear before applying the glue.
Read on to learn how to fix those tears.
Required materials for repairing tears in leather and vinyl
Leather Repair Kit or Vinyl Repair Kit
The first kit that comes to mind is a repair kit. A repair kit typically includes adhesive glue, color compound, and other materials needed to fix the tear.
There are two types of repair kits available: a leather repair kit and a vinyl repair kit. These kits may also include backing cloth, solution, replacement pieces, or other necessary items for a more complete repair.
Leather Repair Kit
For real leather seats, it is recommended to use a replacement kit that matches the color and texture of the original leather. The replacement kit contains pieces of matching leather material that can be cut into any shape required for patching up the tear.
Before applying the adhesive solution, test vinyl should be used to ensure that the color matches perfectly. Additionally, using a backing cloth to reinforce the patch can prevent future rips or tears.
The adhesive glue included in the kit bonds with the original leather material, making it almost impossible to tell where the tear was once located.
The color compound included in a leather repair kit, adhesive glue, and vinyl adhesive help give your repaired seat a uniform look by matching its original color. Choosing a high-quality compound that will not fade or peel away from your seat over time is important.
Additionally, using a backing cloth during the replacement process can provide extra support and durability for your repaired seat.
Vinyl Adhesive
Vinyl seats with leather flaps can be repaired using a vinyl adhesive that is designed to bond with this type of material. The adhesive glue, which can also be used on cloth, is thicker than regular glue and can easily fill gaps between torn edges and cracks.
When applied correctly, it forms an unnoticeable seal on your seat. If the damage is beyond repair, consider using a replacement kit.
Choosing the right materials for the type of tear you’re dealing with in your leather chair repair is essential since different types of adhesives work better on different types of damage.
For example, if you have a small hole in your leather flaps or cloth seat instead of a large tear, you may need less adhesive glue than someone who has ripped their entire seat apart.
Consider using a replacement kit specifically designed for your leather chair repair needs to ensure a proper repair.
Replacement Kit
If you want to try an all-in-one solution for repairing tears in real leather and vinyl seats, consider purchasing a replacement kit. These kits contain everything required, including adhesive glue, a tool, and cloth, to fix any damage done to your car’s interior quickly and efficiently.
Replacement kits typically include a variety of adhesives, patches, and other materials needed for repairing tears in leather and vinyl seats. These kits often come with glue, cloth, and tools to help you achieve professional results.
Some kits even include flaps to cover larger tears. They’re an excellent option for those who want to save money on repair costs while still achieving professional results.
Having the right materials and tools is essential. Whether you opt for a leather repair kit, vinyl adhesive or replacement kit, make sure you choose high-quality glue that will last.
With these materials and cloth, you can easily fix any damage to your car’s interior and keep the seat looking brand new.
Step-by-step instructions for fixing tears, holes, and cuts in leather and vinyl
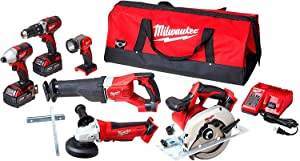
Tools needed to fix tears in leather and vinyl
Before we dive into the step-by-step instructions, let’s talk about the tools you’ll need to fix tears in leather and vinyl seats.
The essential items are adhesive glue, cloth, and a replacement kit.
- Leather or Vinyl repair kit typically includes a patch or fabric piece, adhesive glue, colorant, spatula tool, grain paper, and replacement compound.
- Scissors: To cut the patch or fabric piece according to your needs. Leather flaps can also be cut using this tool. Adhesive glue can be used to attach the leather flaps to the patch. Grain paper can be used as a guide for cutting the leather flaps accurately.
- Tweezers: A useful tool to remove any dirt or debris from the tear before starting the repair process. For a more complete repair, consider using adhesive glue and a replacement kit, especially if the tear is on leather flaps.
- Heat gun or hairdryer: To speed up drying time during the repair process, use adhesive glue, replacement kit, vinyl adhesive, or any other appropriate tool.
Solution for different sizes of tears in leather and vinyl
The solution for fixing a tear in leather or vinyl varies depending on its size.
Here are some steps and tools needed to fix it: – For small tears, use adhesive glue to fix the damaged area. –
For larger tears, use a tool like a leather sewing kit to stitch the torn area back together. – If the tear is on a seat, make sure to remove any loose threads before applying adhesive glue or stitching it up.
Small Tears (less than 1 inch)
You can use a simple DIY method with the right tool for small tears on your leather chair.
Follow these steps and use glue or vinyl adhesive for an effective leather chair repair.
- Cut a small patch from your repair kit tool that is slightly larger than the tear. Apply glue to the leather flaps and use vinyl adhesive to attach the patch.
- Apply adhesive to one side of the patch using a spatula tool. Take your seat and ensure you allocate enough time to complete the task effectively.
- Place the grain paper patch over the tear and press down firmly with your fingers. Use a glue tool to ensure it sticks securely to the seat.
- Use a heat gun or hairdryer to quickly dry the glue applied on the grain paper with vinyl adhesive. This saves time.
Medium Tears (between 1 inch – 3 inches)
For medium-sized tears, follow these steps:
- Step 1: Cut a patch from your repair kit that is large enough to cover at least an inch around each side of the tear.
- Step 2: Apply glue or vinyl adhesive to the back of the patch. Step 3: Place the patch over the tear, aligning the grain paper with the surrounding fabric.
- Apply adhesive to one side of the patch using a spatula.
- Step 1: Place the vinyl adhesive patch over the tear on the paper with enough pressure to stick well without wrinkles using glue.
- Use the provided grain paper in your kit to achieve a matching texture with the surrounding area and enhance its appearance.
- Use a heat gun or hair dryer to dry it out completely. Keywords: drying, equipment.
Large Tears (more than 3 inches)
For large tears, follow these steps:
- Cut a paper patch from your repair kit that is larger than the tear. Apply vinyl adhesive compound to the back of the patch. This is an important step to ensure proper adhesion.
- Apply adhesive to one side of the patch using a spatula.
- Place the patch over the tear and press down firmly with your fingers.
- Use grain paper provided with your kit over it so that it matches the surrounding texture.
- Use a heat gun/hair dryer over it until it dries completely.
YouTube videos with answers to common questions and tips for fixing tears in leather and vinyl
If you’re still unsure about how to fix tears in leather or vinyl even after reading these step-by-step instructions, don’t worry!
There are plenty of YouTube videos available that can help you out.
Additionally, using paper to smooth the grain and applying a compound to the affected area can also aid in repairing the tear.
Here are some popular ones:
- “How To Fix A Tear In Leather” by DIY Auto Repair Videos: This step-by-step video covers all aspects of repairing small, medium, and large tears in leather seats or other items using vinyl adhesive. Before starting the repair process, making a paper template of the tear is recommended to ensure the grain of the leather matches perfectly.
- “Vinyl & Leather Repair Video” by Fibrenew International: This step-by-step video is an excellent resource for those who want to learn more about repairing vinyl and leather items such as car interiors, furniture, and even paper products. The video shows how to use a compound to fill in cracks and restore the material’s grain for a seamless repair.
- “Leather Seat Repair – How To Fix Tears And Cracks” by Detail King: This video provides step-by-step tips on repairing different types of damage on leather seats, such as cracks, cuts, and scratches using vinyl adhesive. It also includes paper to match the grain of the leather for a seamless repair.
Practice makes perfect
Remember that fixing tears in leather or vinyl requires practice!
Don’t be afraid to make mistakes; they will only help you learn better.
Start with small tears as the first step before moving on to bigger ones to get a feel for how much adhesive you need and how long it takes for the patch to dry completely. Also, make sure to match the grain of the leather or vinyl when using a paper patch to cover the tear.
Applying reinforcement fabric and sub-patch to the tear
Apply reinforcement fabric to the tear
Fixing tears in leather and vinyl can be daunting, but it is not impossible. One of the ways to fix tears is by applying reinforcement fabric with a grain of paper to the tear. This process involves placing a piece of fabric on top of the torn area and then gluing or stitching it into place.
This step aims to reinforce the area around the tear, preventing it from worsening.
When choosing a reinforcement fabric, the first step is considering factors such as color, texture, and thickness. You want your patch to match the original material’s grain as closely as possible so that it blends in seamlessly with the rest of your item.
For instance, if you’re fixing a black leather jacket, you’ll want to choose a black reinforcement fabric with a similar texture and thickness.
Additionally, make sure to use a vinyl adhesive to ensure a secure bond between the patch and the item. It’s also helpful to place a piece of paper underneath the fabric while applying the adhesive to prevent any excess from seeping through.
Use a sub-patch to strengthen the backing cloth.
Another critical step when fixing tears in leather or vinyl is using a sub patch.
A subpath is an additional layer of material, such as paper, placed underneath the main patch that helps strengthen the backing cloth and maintain the grain of the material. It’s especially useful for larger tears or areas with significant stress on the grain.
To use a sub-patch, cut out a piece of paper slightly larger than your main patch and place it underneath your tear.
This step ensures that the grain of the paper aligns with the grain of the fabric, providing added reinforcement.
Then apply glue or adhesive around its perimeter before placing your primary patch on top. This way, you’ll have two layers of material reinforcing each other instead of just one.
Repeat the process for larger tears.
If you’re dealing with more extensive damage, such as large rips or holes in your leather or vinyl item, you may need to repeat these steps multiple times until you’ve covered all affected areas fully.
Remember always; prevention is better than cure: avoid overstretching your leather items beyond their limits.
It’s also important to note that when using the repair paper, make sure to follow the grain of the leather to ensure a seamless finish.
Ensure the patch covers the entire perimeter of the tear
When applying patches onto damaged surfaces like leather and vinyl, the first step is to ensure that the patch covers the entire perimeter of the tear.
This way, you’ll prevent any further damage or tearing from happening around the edges of your primary patch. It’s also important to consider the material’s grain when selecting your patch.
A patch with a similar grain will help it blend seamlessly with the surrounding area. And if you don’t have a suitable patch material on hand, you can use paper as a temporary fix until you can get a proper patch.
To achieve this, follow these steps: cut your paper or vinyl adhesive patch to size and align it with the grain of your tear.
This step is crucial for a seamless repair.
Use a pair of scissors or a utility knife to trim it down if necessary, ensuring that the patch fits perfectly.
Choose a fabric that matches the color and texture.
When choosing a reinforcement fabric for your leather or vinyl item, the first step is to ensure that it matches both the color and texture grain of the original material.
If you’re unsure what type of fabric to choose, consider taking a small sample from your item and bringing it with you when shopping for supplies.
It’s also important to note that paper should not be used as a reinforcement fabric as it lacks the durability needed for this purpose.
If you can’t find an exact match, try using a similar-looking material such as suede or faux leather instead.
Remember always; prevention is better than cure: avoid overstretching your leather items beyond their limits. As an additional step, you can also consider reinforcing the material with paper or applying a vinyl adhesive for added durability.
Applying Leather Filler and Texturizing the Repair
Using a Leather Repair Kit
If you have a tear or crack on the surface of your leather seat, using a leather repair kit can help fix the damage. One step in the process involves applying vinyl adhesive to the area, followed by layering paper over it to create a smooth surface for the leather filler.
This is an important step to ensure that the filler adheres properly and blends seamlessly with the surrounding material.
What is a Leather Filler?
Leather filler is a flexible and durable wet compound used for filling in cracks, tears, or holes on the surface of your leather seat.
To repair your furniture, you can follow these simple steps: Apply vinyl adhesive to the affected area, let it dry, and then apply paper with the leather filler on top.
It is important to choose a filler that matches the color and texture of your existing leather to blend in seamlessly with the repaired area.
To apply leather filler, start by cleaning and preparing the damaged area. Use a soft brush or cloth to remove dirt or debris around the tear. Then, use a sharp pair of scissors or knife to trim any loose threads or edges around the tear.
The next step is to apply vinyl adhesive over the tear. Make sure to spread it evenly using a paper towel.
Next, apply a small amount of vinyl adhesive to a putty knife or spatula as a first step. Then, spread it evenly over the damaged area until it’s completely filled in with paper.
Be sure not to overfill; you want just enough filler to fill in any gaps without creating excess buildup.
Step 1: Apply vinyl adhesive to the surface that needs repairing.
Step 2: Allow the filler to dry completely before moving on to texturizing.
What is Texturizing?
Texturizing is important when repairing torn or cracked leather using vinyl adhesive because it helps ensure that the repaired area matches the surrounding material.
You’ll need some tools like sandpaper and grain paper to texture your repair properly.
After allowing your vinyl adhesive filler enough time to dry out completely (check instructions for recommended wait time), use fine-grit sandpaper (220-320 grit) lightly across its surface until smoothness is achieved. This step will help create an even surface for texturizing.
Once the initial smoothness is achieved through sanding, the next step is to take a piece of grain paper and place it over the repaired area. Use a heated iron or hairdryer to warm up the grain paper until it adheres to the filler.
Then, remove the paper and use a textured roller to add texture to the repair in the final step.
Color Match
When using leather filler, the first step is to ensure color match. This step is crucial as it ensures that the repaired area blends seamlessly with the rest of the leather surface.
If you’re unsure about which color to choose, try testing different shades on an inconspicuous area first.
To test for color match, the first step is to apply a small amount of filler on an unnoticeable part of your furniture and let it dry completely. Once dry, compare its shade with your existing material.
If they match perfectly, then proceed with repairing.
If you can’t find an exact color match in-store or online, consider mixing two colors together as a step to create a custom shade that matches your furniture’s hue.
Curing the Repair with Heat and Weighing Down Flaps
Using Heat Transfer Tool to Cure the Repair and Fix the Damage
Leather and vinyl are prone to tears, cuts, and scratches. These damages can be unsightly and reduce the value of your furniture or clothing items.
However, you can fix these damages by using a heat transfer tool to cure the repair.
A heat transfer tool is a device that heats up an area of leather or vinyl until it becomes soft and pliable. You can then press down on the damaged area to smooth out any bumps or wrinkles.
This process will cause the leather or vinyl to bond together seamlessly.
To use a heat transfer tool, follow these steps:
- Clean the damaged area with rubbing alcohol.
- Apply a small amount of leather glue to the tear.
- Place a piece of grain paper over the tear.
- Use the heat transfer tool on a low heat setting for 10-15 seconds.
- Press down on the tear with a flat object like a spoon until it bonds together seamlessly.
Weighing Down Flaps with Heat Disk and Grain Paper Helps in Fixing Tears
When fixing tears in leather or vinyl, flaps may occur with excess material around the edges of the damage.
To prevent these flaps from sticking out after repairing, you can weigh them down with a heat disk and grain paper.
A heat disk is a heavy metal plate that conducts heat evenly across its surface area. It helps distribute pressure equally across all parts of your repair job, ensuring that no part gets more attention than another.
Grain papers are thin sheets of paper with tiny bumps on their surface, similar to those found on leather or vinyl materials.
They help protect your workpiece from burning while working with high temperatures such as those generated by blowtorches.
To weigh down flaps using a heat disk and grain paper, follow these steps:
- Place a grain of paper over the damaged area.
- Put the heating disk on top of the grain paper.
- Heat the heat disk with a blowtorch or other heat source for 10-15 seconds.
- Press down on the heating disk with a flat object like a spoon until it bonds together seamlessly.
Using a Blowtorch as a Heat Source to Fix the Tear
A blowtorch is an excellent tool for fixing tears in leather or vinyl materials. It produces high temperatures that can melt and fuse together any torn edges, creating a seamless repair job.
To use a blowtorch as your heat source, follow these steps:
- Clean the damaged area with rubbing alcohol.
- Apply a small amount of color heat compound to the tear.
- Place a backing piece behind the tear to support it while you work on it.
- Use your blowtorch to apply high heat to the damaged area for 10-15 seconds.
- Press down firmly on both sides of the tear using pliers until they bond together seamlessly.
Color Heat Compound Can Be Used in Combination with Backing Piece to Fix Damage
Color heat compound is combined with backing pieces when repairing tears in leather or vinyl materials because it helps match colors between different parts of your repair job.
To use color heat compound, follow these steps:
- Clean the damaged area with rubbing alcohol.
- Apply a small amount of color heat compound to one side of your backing piece.
- Place your backing piece behind your tear and press down firmly so both sides touch each other.
- Use your blow torch or other heating devices to apply high temperature evenly across both sides for 10-15 seconds.
- Remove any excess residue left over from applying color heat compound by wiping gently using a damp cloth.
Grain Papers and Paper Plate Can Be Used To Prevent Burning While Working with Heat
When working with heat, protecting your workpiece from burning is essential. Grain papers and paper plates are excellent tools for preventing burns while you work.
To use grain papers and paper plates, follow these steps:
- Place a grain of paper over the damaged area.
- Put a paper plate on top of the grain paper.
- Heat up the heat source (blowtorch or other) for 10-15 seconds.

Tips for repairing tears and holes in furniture, upholstery, car seats, and other items
Use a leather repair kit for small cracks and holes in upholstery and car seats.
If you notice a small crack or hole on your leather car seat or upholstery, don’t panic. You can easily fix it with a leather repair kit. These kits usually come with all the tools you need to patch up the spot.
However, before you start using the kit, make sure to clean the area properly using a cloth and mild soap. This will help remove any dirt or dust that may interfere with the adhesive’s effectiveness.
When using the repair kit, follow the guidelines provided carefully. Most kits come with instructions on how to use them effectively.
Usually, you’ll have to apply some glue to the affected area before placing a patch of matching vinyl or leather over it. The patch should be slightly larger than the tear itself to cover all edges of the damaged spot.
After applying the patch, press it firmly onto the surface until it adheres completely. Then wait for some time (usually 24 hours) before reusing your car seat or sitting on your furniture.
This will give enough time for the adhesive to dry completely.
Use a patch of matching vinyl or leather and adhesive for larger tears to fix the spot.
If you have a larger tear in your leather car seat or upholstery that cannot be fixed by just using a repair kit alone, then you’ll need to do some extra work. In this case, you’ll need a piece of matching vinyl or leather that is large enough to cover the entire damaged area.
Start by cutting out a piece of vinyl/leather that is slightly larger than the torn area using scissors. Next, place some adhesive on both sides of this patch before sticking it onto where there is damage.
Ensure there are no air bubbles between these surfaces, as they might cause peeling or cracking in the future.
After applying the patch, you can use a hairdryer to dry up any excess adhesive that may have squeezed out between the surfaces. This will give your repair job a smooth and professional finish.
Always clean the area before attempting any repair job to help the patch adhere properly.
Cleaning is an essential step. Before starting any repair job, make sure to clean the affected area properly using a mild soap and water solution.
If there are stubborn stains, you can use a pencil eraser to remove them gently.
When cleaning, make sure not to use too much water as this might damage your car seat’s foam padding or furniture’s inner cushioning. After cleaning, let the surface dry completely before starting any repairs.
In cases where there is dirt buildup on the edges of things like car seats, try using a toothbrush with soft bristles to get rid of it effectively.
Remember always to be gentle while doing this so you don’t cause further damage.
Final thoughts on repairing tears in leather and vinyl
Fixing tears in leather and vinyl can be daunting, but it is not impossible.
With the right materials and step-by-step instructions, you can repair any tear, hole, or cut in your leather or vinyl items.
First, ensure all necessary materials are available before starting the project.
Secondly, follow each step carefully to ensure your repair is done correctly.
Lastly, be patient throughout the process; repairs may take time, but they will be worth it once completed.
Overall fixing tears in leather or vinyl can save you money by avoiding costly replacements of damaged items. It also allows you to keep cherished possessions looking great for years to come.
With these tips at hand, you should feel confident tackling any tear that comes your way.
FAQs
Q: Is it possible to fix large tears?
A: Yes! Large tears can be fixed using a combination of reinforcement fabric, sub patches, and a strong adhesive like super glue.
Q: How long does it take to fix a tear?
A: The amount of time it takes depends on the size of the tear, but generally, repairs can take anywhere from 30 minutes up to an hour.
Q: Can I use household items instead of purchasing specialized products?
A: While using household items may seem like an easy solution, they often do not provide adequate results compared to specialized products. It is best to use the recommended materials for the best results.
Q: Will the repair be noticeable?
A: If done correctly, repairs should not be noticeable. Texturizing and coloring the repair can help blend it in with the surrounding material.
Q: Can I fix tears on items other than furniture or car seats?
A: Yes! Tears can be fixed on a variety of items, including jackets, purses, and even shoes.
Q: Is it better to hire a professional for repairs?
A: While hiring a professional may seem like an easy solution, it can also be costly. With proper instruction and patience, anyone can learn how to fix tears in leather or vinyl themselves.
Q: How often do I need to repair tears in my leather or vinyl items?
A: The repair frequency depends on the wear and tear your item receives.
However, with proper care and maintenance, you can extend the life of your items and minimize future repairs.