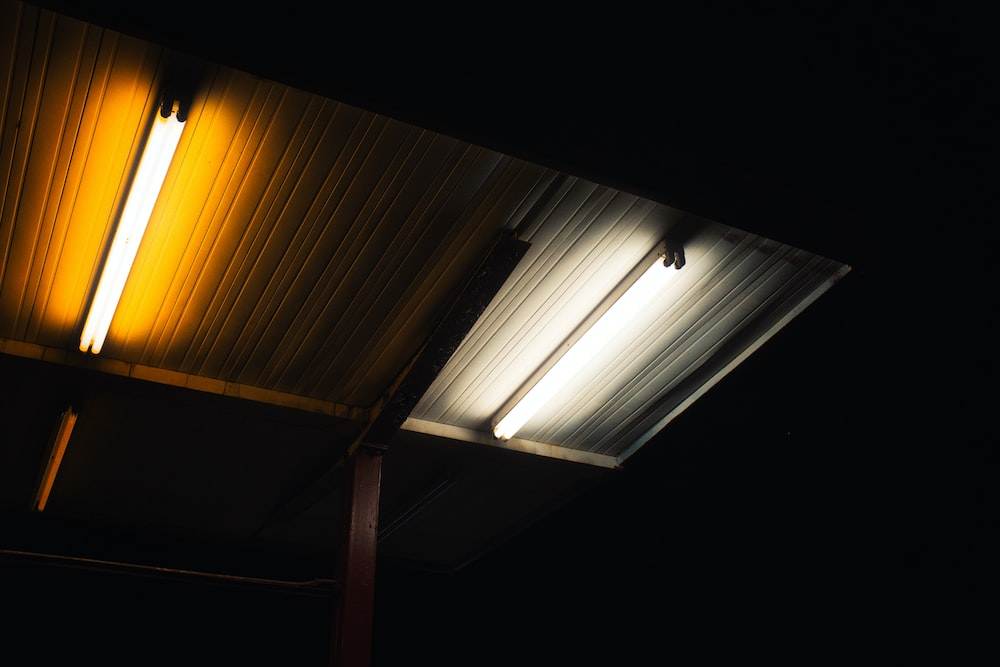
Fluorescent Lighting Ballast: Easy Step-by-Step Repair Guide
Have you ever walked into a room with flickering or buzzing fluorescent lighting?
It’s not only annoying but can also be a sign of faulty magnetic ballasts. Fluorescent lamps require magnetic ballasts to regulate the current and voltage, ensuring proper functioning.
Without them, they may not light up at all.
If the issue persists, it may be due to faulty fixture wires or a dirty lens.
If you’re experiencing any issues with your fluorescent lighting, it’s important to check if the magnetic ballast is the culprit. Using a voltage detector can help determine if there’s an issue with the ballast.
Checking the lamp holders and wiring for any damage is also crucial for properly functioning your lamps.
Fixing a fluorescent light ballast, including magnetic ballasts, doesn’t have to be complicated or time-consuming. In fact, it can take as little as 10 minutes!
Note that replacing a ballast in fluorescent lights isn’t always necessary; sometimes, simply fixing it does the trick.
So before you go out and buy new lamps or tubes, make sure to troubleshoot the problem first. Lamp holders are also important components of lighting fixtures that can cause issues if not properly installed or maintained.
We’ll also answer some common questions about when to replace light bulbs and fluorescent lamps in your fixtures.
Additionally, we’ll discuss the importance of proper lamp holders and functioning light switches.
Troubleshooting Tips for Common Issues Related to Fluorescent Light Ballasts
Loose Connections: Tighten Them If Necessary
One of the most common issues with fluorescent light ballasts is loose connections between the lamp holders and the ballast. These can cause flickering, dimming, or even complete lighting failure.
The first step in troubleshooting this issue is to check all screws and ensure they are tight.
Start by turning off the power to the lighting fixture at the light switch, circuit breaker, or fuse box. Then, remove the cover from the fixture and inspect all wiring connections.
Look for any that appear loose or disconnected and tighten them as necessary. Be careful not to overtighten, as this can damage wires or connectors.
Also, check the light bulbs or fluorescent lamps and replace them if necessary.
Once you have tightened all screws and connections for the fluorescent lamps’ lighting output, replace the cover and turn on the power again.
Test the light to see if it is working properly. If it still has issues with lighting output, move on to other potential causes.
Replace The Starter If The Light Flickers Or Takes A Long Time To Turn On
Another common issue with fluorescent lighting is a flickering or slow start-up time. This can be caused by a faulty starter, which is a small device that helps initiate the electrical charge needed to ignite the gas inside the tube.
When it comes to fluorescent lamps, one may also face problems with screws that hold the lamp in place. In some cases, a license is required to replace these lamps.
To replace a starter for fluorescent lamps in your lighting fixture, start by turning off power to the fixture at your circuit breaker or fuse box.
Next, locate the starter (usually located near one end of the fixture) and remove it by twisting it counterclockwise until it comes free.
This step should only be done if you have the proper license to handle electrical work.
Take note of any markings on your old starter as the first step so that you can purchase an exact replacement with a valid license at your local hardware store or online retailer.
It’s important to ensure the lighting is compatible with your parser for optimal performance.
Once you have your new starter in hand, please insert it into place by twisting clockwise until it is snugly fitted into its socket.
As the next step, replace any covers removed earlier to ensure the lighting is not affected. Finally, restore power to test if everything works correctly now and ensure a valid license for any electrical work done.
Use A Multimeter To Test The Ballast’s Voltage Output And Replace It If It’s Not Within The Recommended Range
If the above steps don’t resolve your lighting issue, the ballast in your lighting system may be faulty. A multimeter can help determine if this is the case.
This is especially important for those in the lighting class who need to troubleshoot their lighting systems.
To begin the lighting repair process, start by turning off the power to the fixture at your circuit breaker or fuse box.
Next, remove any covers from the lighting fixture and locate the ballast.
This is an important step in fixing lighting issues. Using a multimeter, test the voltage output of each wire connected to it.
Compare these readings with those recommended by the manufacturer for your specific lighting fixture model.
If they do not match, you need to take the next step and replace your ballast.
This is an important class of action to ensure the safety and efficiency of your lighting system.
To replace a ballast in your lighting fixture, follow this step.
Remove any covers from your fixture and disconnect all wires from it.
Take note of which wire goes where to reconnect everything correctly later on.
Next, in the lighting replacement class, remove any screws holding the old ballast in place and carefully remove it from its mounting bracket.
Replace it with a new one that matches both your existing wiring scheme and recommended voltage range as specified by its manufacturer.
This step is crucial for ensuring proper lighting function.
Once the lighting device is installed properly, follow this step to reconnecting all wires back into their respective positions on each side of this lighting device before replacing any covers removed earlier and restoring power to test if everything works correctly now.
How Do You Know When A Fluorescent Ballast Is Bad?
Several signs indicate when a fluorescent ballast might be bad, including issues with lighting, a step in performance, and a potential need for replacement in the class of ballast used.
- Flickering or dimming lights.
- Slow start-up times.
- Buzzing or humming sounds coming from inside fixtures.
- Burning smells emanating from fixtures or nearby electrical outlets/wiring.
- Complete failure of the lighting system (lights won’t turn on at all) in the first step of troubleshooting for this class of issue.
If you notice any of these symptoms occurring frequently or persistently over time, then it’s likely time to replace your fluorescent lighting’s ballast unit.
This step is crucial to ensure your lighting system is functioning properly and efficiently. Don’t let a faulty ballast unit affect the performance of your lighting system.
Make sure to replace it with a high-quality unit from a trusted class of manufacturers.
Safety Precautions Before Handling Fluorescent Light Ballasts
Fluorescent light ballasts are essential components of fluorescent lighting systems. They regulate the flow of electricity to the bulbs and ensure that they operate efficiently.
However, handling ballasts can be dangerous if proper safety precautions are not taken.
It is important to take the necessary step to attend a safety class before handling ballasts.
Turn Off the Power Supply to the Fluorescent Light Before Handling the Ballast
The first and most crucial step in ensuring your safety when handling a fluorescent lighting ballast is to turn off the power supply to the fixture.
This means switching off the circuit breaker or unplugging the fixture from its power source.
Never attempt to remove or replace a ballast while it is still connected to an electrical current.
Always Wear Protective Gear Such as Gloves and Safety Glasses When Handling Ballasts
When handling lighting equipment such as fluorescent light ballasts, it’s crucial to take an extra step to ensure safety.
These devices contain hazardous materials like mercury, which can harm your skin and eyes.
Always wear protective gear like gloves and safety glasses when working with them. Gloves protect your hands from cuts and exposure to toxic substances, while safety glasses shield your eyes from dust, debris, and chemical splashes.
Make Sure to Dispose of Old or Damaged Ballasts Properly and in Accordance With Local Regulations
When replacing an old or damaged fluorescent light ballast, it’s crucial to dispose of it properly and in accordance with local regulations for lighting waste.
Most states have specific guidelines for disposing of electronic waste safely. You can check with your local authorities or recycling centers for information on how to safely dispose of old or damaged ballasts in terms of lighting.
Check for Any Signs of Damage or Corrosion on the Ballast Before Handling It
Before handling a fluorescent light ballast, the first step is to inspect it thoroughly for any signs of damage or corrosion.
If you notice any cracks, leaks, or other visible damage related to lighting, do not attempt to handle the ballast yourself. Instead, seek professional help from a licensed electrician.
If You Are Unsure About How to Handle a Ballast Safely, Seek Professional Help
Finally, if you are unsure how to handle a fluorescent lighting ballast safely, it’s always best to seek professional help. Handling electrical components can be dangerous and should only be done by trained professionals who know how to work with them safely.
Don’t take any chances with your safety; call an electrician if you’re unsure what step to take.
Step-by-Step Guide on How to Replace a Fluorescent Light Ballast
If you have been using fluorescent lighting for a while, you may have experienced issues with the ballast. A ballast is an essential component of fluorescent lighting that regulates the current to the bulbs.
When it fails, your lighting won’t work correctly or may not work at all. In this guide, we will show you how to replace a fluorescent lighting ballast step by step.
Turn off the Power Supply and Remove the Fluorescent Bulb
Before starting any lighting work, ensure the power supply is turned off. You can do this by turning off the switch connected to your fixture or turning off the circuit breaker in your electrical panel box.
Once you are sure there is no power supply flowing through the wires, remove the fluorescent bulb from its socket as the first step.
Use a Voltage Tester to Ensure That There Is No Electrical Current Flowing Through The Wires
Ensuring your safety is important before taking the next step in your lighting project. Some residual electricity could still flow through your fixture’s wires even after turning off the power supply.
To be safe, use a voltage tester to check for any current flow before proceeding with the next step. Hold one probe of your voltage tester against one wire and touch another probe against another wire; if it doesn’t beep or light up, no electricity flows through them.
Remove Old Ballast from Fixture and Disconnect Wires Using Wire Stripper
The next step involves removing the old ballast from your lighting fixture and disconnecting its wires using a wire stripper.
First, locate where your ballast is installed in your lighting fixture; it’s usually near one end of it, but consult with manufacturer instructions if unsure.
Unscrew any screws holding it in place and gently pull it out of its slot.
Once you have removed the lighting from its slot, locate where its wires are connected to other components, such as sockets or tube holders on either end of your fixture (again, consult manufacturer instructions if unsure).
Use a wire stripper to loosen the wires’ connections and disconnect them from their respective components. This is an important step in the process of removing the lighting fixture.
Install New Ballast by Connecting Wires According to the Wiring Diagram Provided with New Ballast
Now that you have removed the old ballast and disconnected its wires, it’s time to move on to the next lighting step and install the new one.
Start by connecting its wires according to the wiring diagram provided with your new ballast.
The diagram will show you how to connect each wire correctly, so take your time and double-check that they are all connected properly for proper lighting.
Once you have connected all the wires for your lighting, insert the new ballast into your fixture’s slot and screw it in place.
Finally, reinsert your fluorescent bulb into its socket and turn on your power supply; if everything is done correctly in this step, your lights should work as expected.
Mounting a New Ballast for Your Fluorescent Light
If you have a lighting fixture with fluorescent tubes that is not working properly, the first step is to check the ballast.
A ballast is an electronic device that controls the voltage and current supplied to the tubes. If it fails, your light won’t work.
Where is the Ballast on a Fluorescent Light Fixture?
Before we dive into the step-by-step process of mounting a new ballast for your lighting fixture, let’s first locate where it is.
The ballast is usually located inside the frame or cover of your light fixture. You may need to remove screws or clips to access it.
What is a Ballast?
A ballast is an essential component of any fluorescent lighting system. It regulates the electrical current flowing through the bulbs and provides them with enough voltage to start and operate efficiently in a step-by-step process.
There are two types of ballasts: magnetic and electronic.
Magnetic ballasts are older technology and use wire coils to regulate current flow step-wise. They are bulkier and heavier than electronic ballasts but can handle more significant voltages.
Electronic ballasts are newer technology and use solid-state components such as capacitors, resistors, and transistors to regulate current flow step-wise. They are smaller, lighter, and more energy-efficient than magnetic ones but cannot handle high voltages.
Now that we know what a ballast is, let’s move on to the step of how you can replace one.
- Turn off Power Supply
The first step when replacing a faulty ballast in your fluorescent light system is always safety! Turn off the power supply by switching off both switches at your circuit breaker box: one switch controls the power supply from utility companies while another switch controls the power supply within homes/buildings themselves; make sure both switches are turned off before proceeding further!
- Remove the Cover of the Fixture and Disconnect the Ballast Wires from the Lamp Holders
Once you have turned off the power supply, remove the cover of your fixture. You may need to unscrew it or unclip it, depending on how it is attached. Then disconnect the ballast wires from the lamp holders by gently pulling them apart.
- Take out Old Ballast and Mount New Ballast in Its Place, Making Sure It Fits Securely
Now that you have removed the old ballast, please take out your new ballast and mount it in its place. Make sure that it fits securely into position and that all screws are tightened.
- Connect Ballast Wires to Lamp Holders and Secure Them with a Nut
Next, connect the ballast wires to the lamp holders by matching up colors (usually black/white) and securing them with a nut.
- Close Fixture Cover and Turn On Power Supply to Test If the Tubes Are Working Properly
Finally, close your fixture cover and turn on the power supply at the circuit breaker box to test if the tubes are working properly. If they are not functioning as expected, check connections again or contact an electrician for assistance.
Stripping Insulation and Disconnecting Wires from the Old Ballast
Turn Off the Electricity to the Fixture Before Starting Work
Before starting any work on your fluorescent light ballast, it is essential to turn off the electricity to the fixture. If you are unsure which circuit breaker controls your fixture, turn off the main power supply to be safe. It is best practice to use a voltage tester or multimeter to verify that there is no electrical current running through the wires.
Use a Socket Wrench to Remove the Screws Holding the Ballast Cover in Place
Once you have turned off the power supply, use a socket wrench or screwdriver (depending on what type of screws hold your ballast cover in place) to remove all of the screws holding it in place.
Keep these screws safe, as they will be needed when installing a new ballast.
Identify the Fixture Wires and Disconnect Them from the Old Ballast
Identifying which wires go where can be tricky, but it’s essential for properly installing new ballast.
First, locate all your fixture wires and identify their colors: black, white, green, or bare copper.
The black wire is typically hot (carries electrical current), while white is neutral (does not carry electrical current). Green or bare copper wires are ground wires.
Next, disconnect each wire from its corresponding terminal on the old ballast.
Be sure to keep track of which wire goes where, as you will need this information later when connecting them back up again.
Cut Insulation and Remove Wire Nuts from White Wires
The white wires may have wire nuts attached that connect them with other white wires or colored wires. Use wire cutters or pliers to remove these wire nuts carefully without damaging any of the wiring inside.
After removing any wire nuts, cut away about an inch of insulation from both ends of each white wire using a wire stripper.
This will expose the bare copper underneath, allowing you to connect the wires to their corresponding terminals on the new ballast.
Parser Tools Can Help Identify Which Wires Go Where
If you are unsure which wire goes where parser tools can help identify them for you. These tools use a combination of color coding and labeling to make it easy to identify each wire’s function.
You can also check your fixture’s manual or contact an electrician for assistance.
Disposing of the Old Ballast and Fluorescent Light
Proper Disposal of Old Ballasts and Fluorescent Lights
Disposing of the old ballast and fluorescent light is just as important as installing a new one. You can’t simply throw these items in the trash since they contain hazardous materials that could harm the environment. Instead, you need to dispose of them properly.
Fluorescent lamps contain mercury, which is harmful if released into the environment. Therefore, it’s crucial to recycle them through appropriate channels.
Many local recycling centers or hardware stores offer free recycling programs for fluorescent lights and ballasts.
If you’re unsure where to recycle your old ballast or fluorescent light, try contacting your local government office or searching online for facilities that accept hazardous materials. Remember that it’s better to take some time to find an appropriate place for disposal than to risk environmental damage.
Replacing the Entire Fixture
Sometimes fixing a fluorescent light requires more than just replacing the ballast. If your fixture is too old or damaged beyond repair, you may need to replace it entirely.
Before making any decisions about replacing your fixture, ensure you have correctly diagnosed what needs fixing. If you’re unsure how to diagnose problems with your fixture, consider hiring an electrician or asking a knowledgeable friend for help.
If you decide to replace your entire fixture, remember that many options are available on the market today. You can choose from LED fixtures or other energy-efficient lighting solutions depending on your budget and preferences.
Checking Output Wires Before Handling Them
When removing an old ballast from a fluorescent light fixture, checking output wires before handling them is essential.
These wires carry electricity even when the power is off, so it’s crucial not to touch them without taking proper precautions.
To check output wires safely, use either a detector or your hand. A voltage detector will beep or light up if it detects any electrical current in the wires, alerting you to their presence.
Alternatively, you can use your hand to test for electricity by touching the red and white wires together with one hand while holding a screwdriver with the other.
If you feel a slight shock when touching the wires, electricity still flows through them. In this case, make sure to turn off the power at the circuit breaker before proceeding further.
Successfully fixing your fluorescent light ballast.
If you’ve been experiencing issues with your fluorescent light ballast, there’s no need to panic.
By following the troubleshooting tips and safety precautions outlined in this guide, you can successfully fix your fluorescent light ballast without any hassle.
The step-by-step guide on replacing a fluorescent light ballast and mounting a new one is easy to follow and will have you up and running in no time. Just remember to strip insulation and disconnect wires from the old ballast before disposing of it properly.
By taking these simple steps, you’ll save money by avoiding costly repairs or replacements.
Plus, you’ll better understand how your fluorescent light works, which can help prevent future issues.
So what are you waiting for? Get started on fixing that pesky fluorescent light ballast today!
FAQs:
Q: Is it safe to handle a fluorescent light ballast?
A: It’s important to take proper safety precautions when handling a fluorescent light ballast. Make sure the power is turned off before attempting any repairs or replacements.
Wear protective gear such as gloves and safety glasses to avoid injury.
Q: How do I know if my fluorescent light ballast needs replacing?
A: If your fluorescent light is flickering or not turning on at all, it may be an issue with the ballast. Other signs include humming noises or burning smells coming from the fixture.
Q: Can I replace a fluorescent light ballast myself?
A: Yes, with proper guidance and safety precautions, replacing a fluorescent light ballast can be done yourself.
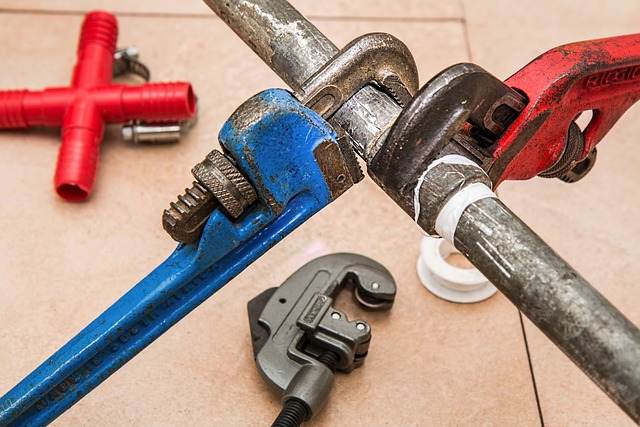
Q: What tools do I need to replace a fluorescent light ballast?
A: You will need wire strippers, pliers, screwdrivers (flathead and Phillips), electrical tape, wire nuts, and a replacement ballast.
Q: How long does it take to replace a fluorescent light ballast?
A: The entire process can take anywhere from 30 minutes to an hour, depending on your experience level and the complexity of the fixture.
Q: Can I dispose of my old fluorescent light ballast in the regular trash?
A: No, fluorescent light ballasts contain hazardous materials and should be disposed of properly at a designated recycling facility.
Q: What if I’m still having issues with my fluorescent light after replacing the ballast?
A: If you’re still experiencing issues, it may be a problem with the wiring or other components. It’s best to consult a professional electrician for further assistance.