How to Restore Old Wooden Windows: A Beginner’s Guide
Restoring old wood sash windows is a worthwhile endeavor that can bring charm and character to your home while preserving the historical significance of buildings.
Repairing these windows may require the expertise of a skilled glazier, especially if you have casement windows that need attention.
Wood window restoration is a cost-effective alternative to replacement, making it appealing to owners of old houses with historic windows.
A skilled glazier can also repair hung windows.
You can restore their original beauty and functionality by repairing old wood sash windows, enhancing your home’s overall aesthetic appeal.

Last update on 2026-06-25 / Affiliate links / Images from Amazon Product Advertising API
Restoring these windows can bring new life to your home, whether the top sash or the bottom sash.
With their old wood and top sash, historic windows in old houses add a unique touch and sense of authenticity that cannot be replicated with modern casement replacements.
Moreover, restoring old wood windows helps preserve historic buildings’ architectural integrity, particularly old houses, by preserving their original features.
This is especially important when considering replacement windows, as they may not match the unique style and character of the building.
Additionally, proper glazing techniques should be employed during window restoration to ensure the longevity and functionality of the windows.
This blog post will also discuss how to address common challenges related to wood window restoration, such as lead paint removal and weatherproofing.
Whether you have old wood windows that need some TLC or are considering replacement windows, we’ve got you covered.
Whether you are a homeowner looking to restore your windows or a preservation enthusiast interested in learning more about this craft, we’ve got you covered, from repairing wood rot to sanding the top sash.
Benefits of Restoring Old Wooden Windows
Restoring old wooden windows, including the top sash, can benefit your home. Sanding and replacement can help eliminate noise.
Not only does wood window restoration enhance the overall aesthetic appeal, but it also allows you to retain the original architectural features and craftsmanship of older homes.
Wood windows, window sashes, and replacement windows are all important elements to consider when restoring the beauty of your home.
Restoring old windows improves energy efficiency and reduces the environmental impact of manufacturing new ones.
If your windows are making noise or need sanding, focusing on the top sash can help address these issues.
Enhancing the Aesthetic Appeal
Restoring old wooden windows can transform the look and feel of your home. If your windows are making noise or if the top sash needs repair, it may be time to consider restoring them.
By restoring the windows, you can improve their overall appearance and functionality.
Restoring the windows can also help trim down any excess noise that may be coming from outside.
By bringing back the natural beauty of wood windows, you add character and charm that may be lacking in newer window replacements.
The sash of wood windows can help reduce noise, making your home more peaceful.
Wood’s warm tones and unique grain patterns create a timeless elegance that complements various architectural styles.
Wood’s natural beauty will surely attract attention, whether it’s the top of a window sash or a door.
Retaining Original Architectural Features
Older homes often boast intricate architectural details, including wood window restoration, that are worth preserving.
The window sash at the top of the window is an important component to consider when undertaking a restoration project.
Proper planning can make restoring and maintaining these historic windows easier and more effective.
Restoring old wooden windows allows you to maintain these original features, such as decorative moldings, muntins, or even stained glass panels.
You can get your windows looking as good as new with some effort.
Whether replacing a broken sash or fixing a worn-out top, taking the time to pamper your windows will ensure their longevity.
By restoring wood windows, you can honor your home’s history and craftsmanship while adding value to its overall appeal.
The sash can be restored to its original condition, preserving the windows’ top quality.
Improving Energy Efficiency
Contrary to popular belief, properly restored old wooden windows with a top sash can be as energy-efficient as modern replacements.
Sealing gaps, insulating with weatherstripping materials, and adding storm windows or glazing options can significantly improve the insulation properties of your sash windows.
Additionally, by properly maintaining and cleaning your sash windows, you can ensure that they continue to provide optimal performance.
With the help of a professional, you can keep your sash windows in top condition and extend their lifespan.
Wood window restoration is essential for maintaining their efficiency.
This helps prevent drafts and heat loss during colder months while keeping your home cooler in summer.
With the help of a professional, you can ensure that your wood windows are restored to their original condition.
- Properly seal gaps using caulk or weatherstripping
- Add storm windows for extra insulation
- Consider double glazing for enhanced energy efficiency
Avoiding Environmental Impact
One significant advantage of restoring old wooden windows, specifically those with a sash, is minimizing environmental impact.
Opting for window restoration instead of replacement can preserve your home’s original charm and character while reducing waste.
Manufacturing new windows requires substantial resources like timber extraction and energy consumption,
By opting for restoration instead of replacement, you contribute to sustainable practices by reducing waste generation and conserving valuable materials.
- Reduce waste by refurbishing existing frames.
- Preserve historic wood rather than replacing it entirely
- Contribute to sustainable practices by minimizing resource consumption
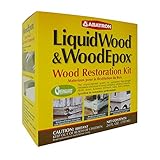
- REPAIR DAMAGED WOOD: Permanently harden, regenerate, fill, replace, and waterproof damaged wood with this epoxy hardener and filler kit. It’s great for historical restoration and can repair windowsills, frames, doors, trim, clapboards, furniture, and more.
- EASY TO USE: LiquidWood has a 30-45 minute pot life (working time) after mixing, and the treated wood hardens in just a few hours. WoodEpox can be mixed and applied by hand to wet LiquidWood and has a 20-30 minute pot life.
- GREENGUARD CERTIFIED: This product contains almost no VOCs (volatile organic compounds) and does not include water or solvents. It has a low odor and is a clean, safe wood repair solution for both the user and the environment.
- NO SHRINKING OR CRACKING: This kit creates structural, shrink-free repairs that mimic the original wood. These products bond to previously damaged substrates and are resistant to further damage by water, pests, and UV.
- ABATRON: We specialize in providing high-quality, easy-to-use, permanent building restoration products. Our items do not contain solvents and have virtually no VOCs. We are committed to offering safe products that deliver professional results.
Last update on 2026-06-25 / Affiliate links / Images from Amazon Product Advertising API
Cost Considerations
Restoring old wooden windows, including the sash, can be a cost-effective choice compared to purchasing new ones.
While the initial investment in restoring a sash window may vary depending on the extent of restoration required, it is often more affordable than full window replacements.
Over time, maintaining and repairing existing windows, including the sash, tends to be less expensive than frequent replacements.
It is important to take care of the window’s sash and maintain it properly.
By doing so, homeowners can save money in the long run.
Regular maintenance and repairs, such as fixing a broken sash, can help extend the lifespan of the window and prevent the need for costly replacements.
Here’s a cheat sheet for restoring old wooden windows:
Old Wooden Window Restoration Cheat Sheet
Benefits
- Preserves historical significance
- Adds charm and character to your home
- Cost-effective alternative to replacement
- Enhances overall aesthetic appeal
Types of Windows
- Sash windows (single-hung or double-hung)
- Casement windows
Key Components
- Top sash
- Bottom sash
- Glazing (glass panes)
When to Seek Professional Help
- For complex repairs
- Casement window restoration
- When dealing with hung windows
Steps for DIY Restoration
- Remove window sashes
- Strip old paint and putty
- Repair or replace damaged wood
- Reglaze windows if necessary
- Prime and paint wood
- Reinstall weatherstripping
- Lubricate moving parts
- Reinstall sashes
Tools and Materials
- Paint stripper
- Putty knife
- Wood filler
- Sandpaper
- Primer and paint
- Glazing compound
- Weatherstripping
- Lubricant
Tips
- Research proper techniques for your specific window type
- Take photos before disassembly for reference
- Work in a well-ventilated area
- Use appropriate safety gear (gloves, goggles, mask)
- Consider energy efficiency upgrades (e.g., weatherstripping, storm windows)
Remember: Patience and attention to detail are key to successful window restoration!
DIY Window Restoration: Step-by-Step Guide
Restoring old windows, including the sash, can be a rewarding and cost-effective project that brings new life to your home.
With the right tools and techniques, you can easily restore the beauty of your windows and enhance the overall appearance of your space.
By carefully removing layers of paint and repairing any damage, you can ensure that your windows are functional and aesthetically pleasing.
So, grab your tools and prepare to pamper your windows with some much-needed TLC.
If you’re up for the challenge, this step-by-step guide will help you complete DIY window restoration.
So grab your tools, and let’s get started!
A Comprehensive Guide on How to Restore Your Old Windows Yourself
- Assess the condition of your windows by thoroughly inspecting them for any damage or decay. Look for cracked glass, loose frames, peeling paint, rotting wood, or damaged sash.
- Remove hardware and sashes: Remove any hardware, such as locks, handles, and hinges, before removing the sashes from the frame. This will make it easier to work on each sash component individually.
- Repair or replace damaged sash parts: Use epoxy putty or wood filler to fix broken or rotted wood. If necessary, replace irreparable sections with matching wood pieces.
- Strip old paint from the sash: Remove layers of old paint using a heat gun or chemical stripper. When working with these materials, follow safety precautions, such as sash.
- Sand surfaces: Once the paint is removed, sand all sash surfaces until they are smooth and ready for refinishing.
- Apply primer and paint to the sash: A high-quality primer protects the sash from moisture and ensures better paint adhesion. Then, evenly apply a suitable exterior-grade paint color to the window frames, including the sash.
- Replace weatherstripping: Install new weatherstripping around the edges of your windows to improve energy efficiency and prevent drafts. Additionally, make sure to install weatherstripping on the sash for optimal results.
- Reinstall hardware and sashes: Once the paint has dried completely, reattach all hardware components and carefully reinstall them into their respective frames.
Tips for Tackling Common Challenges During Window Restoration
- Dealing with stuck sash windows: If your sash windows are difficult to open or close, try applying silicone-based lubricant to the sash tracks and hinges. This should help them glide smoothly.
- Repairing broken glass sash: If your glass panes are cracked or broken, carefully remove the old glass and replace it with new ones of the same size. Wear protective gloves and eyewear while handling glass.
- Addressing rotting wood, especially in the sash, can be challenging. Consult a professional for assistance with extensive wood rot in the sash. They can provide expert guidance on repairing or replacing severely damaged sections, such as the sash.
Detailed Guidance on Safety Precautions Throughout the DIY Restoration
- Wear protective gear, such as a sash: When working with chemicals or power tools, always wear safety goggles, gloves, and a dust mask to protect yourself from potential hazards.
- Work in a well-ventilated area: Ensure proper ventilation by opening windows and using fans if necessary. Also, make sure to wear a sash while working to protect yourself. This will help minimize exposure to fumes from paint strippers or other chemicals, especially when using a sash.
- Use appropriate tools: Make sure you have the right tools for each task, such as scrapers, sandpaper, putty knives, brushes, and sashes. Using improper tools can lead to accidents or damage to your windows, especially when working with the sash.
Following this guide and keeping these tips in mind, you’ll be well-equipped to restore your old windows and their sash like a pro.
Remember to take your time and work diligently through each step for optimal results with your sash. Happy window restoration!
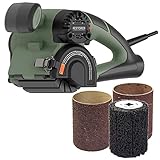
- The Original Restorer invented in Ohio. Instantly prep and restore wood, metal and more. Strip, sand, sweep, texture and burnish dust-free when connected to a shop vac using the built-in dust port
- APPLICATIONS: Ideal for furniture refinishing, deck restoration, reclaimed wood cleanup, live edge and epoxy prep, shou sugi ban technique, cleaning bourbon barrels, auto restoration, paint and rust removal, perfect compact burnishing polishing machine
- COMFORT: Lightweight design, Reduce hand fatigue with ergo soft grip for large and small hands. Comfortable even for arthritic hands. Light weight design for easy use at any angle with simple tool-less roller change.
- PERFORMANCE: 10x more efficient than a belt sander or orbital sander, Powerful 3.5 amp 120 volt variable speed motor with front and rear handles for maximum control. Connect Built-In dust port to vac for no mess.
- COMPATABILITY: Works with BDJD2674, PXRA2676, CMXEQWX3232 Restorer tool models.
Last update on 2026-06-25 / Affiliate links / Images from Amazon Product Advertising API
Necessary Tools and Supplies for DIY Window Restoration
Essential Tools for Successful Window Restoration
You’ll need essential tools to restore old windows and their sash like a pro.
These sash tools will help you easily tackle the cleaning, repairing, and refinishing.
Here are the must-have tools for a successful window restoration project, including the sash.
- Putty Knife: A putty knife is indispensable. It allows you to scrape away the old putty without damaging the wood using a sash.
- Screwdriver Set: A set of screwdrivers in various sizes will come in handy when disassembling and reassembling window components. Make sure to have both flathead and Phillips head screwdrivers on hand.
- Claw Hammer: A claw hammer is essential for removing nails or gently tapping wooden parts back into place during restoration.
- Chisel: A sharp chisel is useful for carefully removing any stubborn paint or varnish from wooden surfaces without causing damage.
- Sander: An electric sander or sanding block will save you time and effort.
- Paintbrushes: High-quality paintbrushes in different sizes are necessary for applying primer, paint, or stain to your restored windows.
- Caulking Gun: A caulking gun is vital for applying fresh caulk around the edges of your windows to prevent drafts and water leaks.
Recommended Supplies for Cleaning, Repairing, and Refinishing Wooden Frames
In addition to tools, there are specific supplies that will aid in cleaning, repairing, and refinishing the wooden frames of your old windows:
- Glass Cleaner: To thoroughly clean the window panes, use a non-ammonia-based glass cleaner and a lint-free cloth or newspaper.
- Wood Filler: Wood filler helps repair cracks, holes, or damaged areas in the wooden frames. Choose a high-quality wood filler that matches the color of your window frames for seamless repairs.
- Sandpaper: Different grits of sandpaper, ranging from coarse to fine, will be necessary to smooth rough surfaces and prepare the wood for refinishing.
- Primer: Applying a primer before painting or staining is crucial as it helps the paint adhere better and provides an even finish. Opt for a primer specifically designed for use on wood surfaces.
- Paint or Stain: Depending on your preference, choose either paint or stain to give your restored windows a fresh new look. Ensure you select products suitable for exterior use and that provide adequate protection against the elements.
Safety Equipment Required When Working with Chemicals or Power Tools
While restoring old windows can be a rewarding DIY project, it’s essential to prioritize safety.
Here are some safety equipment items you should have:
- Safety Glasses: Protect your eyes from debris and dust by wearing safety glasses throughout restoration.
- Dust Mask: A dust mask will help filter harmful particles when sanding or working with chemicals.
- While handling tools and materials, work gloves protect hands from sharp edges, splinters, and chemical exposure.
- Ear Protection: If using power tools like sanders or saws, wear ear protection to prevent hearing damage from prolonged exposure to loud noises.
Where to Find Quality Tools and Supplies for Your Window Restoration Project
There are several options available:
- Local Hardware Stores: Visit your nearest hardware store to find a wide range of tools, supplies, and expert advice tailored to window restoration projects.
- Online Retailers: Many online retailers specialize in selling tools and supplies for DIY enthusiasts. Browse through their selections and read customer reviews before making a purchase.
- Secondhand Shops: Consider checking out secondhand shops or salvage yards for vintage or antique window hardware that may add an authentic touch to your restoration project.

Inspecting and Preparing the Window for Restoration
Before restoring your old windows, it’s important to assess their condition.
Look closely at each window to identify common issues such as rot, decay, or broken glass.
This will help you determine necessary repairs and plan your restoration process accordingly.
To get started with the restoration process, here are some steps to inspect and prepare your old windows:
Assessing the Condition of Your Old Windows
Begin by scrutinizing each window.
Look for signs of rot or decay in the wood frames and any cracks or damage to the glass panes.
Check if the windows open and close smoothly or are stuck due to paint buildup or warped frames.
Identifying these issues will give you a clear idea of what must be fixed during restoration.
Removing Hardware and Preparing the Workspace
Before you begin working on your old windows, it is crucial to remove any hardware, such as hinges, handles, or locks, from the window frame.
This will make it easier to clean and restore both the frame and the hardware separately.
Set aside all removed hardware in a safe place to reinstall them later.
Next, create a suitable workspace for your restoration project.
Lay down drop cloths or plastic sheets to protect the surrounding area from dust, debris, and paint chips that may come off during the process.
Ensure good ventilation by opening windows or using fans if necessary.
Cleaning Techniques for Old Windows
Over time, old windows often accumulate layers of dirt, grime, and old paint.
Remove loose dirt with a soft brush or vacuum cleaner attachment to prepare them for restoration.
Then, use a mild detergent with warm water to remove stubborn grime.
If your windows have multiple layers of peeling paint, consider using a heat gun or chemical stripper, following manufacturer instructions, to remove it safely.
Be cautious using these methods; always wear protective gear such as gloves and goggles.
Repairing and Restoring the Window Frame
Once your windows are clean, you can start addressing any necessary repairs.
Use a glass scraper to remove any old putty or glazing compound from the window panes.
Inspect the wood frame for signs of rot or decay.
If you encounter damaged areas, use a chisel or utility knife to remove the affected wood carefully.
After removing rotten wood, fill in the gaps with an epoxy-based wood filler.
This will help restore strength and stability to the frame.
Allow the filler to dry completely before sanding it to create a smooth surface.
Before moving on to painting, inspect and repair other components, such as interior stops or exterior storm windows, if necessary.
Replace any broken glass panes or hardware that cannot be salvaged.
Following these steps, you can effectively inspect and prepare your old windows for restoration.
Taking the time to assess their condition, remove hardware, clean thoroughly, and address necessary repairs will set a solid foundation for the rest of your restoration journey.
Repairing Wood Rot and Removing Old Paint
Wooden windows can add charm and character to any home, but they may show signs of wear and tear over time.
Repairing Wood Rot
Wood rot is a common problem in older windows due to moisture exposure. If left untreated, it can compromise the structural integrity of the frame.
Here are some steps you can take to address wood rot:
- Identify the affected areas: Inspect your window frames for soft or discolored spots, which are indicators of wood rot.
- Remove rotted wood: Use a chisel or a rotary tool with a cutting bit to carefully remove the rotten sections until you reach stable, healthy wood.
- Apply a wood hardener: To strengthen the remaining sound wood and prevent further decay, treat it with a liquid epoxy consolidant or a specialized wood hardener.
- Fill gaps with epoxy or filler: Fill any gaps, cracks, or holes using an appropriate material like epoxy or wood filler. Follow the manufacturer’s instructions for application and drying times.
- Sand and smooth: Once the filler has dried completely, sand down the surface until it is smooth and level with the rest of the frame.
Removing Old Paint
Before restoring your old windows, removing layers of old paint that may be peeling or flaking is essential.
Here’s how you can do it safely:
- Safety first: If your window frames were painted before 1978, they may contain lead-based paint. Take necessary precautions by wearing protective gear such as gloves, goggles, and a mask.
- Scrape off loose paint: Start gently using a paint scraper or putty knife to scrape away any loose or peeling paint. Be careful not to gouge the wood.
- Heat gun or chemical stripper: To remove stubborn paint, you can use a heat gun to soften it and then scrape it off. Alternatively, chemical paint strippers can also be effective, but remember to follow the manufacturer’s instructions and work in a well-ventilated area.
- Remove old putty: If your windows have glazing putty around the glass panes, carefully remove any old putty using a putty knife or a specialized tool called a “glazier’s point”.
- Sand and prepare for refinishing: Once all the old paint has been removed, lightly sand the wood surface to create a smooth base for refinishing.
Restoring old windows requires patience and attention to detail, but proper techniques can restore them to their former glory.
Remember to prioritize safety when working with lead-based paint and always follow best practices for repairing wood rot.

- ABATRON Abosolv WRK6OR Wood Restoration Kit, 24 oz Package, Box
- Permanent solution for repairing wood rot or decay and replacing damaged wood.
- This kit conveniently packages together equal volumes of Liquid Wood A and B, WoodEpox A and B and Abosolv.
- Choose from 3 sizes. Kit also contains disposable gloves, putty knife, mixing sticks and instructions.
- Pack of 1 Liquid Wood and Pack of 1 Liquid Wood B.
Last update on 2026-06-25 / Affiliate links / Images from Amazon Product Advertising API
Refinishing and Painting the Window Frame
It’s essential to give some attention to the window frame to restore old windows.
Refinishing and painting the window frame can breathe new life into your old windows and enhance their overall appearance.
Here are some key steps and tips for achieving a professional-looking finish:
Choosing the Right Finish for Your Window Frame
There are two important factors to consider: aesthetics and durability.
You want a finish that complements the style of your home and provides long-lasting protection against the elements.
Some popular options include enamel paint, which offers excellent durability, or stain, which allows you to showcase the natural beauty of wooden frames.
Step-by-Step Instructions for Sanding, Priming, and Painting Wooden Frames
- Start using sandpaper to remove loose or flaking paint from the window frame. Be sure to wear protective goggles and a mask while sanding.
- Use fine-grit sandpaper (around 220 grit) to smooth out the surface of the wood. Sand in the direction of the grain until you achieve a smooth finish.
- After sanding, wipe away any dust with a damp or tack cloth.
- Apply a primer suitable for wooden surfaces to ensure proper paint adhesion.
- Once the primer is dry, apply thin coats of paint using a brush or roller. Make sure each coat is dry before applying another one.
- Aim for at least two coats of paint on your window frame for best results.
Tips for Achieving a Professional-Looking Finish
- To achieve a smooth and even finish on your window frame:
- Use high-quality brushes or rollers designed specifically for painting trim work.
- Avoid overloading your brush or roller with too much paint, leading to drips and uneven coverage.
- Work in small sections, applying the paint evenly and smoothly.
- Take your time and be patient. Rushing the painting process can result in a sloppy finish.
How to Properly Care for Newly Painted Windows
Once you’ve successfully restored your old windows by refinishing and painting the frame, it’s important to care for them to maintain their appearance properly:
- Regularly clean your windows using a mild soap or window cleaner and a soft cloth or sponge.
- Avoid using abrasive cleaners or rough materials that could scratch the painted surface.
- Inspect your windows periodically for any signs of wear or damage. Touch up any chips or scratches with matching paint as needed.
- Add weatherstripping around the window frame to improve energy efficiency and reduce drafts.
Refinishing and painting the window frame can bring new life to your old windows.
This will enhance their overall appearance and extend their lifespan, allowing you to enjoy their beauty for years.
Maintain Your Restored Windows for Longevity
Now that you have successfully restored your old wooden windows, it’s important to maintain them properly to ensure their longevity.
Regular maintenance will preserve the beauty and functionality of your windows and help prevent future damage or deterioration.
To maintain your restored windows, clean them regularly using a mild detergent and a soft cloth.
Avoid harsh chemicals or abrasive materials that could scratch or damage the wood finish.
Inspect the windows periodically for signs of wear or damage, such as cracks, peeling paint, or loose glazing. Repair or repaint as needed.
Remember to keep an eye on the surrounding areas as well.
Trim back any vegetation touching the window frames to prevent moisture buildup and potential rot.
By implementing these simple maintenance practices, you can extend the lifespan of your restored windows and enjoy their charm for years to come.
Restore Old Wooden Windows FAQs
How often should I clean my restored windows?
It is recommended to clean your restored windows at least twice a year, ideally in spring and fall. However, more frequent cleaning may be necessary if you live in an area with high pollution levels or near construction sites.
Can I use a power washer to clean my restored windows?
No, using a power washer on wooden windows is not advisable. It can damage them by forcing water into joints and causing leaks. Stick to gentle hand-cleaning methods instead.
How long does window restoration typically take?
The time required for window restoration depends on various factors, such as the extent of damage, the size of the window, and your experience level. It can range from a few hours for minor repairs and touch-ups to several days for extensive restoration projects.
Can I restore my windows if I have no prior experience?
While DIY window restoration is possible, you should have basic carpentry skills and knowledge. If you are a beginner, consider starting with smaller projects or seeking professional guidance to ensure satisfactory results.
Will restoring my windows increase the energy efficiency of my home?
Properly restored windows can improve energy efficiency by reducing drafts and improving insulation. This can lead to lower heating and cooling costs in your home.