8 Expert Tips for Installing Fiberglass Batt Insulation DIY
Are you tired of feeling like your interior is never quite warm enough in the winter or cool enough in the summer?
Do you dread opening your energy bill each month, knowing it will be higher than you’d like?
If so, it might be time to consider installing batt insulation in your room. This type of insulation can also help regulate the temperature in attics and around electrical outlets.
Insulation is a crucial component of maintaining energy efficiency in a house.
Without proper insulation, heat can escape through walls, ceilings, attics, and electrical outlets, causing your heating system to work harder and use more energy.
This leads to higher energy bills and puts unnecessary strain on the environment. It is important to ensure that the interior of the room is well insulated to prevent any energy loss.
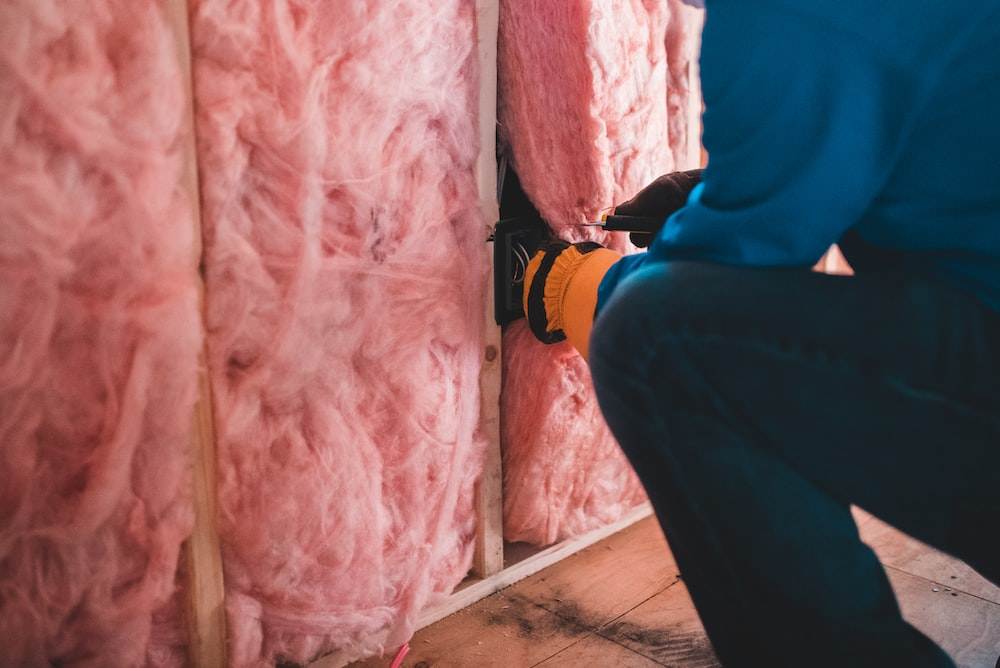
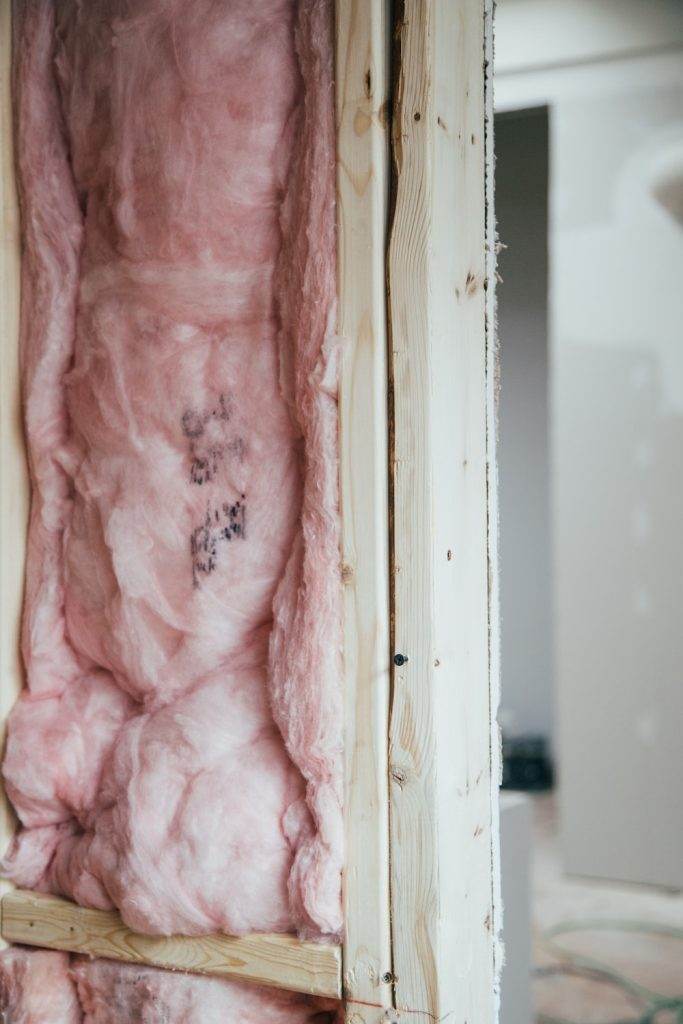
Batt insulation, typically half the length of a standard wall stud at 16 inches, is a popular and effective type of insulation for homes. Made from fiberglass or mineral wool, batts are easy to install and can significantly reduce house energy consumption and heat loss.
By creating a barrier between the inside and outside of your home, batt insulation helps regulate temperature and improve overall comfort.
So what exactly is batt insulation? From its benefits to its installation process, we’ll cover all the information you need to make an informed decision about improving your home’s energy efficiency.
This type of insulation comprises half-inch thick sheets of glass fibers and can be installed with a moisture barrier for added protection.
- EXTREMELY EFFECTIVE – reflect 95% of radiant energy, perfect RADIANT BARRIER.
- VAPOR BARRIER -Unaffected by humidity and moisture, can be used indoor/outdoor.
- SUPREME QUALITY – 3mm closed cell polyethylene FOAM ( not a cheap bubbles) sandwiched between highly reflective Engineered Foil on both sides. Easy to install, easy to cut and easy to clean, Strong but lightweight.
- SOUND BARRIER – excellent soundproofing material.
- NON TOXIC – will not irritate skin, eye or throat. Non allergic.
Last update on 2026-07-23 / Affiliate links / Images from Amazon Product Advertising API
Understanding R-values and insulation types
What are R-values?
Understanding R-values is crucial in reducing energy consumption. An R-value measures the effectiveness of an insulating material in resisting heat flow, making it a great moisture barrier.
The higher the R-value, the better the insulation’s ability to resist heat transfer, which can help save on energy costs and prevent ic formation.
For example, suppose you live in a colder climate. In that case, you’ll want to choose an insulation material with a higher R-value to keep your home warm during winter months while reducing energy consumption.
On the other hand, if you live in a warmer climate, you’ll want an insulation material with a lower R-value to help keep your home cool during summer months and act as a moisture barrier.
Additionally, proper insulation can prevent the formation of icicles on your roof during winter months.
Different types of insulation
Various types of insulation materials available on the market today can help reduce energy consumption. Some common types include fiberglass batts or rolls, cellulose loose-fill, and spray foam.
It is important to note that proper insulation can also help prevent issues with ice dams.
Fiberglass batts or rolls are made from glass fibers and come in pre-cut lengths that fit between studs and joists. They’re easy to install but can be itchy and irritating when handling.
Cellulose loose-fill is made from recycled paper products treated with chemicals for fire resistance. It’s blown into walls or attics using special equipment and provides excellent soundproofing and thermal protection.
Spray foam is a two-part liquid that expands upon application and hardens into a solid foam. It can fill gaps and cracks more effectively than other types of insulation but can be more expensive.
Choosing the right type of insulation
Choosing the right type of insulation depends on several factors, such as climate, building structure, budget, and personal preference.
If you’re looking for an affordable option that’s easy to install yourself, fiberglass batts may be your best choice.
However, cellulose loose-fill could be a better option if you have irregularly shaped spaces or need better soundproofing capabilities.
If you’re willing to spend more money upfront for long-term energy savings, spray foam insulation may be the best choice. However, it’s important to note that spray foam can be more difficult to remove or replace if necessary.
Choosing the right R-value
In addition to choosing the right type of insulation, you’ll also need to select the appropriate R-value for your home. The Department of Energy recommends different R-values based on your location and climate zone.
For example, homes in colder climates will require higher R-values than those in warmer climates. You can use a calculator the Department of Energy provides to determine the recommended R-value for your specific location and building type.
Tools and Equipment Needed for Installing Batting Insulation
It’s essential to have the right tools and equipment on hand. Here are the necessary items you’ll need before starting your installation project.
1. Utility Knife
A utility knife is one of the most crucial tools for installing batting insulation. A utility knife is a versatile cutting tool that can cut through various materials such as paper, cardboard, plastic, and even drywall.
It’s perfect for trimming batting insulation to fit around outlets, fixtures, or any other wall obstacles.
When using a utility knife for cutting batting insulation, make sure to use a sharp blade. Dull blades can cause ragged cuts that may not fit properly into your wall cavities.
Also, be careful when handling the knife, and always cut away from yourself to avoid injury.
2. Staple Gun
Another essential tool needed for installing batting insulation is a staple gun. A staple gun is used to secure the batting in place between wall studs or ceiling joists.
You’ll want to use staples that are long enough to penetrate through the thickness of the insulation but not too long that they poke through your wall or ceiling.
When using a staple gun for installing batting insulation, wear safety goggles and gloves to protect yourself from flying staples and sharp edges of metal studs or joists.
3. Long Blade
A long blade is another useful tool that can help you quickly cut large sections of batting insulation. This tool can save time if you have large areas of wall cavities to fill with insulation.
When using a long blade, be careful not to damage any electrical wires or plumbing pipes hidden behind your walls or ceiling cavities.
Measuring Your Space
Before starting your installation project, measure the area where you plan on installing batting insulation carefully. Accurately measuring will ensure you purchase enough material to properly fill your wall cavities or ceiling joists.
When measuring, make sure to account for any obstacles, such as outlets, fixtures, or pipes, that may require special cuts in the insulation.
Cutting Around Outlets and Fixtures
Outlets and other fixtures should be cut around and not covered by the batting. This will help ensure they remain accessible and safe to use after installation.
When cutting around outlets or fixtures, use a utility knife to trim the insulation carefully. Make sure you’re cutting it precisely so that it fits snugly around the obstacle without leaving gaps or spaces where air can escape.
Placing Your Insulation
Once you’ve measured and cut your batting insulation, it’s time to place it into your wall cavities or ceiling joists. Start at one end of the cavity and work your way down until you reach the other end.
Use a staple gun to secure the insulation in place between studs or joists. Ensure you’re stapling through both layers of the paper backing on each side of the batting for maximum support.
Repeat this process until all areas are filled with insulation evenly.

- 【Attic Insulation Cover】Attic Door Insulation Cover works during the entire year, hot summers and cold winters; Creates a seal at the attic door to prevent dust or pollutants from entering your home
- 【Attic Insulation Tent】This Attic Stairs Insulation Cover is made with premium foil bubble insulation inside to provide you with all-year-round energy savings insulating performance. Fits openings up to 25″ x 54″ x 11″
- 【Fireproof Material】Constructed of 2 layers of Aluminum and the air bubble in the second layer helps in blocking the heat transmission, reflects 97% of radiant heat, provides an R-Value of 14. 5. Premium material protect your house from affecting by moisture or humidity. Make your life more comfortable and health
- 【Easy to install】Our set comes standard with tool pliers installed.Zipper access and simple installation. To install, simply place the attic door insulation cover in your attic door opening and staple it to the door frame
- 【Attic Ladder Insulation Cover】This attic door insulating cover will keep your home cool and dry in the summer and warm and dry during winter whilst saving you on power bills. Our high quality Attic Cover is very effective at controlling excess heat during the summer and winter
Last update on 2026-07-23 / Affiliate links / Images from Amazon Product Advertising API
Dealing with obstacles: insulating around them
Insulating around obstacles can be challenging, but there are ways to make it work.
Insulating your home is one of the best ways to improve its energy efficiency and reduce heating and cooling costs.
However, you may find that there are several obstacles in your way. These can include pipes, ductwork, electrical wires, and other fixtures that run through walls or ceilings.
Fortunately, there are several methods you can use to insulate around these obstacles. One of the most effective is faced insulation with a moisture barrier facing the outside.
This type of insulation helps prevent moisture from entering your home while providing an extra layer of protection against drafts and air leaks.
Safety is another important consideration when insulating around obstacles. Gloves and goggles are essential when working with insulation to protect yourself from irritation and other health hazards.
It’s also important to ensure that any gaps around obstacles are filled with insulation so that no space is left uninsulated.
Faced insulation with a moisture barrier facing the outside can help improve efficiency.
Faced insulation is a type of batting insulation with a paper or foil backing on one side. This backing acts as a vapor barrier, which helps prevent moisture from entering your home through the walls or ceiling.
When installing batting insulation around obstacles such as pipes or ductwork, it’s important to use faced insulation with the moisture barrier facing outward towards the insulated room.
By using faced insulation in this way, you can help improve energy efficiency by reducing heat loss through walls and ceilings.
The added layer of protection also helps prevent drafts and air leaks from entering your home, which can further improve comfort levels while reducing energy costs.
Gloves and goggles are essential when working with insulation to protect yourself from irritation.
When working with any type of batting insulation, including faced insulation, it’s important to take safety precautions to protect yourself from irritation and other health hazards. This includes wearing gloves and goggles to prevent insulation fibers from coming into contact with your skin or eyes.
Fiberglass insulation, in particular, can cause skin irritation and respiratory problems if not handled properly.
By wearing gloves and goggles, you can reduce the risk of these types of health issues while also ensuring that your insulation is installed correctly.
Gaps around obstacles can be filled with insulation to ensure no space is left uninsulated.
One common problem when insulating around obstacles is gaps that are left between the obstacle and the surrounding wall or ceiling. These gaps can allow air to escape or enter your home, reducing energy efficiency and making it more difficult to maintain a comfortable temperature.
To avoid this problem, it’s important to fill any gaps around obstacles with additional insulation. This can be done by cutting small pieces of batting insulation to fit snugly into any space with a gap. By doing so, you can ensure that no space is left uninsulated and that your home remains energy-efficient all year round.
When insulating around studs, make sure to insulate the space between each stud and the edge of the wall.
Studs are vertical framing members that support walls or ceilings in a building. When installing batting insulation around studs, it’s important to ensure you’re filling every available space with insulation.
This includes the space between each stud and the area between the stud and the edge of the wall or ceiling.
By using batting insulation cut to size for each individual stud cavity, you can help ensure that your walls or ceilings are fully insulated without leaving any gaps behind.
This will help improve energy efficiency while also providing better soundproofing and thermal protection throughout your home.
Cutting and Fitting Insulation Around Electrical Cables and Boxes
How to Cut Insulation for a Perfect Fit
When installing batting insulation around electrical cables and boxes, it is essential to cut the insulation strips accurately. Using a straightedge can help you cut precise strips that fit snugly around the electrical boxes and outlets.
To use a straightedge, place it on top of the insulation sheet where you want to make your cut. Hold down the straightedge firmly with one hand while using a utility knife or scissors with the other hand to make your cut along the edge of the straightedge.
If you are cutting strips from a large roll of insulation, measure the length of each strip before cutting it. This will ensure that each strip fits perfectly around your electrical box or outlet.
Using Precut Insulation Strips for Quick Installation
If you prefer not to cut your own insulation strips, consider using precut insulation strips instead. These pre-cut strips are designed to fit perfectly around standard electrical boxes and outlets, making installation quick and easy.
To install precut insulation strips, peel off the backing paper and press them into place around your electrical box or outlet. Ensure no gaps exist between the insulation strip and the box/outlet.
Fitting Insulation Around Electrical Cables/Wires
When fitting insulation around electrical cables/wires, take extra care to avoid leaving any gaps in order to maintain proper thermal protection. You can use two methods when fitting:
Method 1: Cut Slits in Insulation Sheets
Cutting slits in your insulation sheets is an easy way to fit them snugly around wires/cables without leaving any gaps.
To do this:
- Measure out how much insulation you need by wrapping it loosely around the wire/cable.
- Use a utility knife or scissors to make small cuts/slashes in each side of where you measured so that they create flaps.
- Slide the insulation over the wire/cable and fold the flaps inward to create a snug fit.
Method 2: Use Insulation Sleeves
Insulation sleeves are pre-cut tubes of insulation that can be slipped over wires/cables before installation. This method is ideal for thicker or more complex wiring setups where cutting slits in insulation sheets may be difficult.
To use insulation sleeves:
- Choose an appropriate sleeve size for your wire/cable.
- Slip the sleeve over the wire/cable before installing it.
- Press the sleeve firmly into place around your electrical box or outlet, ensuring no gaps between the sleeve and the box/outlet.

Last update on 2026-07-23 / Affiliate links / Images from Amazon Product Advertising API
Insulating Windows and Doors
Why is it important to insulate windows and doors during winter?
During the cold months, keeping warm air inside our homes is essential. One of the ways we lose heat is through gaps around windows and doors. These gaps allow cold air to seep in a while, allowing warm air to escape, resulting in higher heating bills and less comfortable living space.
How can fiberglass insulation help?
Fiberglass insulation is an excellent material for filling gaps around windows and doors. It’s made of tiny glass fibers that trap air between them, providing excellent insulation properties.
When installed correctly, fiberglass insulation can reduce heat loss by up to 50%.
How do you install fiberglass insulation?
Installing fiberglass insulation around windows and doors is relatively simple.
Here are the steps:
- Measure the gap: Before purchasing your insulation, measure the gaps you need to fill. This will help ensure you buy enough material for the job.
- Wear protective gear: Fiberglass can irritate your skin, eyes, and lungs. Always wear gloves, goggles, long sleeves, pants, and a mask when handling this material.
- Cut the insulation: Use scissors or a utility knife to cut the fiberglass into strips that fit snugly into each gap.
- Insert the insulation: Place each insulation strip into its corresponding gap until it fits snugly.
- Seal any remaining gaps: If there are still small gaps left after installing your fiberglass strips, use caulk or weatherstripping tape to seal them off completely.
- Check for drafts: After installing your new insulation, check for drafts around your windows and doors using a candle or incense stick.
What should I be careful about when handling fiberglass?
When working with fiberglass insulation, there are several things you should be careful about:
- Avoid getting it in your eyes: Fiberglass fibers can irritate your eyes if they get in them. Always wear goggles to protect your eyes.
- Avoid splitting the fibers: Splitting fiberglass insulation can release tiny glass particles into the air, which can be harmful if inhaled. Be gentle when handling this material.
Pushing Insulation into Wall Cavity: A Step-by-Step Guide to Installing Batting Insulation
Measuring the Wall Cavity for Insulation in Inches
Before installing batting insulation, it is crucial to measure the wall cavity to determine the amount of insulation needed.
The wall cavity should be measured in inches, as this will help you purchase the right amount of insulation for your walls. To get started, locate a small hole in your wall that you can use to insert a tape measure.
Once you have inserted the tape measure into the hole, push it all the way down until it reaches the bottom of the wall cavity. Take note of how deep the cavity is and record this measurement.
Once you have determined how deep your wall cavity is, calculate how much insulation you need by multiplying the depth by the square footage of your walls.
For example, if your wall cavity is 4 inches deep and you have 100 square feet of walls to insulate, then you will need 400 cubic feet of insulation.
Pushing Insulation into Wall Cavity with Slight Pressure
When installing batting insulation in walls, it’s important to apply slight pressure while pushing it into place. This ensures no gaps or spaces are left unfilled between the studs or joists.
To begin the installation, cut your insulation batts to size using a utility knife or scissors so they fit snugly between each stud or joist.
Next, insert each batt between each stud or joist and gently press it into place with slight pressure. Make sure that each batt fits tightly against its neighboring batts and does not leave any gaps behind. Use additional pieces of batting as necessary to fill any remaining gaps.
Wearing Protective Gear When Installing Insulation in Walls
Installing batting insulation can be a messy job that involves handling materials that can irritate skin and eyes when touched directly. As such, wearing protective gear is essential to protect yourself from potential health hazards.
Protective gear should include gloves, a mask, and safety glasses.
Gloves are important for protecting your hands from the insulation material, which can be itchy and irritating when it comes into contact with the skin.
A mask helps to filter out any airborne particles that may be released during installation, while safety glasses help to protect your eyes from dust and debris.
Insulating Attic Floors and Under Floors
Why Should You Insulate Your Attic Floors?
Insulating your attic floors can help reduce energy costs by preventing heat loss. Heat rises, so if your attic is not properly insulated, it can escape through the roof and leave your home feeling chilly.
By insulating the floors of your attic, you can keep that heat inside where it belongs and save money on your energy bills.
How to Insulate Your Attic Floors with Batts
The best way to insulate your attic floors is with batts. These are pre-cut pieces of insulation that fit between the floor joists in your attic.
Here’s how to install them:
- Measure the distance between the floor joists in your attic.
- Purchase batts that are the correct size for this distance.
- Lay the batts perpendicular to the joists, starting at one end of the attic and working toward the other.
- Tuck each batt snugly into place so there are no gaps or spaces.
- Use a utility knife to trim any excess material.
It’s important to note that you should wear protective gear when installing insulation, including gloves, goggles, and a mask.
Insulating Floor Joists in Your Attic
In addition to placing batts between your floor joists, you should also cover them with additional insulation for added protection against heat loss. This will help ensure proper insulation throughout your entire attic space.
To cover floor joists with batts:
- Cut strips of insulation slightly wider than each joist’s width.
- Wrap each strip around its respective joist to cover both sides completely.
- Secure each strip in place using wire or twine.
This will create an extra layer of insulation around each floor joist and further prevent heat loss.
How Under-Floor Insulation Can Help
If you have a crawl space or basement beneath your home, you should also consider insulating the floors above it. This can help regulate temperature and save energy by preventing heat from escaping through the floorboards.
To install under-floor insulation:
- Measure the distance between the floor joists.
- Purchase batts that are the correct size for this distance.
- Lay the batts perpendicular to the joists, starting at one end of the space and working toward the other.
- Tuck each batt snugly into place so there are no gaps or spaces.
- Use a utility knife to trim any excess material.
Installing Batts in Your Ceiling
For even more insulation, you can also install batts in the ceiling of the floor below your attic. This will help prevent heat from escaping through your attic and keep your home feeling warm and cozy.
To install batts in your ceiling:
- Measure the distance between your ceiling joists.
- Purchase batts that are slightly wider than this distance.
- Lay each batt across two adjacent joists to cover both sides completely.
- Secure each batt in place using wire or twine.
This will create an extra insulation layer between your living space and attic, further improving energy efficiency.
By following these steps and properly insulating your attic floors and under floors, you can save money on energy costs while keeping your home comfortable year-round.
Benefits and Importance of Proper Insulation
Reduces Energy Bills
One of the most significant benefits of proper insulation is that it helps to reduce energy bills. Insulation acts as a barrier, preventing heat from escaping during winter and keeping the home cool during summer.
Without proper insulation, homes can lose up to 30% of their heat through the roof. This means that homeowners have to crank up their heating systems to compensate for the lost heat, leading to higher energy bills.
Proper insulation also ensures that your air conditioning unit works efficiently during summer by preventing hot air from entering your home. This way, you don’t have to keep your AC running all day, saving you money on energy bills in the long run.
Reduces Noise Pollution
Apart from reducing energy bills, proper insulation also helps to reduce noise pollution inside your home. Insulation materials absorb sound waves and prevent them from traveling through walls and ceilings.
This means you can enjoy peace and quiet while inside your home without being disturbed by outside noise like traffic or noisy neighbors.
If you live in a busy neighborhood or near a major highway, installing proper insulation can significantly reduce noise pollution inside your home.
Increases Home Value
Installing proper insulation can increase the overall value of a home. Homebuyers are becoming more aware of the importance of energy efficiency when looking for a new house.
A well-insulated home is more attractive to buyers because it means lower energy bills and greater comfort throughout the year.
Furthermore, some states offer tax incentives or rebates for homeowners who install proper insulation in their homes.
This means that investing in insulation saves you money on energy bills and provides an opportunity for future savings if you decide to sell your property.

- CLASS-A FIRE RATED & HIGH-EFFICIENCY INSULATION: Kraken Bond Spray Foam Insulation Kit is Class-A Fire Rated and meets fire safety standards, including ASTM E84, ensuring enhanced fire resistance for safer applications. It also delivers superior thermal performance (R-Value 5.66/inch) and acoustic insulation, making it ideal for attics, walls, and crawl spaces—perfect for both DIYers and professionals seeking reliable, safe results.
- COMPLETE SET FOR IMMEDIATE APPLICATION: Includes everything you need for a hassle-free insulation project—12 cans of closed-cell polyurethane spray foam, an ergonomic application gun, foam cleaner, safety goggles, worksuit, and gloves. Start improving your insulation without delay.
- VERSATILE & EASY TO USE: Designed for attics, walls, and even hard-to-reach areas, our dual-nozzle system ensures thorough coverage for both vertical and ceiling applications. Adheres to most building materials, creating a watertight, airtight seal that blocks pests and drafts.
- OPTIMAL TEMPERATURE GUIDANCE FOR BEST RESULTS: Achieve peak performance by ensuring the can is at an optimal temperature of 68°F before use. Application is effective in a range of 41°F to 86°F, allowing for flexibility in varying weather conditions. For cold climates, let the can acclimate to room temperature to maintain top-notch results without any compromise in product quality or performance.
- ECO-FRIENDLY & SAFE: Kraken Bond’s polyurethane foam delivers a dense, monolithic application that prevents thermal bridges and dew point formation. Safe and eco-friendly, it enhances insulation while ensuring proper ventilation and following safety guidelines during use.
Last update on 2026-07-24 / Affiliate links / Images from Amazon Product Advertising API
Final Tips for Successful Insulation Installation
Proper insulation installation is crucial in order to achieve an energy-efficient and comfortable home.
By understanding the R-values and types of insulation, equipping yourself with the necessary tools, dealing with obstacles, cutting and fitting insulation around electrical cables and boxes, insulating windows and doors, installing insulation in walls, as well as insulating attic floors and under floors, you can ensure a successful installation.
It is important to note that proper insulation saves energy and reduces your utility bills. It helps to maintain a consistent temperature throughout your home while reducing noise levels from outside.
To summarize the benefits of proper insulation:
- Energy efficiency
- Lower utility bills
- Consistent temperature throughout the home
- Reduced noise levels
In conclusion, following the tips outlined above, you can successfully install batting installation in your home. Remember to choose the right type of insulation for your needs and equip yourself with the necessary tools.
Properly installed insulation will provide long-term benefits for both you and your home.
FAQs
Q: How do I know which type of insulation to use?
A: The type of insulation you should use depends on various factors such as climate zone, budget, and personal preference. It’s best to consult with a professional or refer to online resources for guidance.
Q: Can I install insulation myself, or should I hire a professional?
A: While it is possible to install insulation yourself, hiring a professional may be beneficial if you are unsure about any aspect of the process. A professional installer can ensure all areas are properly insulated without gaps or issues.
Q: Will adding more insulation save me money on my energy bill?
A: Yes! Adding more insulation can significantly reduce your energy bill by preventing heat loss during colder months and heat gain during warmer months.
Q: What safety precautions should I take when installing batting installation?
A: It’s important to wear protective gear such as gloves, a mask, and safety goggles when handling insulation. Ensure that the area is well-ventilated during installation.
Q: How often should I replace my insulation?
A: Insulation can last for several years without needing replacement. However, if you notice any signs of damage or deterioration, it may be time to replace it.