Fixing a Wallpaper Seam: Quick and Easy DIY Solutions
Have you ever noticed a pesky seam in your wallpaper that won’t stay put?
It can be frustrating to see the edges of your wallpapers peeling or curling, especially after all the hard work you put into installing them on drywall or walls.
But fear not!
Fixing wallpaper seams is a simple and easy DIY project that can save you from having to redo your pasted wallcoverings installation completely.
There are several common causes of wallpaper seams, including improper installation techniques, old or damaged wallpapers, changes in temperature or humidity, and the use of pasted wallcoverings on drywall or walls.
However, with the right tools and steps, you can easily repair these seams and prevent them from reoccurring.
To fix loose seams on wallpapers or pasted wallcoverings, you will need tools such as a paint roller, adhesive, seam sealer, and wallpaper roller.
The steps involve carefully lifting up the affected area of the drywall, applying adhesive and seam sealer to both sides of the seam, and using a roller to smooth out any wrinkles or bubbles.
By following these simple steps and taking preventative measures, such as properly preparing drywall before installation and avoiding excessive moisture exposure, you can ensure that your beautiful wallpaper will look great for years.
For those who prefer DIY wallpaper tutorials, it’s important to note that old wallpaper should be removed before applying new wallpaper to ensure a smooth surface.
So why wait?
Let’s dive into how to fix those pesky wallpaper seams on pasted wallcoverings and drywall walls once and for all with the help of repair masters!
Understanding the types of wallpaper seams and materials needed for repairs
Two Types of Wallpaper Seams: Overlapped and Butt
First, you must determine what type of seam you are dealing with on your walls. There are two types of wallpaper seams: overlapped and butt.
Overlapped seams occur when the edges of two wallpaper strips overlap, creating a slight ridge where the two pieces meet.
If you have drywall, it’s important to use a sealer before applying wallpaper to ensure a smooth surface. Butt seams occur when the edges of two wallpaper strips meet without overlapping, resulting in a flat seam.
If you need to remove old wallpaper, using a steamer can help make the process easier.
Overlapped seams tend to be more forgiving than butt seams because they can hide minor imperfections.
However, they may require more paste during installation. Loose wallpaper should be fixed to the drywall before pasting to avoid uneven wallpaper edges.
On the other hand, butt seams provide a seamless appearance but can be more challenging to install correctly.
Applying sealer on the wallpaper edges can help prevent them from peeling off.
Materials Needed for Repairs
To repair loose wallpaper seams, you will need drywall sealer on hand, as seams lift easily.
- Wallpaper Paste – The type of wallpaper material will determine the type of paste needed for repairs. If you have drywall behind your wallpaper, use seam sealer to repair any loose seams. For vinyl-coated or solid vinyl wallpaper, use vinyl adhesive. If your wallpaper is pre-pasted, use water-activated paste. It is important to ensure that any loose seams are sealed properly before applying wallpaper around appliances.
- Putty Knife – A putty knife is essential for smoothing out any bumps or lumps that may appear after repairing your wallpaper seam or drywall. It can also be used to apply sealer to loose seams. Additionally, a putty knife can be handy for fixing small dents and scratches on appliances.
- Seam Roller – A seam roller helps ensure that your loose seams are flat and smooth after repair. Additionally, a sealer can reinforce the repair and prevent future damage. For loose wallpaper seams, a wallpaper steamer can be used to loosen the adhesive before applying the seam roller for a seamless finish.
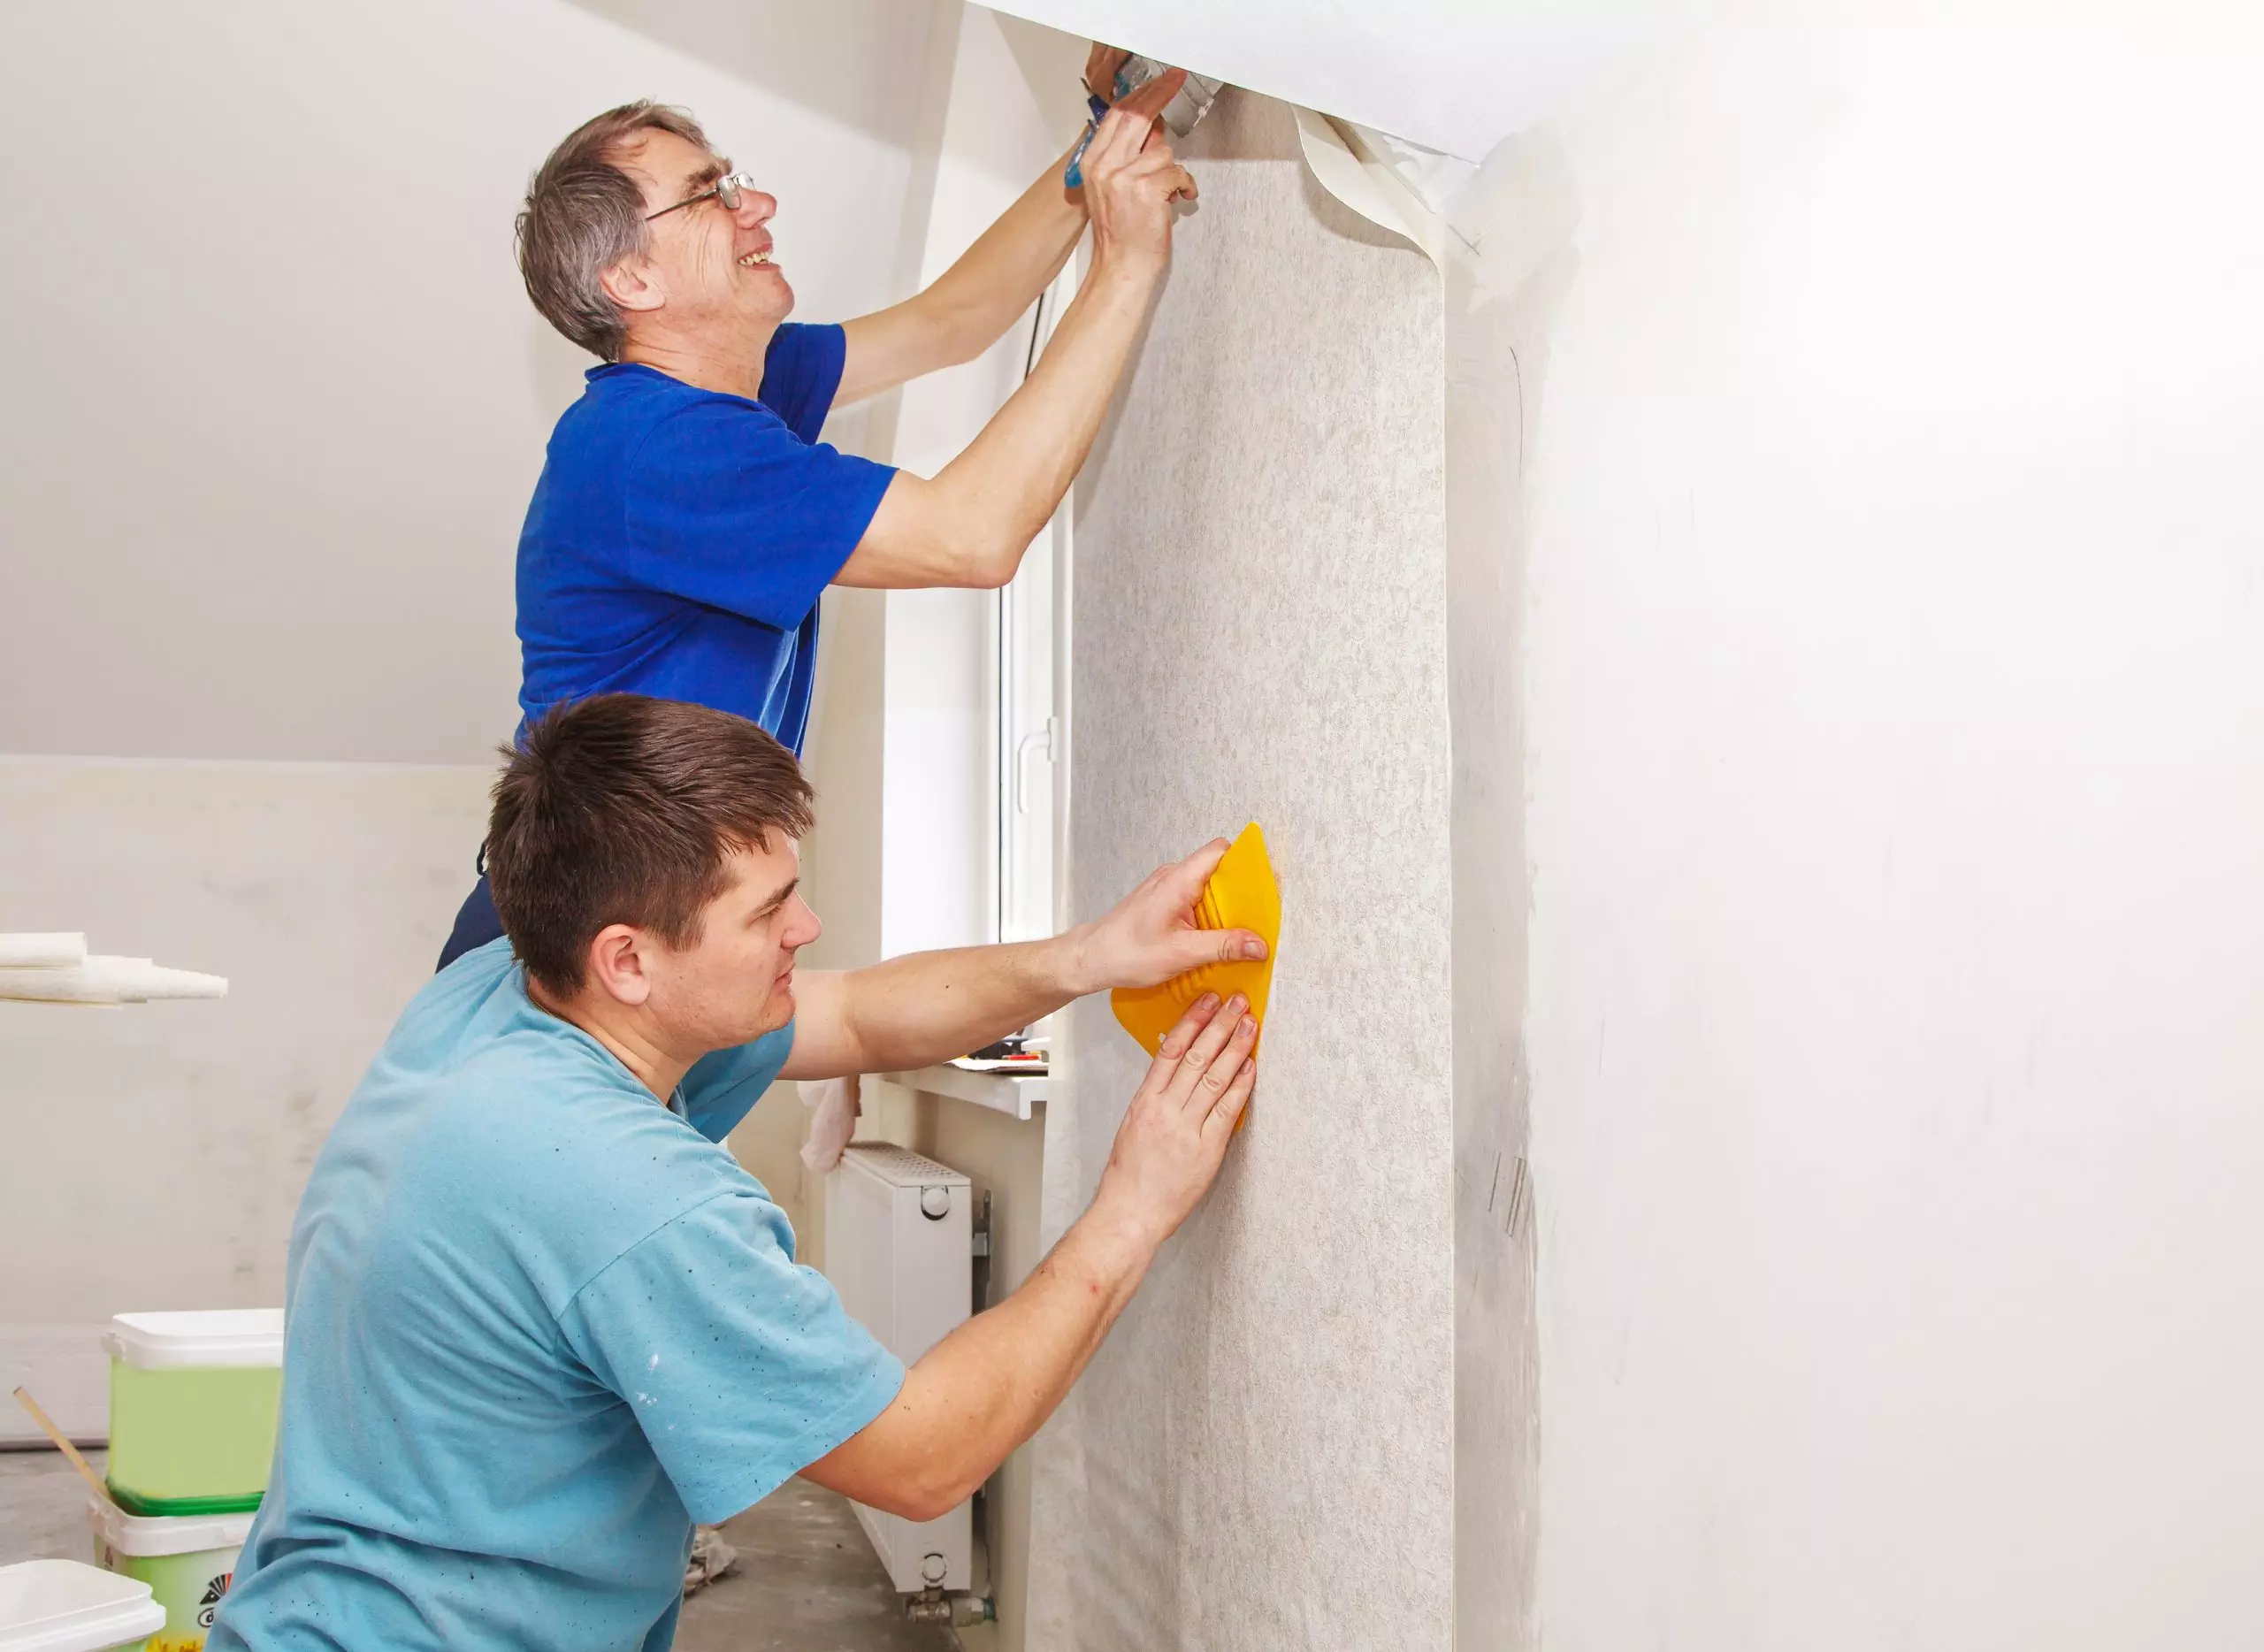
Start by placing a small amount of paste on one side of the loose wallpaper seams using a putty knife. Then press down firmly on the opposite side while rolling over the area with a seam roller until the loose seams lay flat.
This technique works well for both drywall and wallpaper installation.
For drywall butt seams repairs, apply sealer paste to both sides before pressing them with gentle pressure from your fingers or a clean cloth until they stick together seamlessly.
For loose wallpaper, use wallpaper remover to take it down before applying the paste and pressing it back in place.
It’s important not to rush through this process, as applying too much pressure or not enough paste can cause bubbles and other imperfections.
Take your time, and be patient with the process. If you have loose wallpaper seams, consider using a seam sealer before applying the paste.
A wallpaper steamer can also help loosen stubborn seams.
To ensure a smooth finish, use a wallpaper roller to press out any bubbles.
Step-by-step guide on how to fix loose or opened wallpaper seams
Identifying the Loose Wallpaper Seams
The first step in fixing a wallpaper seam is identifying the area where the wallpaper has come loose. This can be done by examining the wall and looking for any gaps or bubbles in the paper.
Once you have identified the problem areas, use a craft knife to cut along the seam, creating a clean edge.
To further strengthen the bond, apply a sealer along the edges.
This technique can be useful for those who enjoy DIY articles or hobbies.
Applying Wallpaper Adhesive to the Loose Edge
After identifying and cutting along the loose edge of your wallpaper edges, it’s time to apply seam sealer. You can use either pre-mixed adhesive or mix your own using equal parts water and white glue.
Using a small brush, apply adhesive to both sides of the cut edge of your wallpaper.
This will ensure that your home looks neat and tidy, even around appliances.
Smoothing Out the Seam with a Craft Stick
Once you have applied adhesive to both sides of your cut edge, it’s time to smooth out your wallpaper seam. Use a craft stick or similar tool to gently press down on both edges of your wallpaper seam, working from one end to another.
Be sure not to press too hard, as this may cause more damage.
This process can be easily done at home without needing special appliances or articles.
Allowing Adhesive to Dry Completely
Finally, in your home, allow your adhesive to dry completely before checking back on your repaired wallpaper seam.
This typically takes around 24 hours but can vary depending on humidity levels and other environmental factors.
Make sure to apply the adhesive to the edges of the wallpaper articles and avoid getting it on nearby appliances.
Tips and Tricks for Preventing Wallpaper Peeling and Curling in the Future
Use a Wallpaper Primer to Create a Smooth Surface Before Hanging Wallpapers
Before hanging your wallpaper, it’s essential to prepare the surface properly.
One of the best ways to do this is by using a wallpaper primer. A primer creates an even surface that allows your wallpaper adhesive to adhere correctly, preventing peeling and curling.
Additionally, applying seam sealer on the edges of the wallpaper articles can help prevent them from coming loose.
It’s also important to make sure that appliances are moved away from the wall before starting the installation process.
To apply a wallpaper primer to your home, you’ll need a scraper or razor scraper, sponge, water, and dry cloth. First, clean the wall with a damp sponge and let it dry completely.
Then apply the primer evenly using a roller or brush.
Don’t forget to use seam sealer to ensure perfect wallpaper adhesion. Allow it to dry according to the manufacturer’s instructions before hanging your wallpaper.
This task is easy enough and; you won’t need any appliances to complete it.
Using a primer will also make it easier for improvement dummies to remove your wallpaper later without damaging the edges and appliances.
Apply Wallpaper Adhesive Evenly with a Roller to Prevent Air Bubbles and Peeling
One of the most common causes of wallpaper peeling in the home is air bubbles trapped between the paper and wall surface, especially around loose edges.
To avoid this problem, apply wallpaper adhesive evenly using a roller and ensure your appliances are properly secured to prevent accidental bumps.
You’ll need adhesive suitable for your type of wallpaper (e.g., vinyl or paper), roller, scraper or razor scraper, sponge, water, and dry cloth.
Start by measuring your home walls carefully before cutting out strips of wallpaper slightly longer than needed.
Apply adhesive to one strip at a time using a paintbrush or roller as per the manufacturer’s instructions. Use appliances such as a wallpaper smoother to flatten the wallpaper and remove any air bubbles.
Use a razor scraper to trim off any excess wallpaper for the edges.
Don’t worry if you’re a beginner; this guide is perfect for wallpaper dummies!
Once you’ve applied adhesive to one strip of paper at a time as instructed by manufacturer’s guidelines, use either the pasting table method or the direct application method for applying wallpapers onto home walls.
Cleaning out any bubbles or wrinkles near the edges using appliances.
This can be a fun project for those with hobbies in DIY home decor.
When you’re ready to hang each strip onto the wall, start from one side while smoothing out any loose wallpaper seams with your hands or a wallpaper roller as you go toward the edges until all bubbles are removed.
If you encounter any stubborn seams, consider using a wallpaper steamer to help loosen them before smoothing them out.
Be sure not to over-saturate the paper with too much adhesive as this can cause shrinking when drying, leading to peeling.
This is especially important for loose wallpaper seams around edges and appliances. Consider using a wallpaper steamer to help with the process.
Use a Damp Sponge to Clean Excess Adhesive and Avoid Curling
Cleaning excess adhesive from the edges of wallpaper is essential to prevent unsightly curls.
If you don’t remove the excess glue using appliances, it can cause the paper to shrink or warp, leading to further damage.
After hanging each strip of wallpaper in your home, use a damp sponge to clean any excess adhesive from the surface.
Be sure not to leave any watermarks on the paper while cleaning, as this may damage them.
Once you’ve cleaned all paper strips, let them dry completely before trimming any excess edges with a sharp blade or scissors.
This task is easy enough and can be done without needing appliances.
It can even be a fun hobby for those looking for a new project to tackle.
If you notice that the edges of your wallpaper are still curling after following these tips, consider using a stronger adhesive or consulting with an expert in home improvement for professional advice.
Additionally, ensure your appliances are not causing excess moisture in the room, as this can also contribute to wallpaper curling.
Common Mistakes to Avoid When Repairing Wallpaper Seams
Applying Too Much Pressure When Smoothing Out the Seam Can Cause Further Damage to the Wallpaper
When repairing a wallpaper seam at home, it’s important to apply just enough pressure to ensure that the seam and edges are flat without causing any further damage to your wallpaper.
If you apply too much pressure, you risk tearing or stretching the wallpaper, worsening the problem.
Always be careful when using appliances to avoid damaging your wallpaper further during your home improvement project.
To fix a wallpaper seam without causing damage to the edges, start by gently lifting the loose edge of the wallpaper with a putty knife or scraper.
Apply a small amount of adhesive to both sides of the seam and use your fingers or a wallpaper roller to smooth it out.
This home improvement task can be done easily without damaging your appliances. Be sure to work slowly and carefully, using only enough pressure to complete the job.
If your trying to smooth out wallpaper seams with appliances, don’t panic if you accidentally cause damage.
You may be able to fix it by applying additional adhesive and smoothing it out again.
However, if the damage is extensive, you may need to remove and replace that wallpaper section entirely.
Using Too Much Adhesive Can Result in a Visible Bump Along The Seam
Another common mistake people make when repairing wallpaper seams at home is using too much adhesive. While it might seem like an improvement for the appliances, more is not always better.
Using too much adhesive can result in a visible bump along the seam that will be noticeable even after painting or applying additional wallpaper.
To avoid this problem, you should use only enough adhesive as necessary to hold down the loose edge of the paper.
Excess adhesive can create an unsightly appearance and damage appliances in the process.
When applying adhesive for home improvement projects, be sure to spread it evenly over both sides of the seam using a small brush or roller.
Then use your fingers or a wallpaper roller to press down on either side of the seam until it lays flat against the wall.
This process is easy enough for those who want to improve their home appliances.
Not Allowing Enough Time for The Adhesive To Dry Before Painting Or Applying Additional Wallpaper Can Cause The Seam To Lift
One final mistake home improvement non-experts often make when repairing wallpaper seams is not allowing enough time for the adhesive to dry before painting or applying additional wallpaper.
If you try to paint or apply more paper too soon, the seam may lift, undoing all your hard work.
It’s important to note that using appliances like hairdryers to speed up drying can also cause the seam to lift prematurely.
To avoid this problem in your home improvement projects, follow the manufacturer’s instructions for drying times when using adhesive on appliances or wallpaper.
Generally, most adhesives will require at least 24 hours of drying before you can safely paint or apply more wallpaper.
Don’t be a dummy and rush the process!
During this home improvement project, you need to keep the area well-ventilated and free from moisture that could interfere with the drying process of the adhesive.
Once the adhesive is completely dry, you can paint or add wallpaper as desired.
Make sure to unplug all appliances before starting the project.
Neglecting To Properly Clean And Prepare The Area Before Repairing The Seam Can Lead To A Poor Result
One mistake that is often overlooked when repairing a wallpaper seam is failing to clean and prepare the area properly beforehand.
If there is dirt or debris on the wall where you plan to repair the seam, it can interfere with how well the adhesive sticks and cause problems down the line.
It’s important to ensure appliances are not in the way during cleaning.
To ensure a successful home improvement repair job, start by cleaning the area around the loose seam with a damp cloth or sponge.
Be sure to remove any dust or debris clinging to the wall surface before proceeding with your appliances.
If there are any loose wallpaper seams near where you plan to repair, fill them in with spackle and allow it to dry completely before continuing.
This improvement will help ensure a smooth surface for your repair job and improve its overall appearance once completed.
Also, be mindful of appliances in the area as they may cause damage to your repair work.
Don’t worry if you’re a bit of a dummy regarding repairs; take your time and follow these steps carefully.
Alternative Methods for Repairing Wallpaper Seams
Using a Seam Roller to Press Down the Wallpaper Edges
A seam roller can be a useful tool for home improvement non-experts.
To use this method, start by cleaning the area around the seam with a damp cloth to remove any dirt or debris.
Then, apply pressure to the edges of the wallpaper using a seam roller, one of the many appliances that can be used for this task.
This will help to flatten out any bumps or wrinkles in the paper and ensure that it adheres properly to the wall.
It’s important not to press too hard when using a seam roller for your wallpaper appliances, as this can cause damage to the home.
Instead, use gentle pressure and work slowly and carefully along the length of the seam until you are satisfied with the results.
Covering the Seam with Appliance Repair Tape
Another option for repairing wallpaper seams is to use appliance repair tape. This type of tape is designed to be strong and durable, making it ideal for holding together wallpaper that has come apart at the seams.
It’s a great home improvement solution for dummies who want to fix their walls without professional help.
To use this method, start by cleaning and drying the area around the seam of your wallpaper.
Then, cut a piece of appliance repair tape slightly longer than the length of the seam.
Carefully apply this tape over the top of your existing wallpaper to cover both sides of your torn seam.
Once you have applied your tape to fix loose wallpaper seams, smooth down any bubbles or wrinkles in its surface using your fingers or a flat edge like a credit card.
This improvement will ensure that your repair looks neat and tidy once complete, even for dummies. Don’t forget to apply the same technique when fixing appliances with tape.
Softening Adhesive with a Damp Cloth
If you need to reposition your wallpaper rather than fix an existing tear or gap in it, then softening adhesive may be necessary.
To do this, start by dampening a clean cloth with warm water and gently apply it over your existing wallpaper. This method can be done without the need for any appliances.
Allow time for your adhesive to soften before attempting any repairs – usually, 10-15 minutes should suffice.
This is an important step in home improvement, especially for those new to fixing appliances. Once your adhesive has softened, you can carefully reposition your wallpaper as needed.
Using Various Newspapers for a Temporary Fix
If you are needing a quick and easy fix for small gaps in your wallpaper seam, then using various newspapers may be an option.
To do this, start by cutting out strips of newspaper that are slightly wider than the gap in your seam.
This trick can be done without the need for any appliances.
Then, apply a small amount of glue to one side of each strip and press it firmly into place over the loose wallpaper seams.
Allow time for the glue to dry before smoothing down any wrinkles or bubbles with your fingers or a flat edge.
This simple home repair technique is easy enough and can be done without moving or disconnecting any appliances.
You need to note that this temporary fix for repairing wallpaper seams should not be used as a long-term solution.
However, it can be a quick and easy solution for unavailable appliances.
Loosening Adhesive with Hot Water
Finally, hot water can effectively loosen the adhesive if you need to remove existing wallpaper rather than repair it.
To use this method, start by filling a bucket or basin with hot water and then soaking your existing wallpaper thoroughly.
You can also make use of appliances such as steamers for easier removal.
It’s important to allow enough time for the water to penetrate the adhesive before attempting to remove your wallpaper – usually, 10-15 minutes should suffice.
Then, use a scraper or putty knife to gently lift away sections of your wallpaper until it has been completely removed from the wall.
Fix an Air Bubble in Wallpaper Seam
Removing Bubbles from Wallpaper
If you’re struggling with loose wallpaper seams, don’t worry; this method also works!
- Plug in your hair dryer at home and turn it on to the highest setting to fix loose wallpaper seams.
- Point the nozzle of the hair dryer at the bubble and hold it about 6 inches away from the surface. This is a great tip for those who want to fix bubbles in their home.
- Move the hair dryer back and forth over the bubble for about a minute or until you see it start to shrink.
- Once the bubble has shrunk, take a credit card or plastic scraper and gently press down on the area to smooth out any remaining bumps. This is a simple task that even almost anyone can do at home.
Fixing an Air Bubble in Wallpaper Seam
An air bubble in wallpaper seam is a common problem faced by many homeowners. It is not only unsightly, but it can also lead to peeling or tearing of your wallpaper if left unfixed.
Here are some steps you can follow to fix an air bubble in wallpaper seam and restore the beauty of your home:
- Use a utility knife to carefully cut along the bubble’s center without cutting through both layers of wallpaper.
- Peel back both sides of the home wallpaper carefully to reveal enough space for adhesive application.
- Apply wallpaper adhesive onto one side of your home wallpaper using a brush or roller.
- Press down firmly on one side of your wallpaper while aligning it with another side so there are no wrinkles or bubbles underneath. This will ensure a smooth surface and prevent air pockets from forming, which could cause peeling or bubbling later on.
- Use a damp sponge or cloth to remove any excess adhesive that might have oozed out from under your paper during home installation.
Smoothing Out Any Remaining Bubbles in Wallpaper Seam
After fixing an air bubble in the wallpaper seam at home, there may still be small bubbles that need smoothing out before painting or decorating your wall surface.
- Take a small piece of sandpaper (around 220 grit) and gently sand the area around the bubble in your home, smoothing out any remaining bumps or ridges.
- Apply a small amount of wallpaper adhesive to the back of your home wallpaper using a brush or roller.
- Press down firmly on one side of your wallpaper while aligning it with another side so there are no wrinkles or bubbles underneath.
- Use a home wallpaper roller to smooth out any remaining bubbles in the seam.
Conclusion: Fixing a Wallpaper Seam Made Simple
Fixing a wallpaper seam can be an easy and cost-effective solution to improve the appearance of your home walls.
By understanding the types of wallpaper seams and following our step-by-step guide, you can easily fix loose or opened seams.
To fix a wallpaper seam in your home, you will need basic materials such as wallpaper paste, a putty knife, and sandpaper.
Choosing the right type of wallpaper paste for your specific type of home wallpaper is important.
By following our tips and tricks for preventing peeling and curling in your home’s walls in the future, you can ensure that your repaired seams last longer.
It’s essential to avoid common mistakes when repairing home wallpaper seams, such as applying too much pressure or using too much adhesive.
Alternative methods for repairing home wallpaper seams include painters or double-sided tape.
If you have bubble marks on your home’s laminate countertop or air bubbles in your repaired seam, don’t worry! We’ve got you covered with our simple solutions.
In conclusion, fixing a wallpaper seam at home doesn’t have to be difficult.
It can be done quickly and easily with the right materials and techniques.
So why not give it a try?
Your home walls will thank you!
FAQs
Q: Can I fix a wallpaper seam without professional help?
A: Yes! Fixing a wallpaper seam at home is relatively simple and can be done without professional help by following our step-by-step guide.
Q: What materials do I need to repair a wallpaper seam?
You will need basic materials such as wallpaper paste, a putty knife, sandpaper, painter’s tape (optional), or double-sided tape (optional) for your home renovation project.
Q: How do I know which type of adhesive is best for my specific type of wallpaper?
A: Choosing the right type of adhesive for your specific type of wallpaper is essential. Check with the manufacturer’s recommendations or consult an expert at your local home improvement store.
Q: How can I prevent wallpaper from peeling or curling in the future?
To prevent the wallpaper from peeling or curling in your home in the future, make sure to apply enough adhesive, avoid over-saturating the wallpaper with water, and allow ample time for the adhesive to dry before smoothing out any bubbles.
Q: What are some common mistakes to avoid when repairing a wallpaper seam?
Common mistakes to avoid when wallpapering your home include applying too much pressure when smoothing out bubbles, using too much adhesive, not allowing enough drying time, and failing to remove excess paste before it dries.
Q: Can I use painter’s tape or double-sided tape as an alternative method for repairing a wallpaper seam?
Yes! Painters or double-sided tape can be an alternative method for repairing a wallpaper seam at home. However, remember that this may not be a long-term solution and may need replacing more frequently than traditional repairs.
Q: How do I get bubble marks off my laminate countertop?
To get bubble marks off your home’s laminate countertop, use a hairdryer on a low heat setting to soften the glue underneath. Then gently lift up the edge of the laminate with a putty knife and reapply it smoothly.
