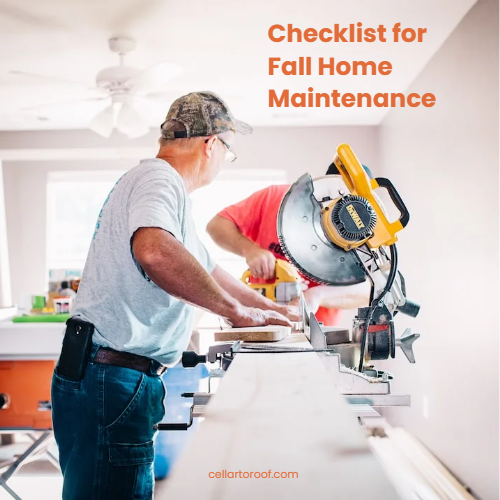
How to Install or Repair Your Heating and Air Conditioning Systems
Installing or Repairing Your Heating and Air Conditioning System
Keeping your home cool in the summer and warm in the winter is essential for maintaining a comfortable living environment. That’s where heating and air conditioning come into play.
Both of these systems help to keep indoor air at optimal levels year-round, which is why it’s important to know how to install or repair them when necessary.
The primary difference between these two systems is that heat pumps and central air conditioning both move heat from one place to another; the main difference is that a heat pump moves heat with the help of an outside source (usually geothermal ground or water), while central air conditioning uses fans and ducts to move air around the house.
There are many advantages to installing a separate heating system rather than relying on an existing furnace during colder months.
And vice versa with an independent A/C unit instead of building it into the furnace. It all comes down to personal preference.
Whether you have one or both, here is everything you need to know about installing or repairing your heating and cooling system to make the right choice for you and your home.

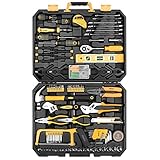
- Slip joint, groove joint, and long nose pliers come with the socket tool kit for increased access in various situations.
- Fiberglass hammer for increased comfort and decreased fatigue.
- Bi-material screwdrivers for increased comfort and decreased fatigue.
- Full polish finish with large markings for corrosion resistance and easy identification.
- Durable blow-molded case is mobile and easy to store.
Last update on 2026-07-30 / Affiliate links / Images from Amazon Product Advertising API
Installing a New Heating System
The first step in installing a new heating system is determining what system will work best for your home.
If you’re unsure where to start, a professional HVAC contractor can walk you through the process.
- Central Heating Systems – Central heating systems run off a boiler, similar to a large tank of water with an element that heats the water. This then travels to a system of pipes that spread the hot water throughout your home. Central heating systems are typically energy efficient, easy to maintain, and last a long time. They also have a variety of installation options, so you can choose a system that best suits your home and your needs.
- Geothermal Systems – Geothermal systems are a type of central heating system that uses the earth’s natural temperature to heat your home efficiently. Geothermal systems work by connecting a series of pipes to the ground outside. The pipes then lead back into your home, where the heat is transferred to your water heater and radiators, which evenly distributes warmth throughout your home. Geothermal systems are very efficient, durable, and quiet. They require very little maintenance and are a great option for environmentally conscious homeowners.
- Indoor Air Quality Systems – Indoor air quality systems are a great option for homeowners with allergies or asthma. These systems reduce airborne contaminants by filtering and/or purifying the air with a system of specialized filters. Indoor air quality systems are a great choice for houses with lots of kids and pets since they help to reduce allergens like dust, pollen, and pet dander.
Here are the general steps to install a new heating system.
- Planning and Choosing the System:
- First, you need to decide on the type of heating system you want. This may be forced air, heat pump, geothermal, or radiant heat systems.
- Then you have to choose between gas or electric systems. Your choice will depend on your location and budget.
- After that, you need to determine the unit size needed for your home. This usually requires professional help as it involves calculations based on factors like insulation levels and window sizes.
- Buying the Equipment:
- Once you’ve decided on a system, purchase all necessary equipment, including required ductwork.
- Removing Old System (if applicable):
- Safely disconnect and remove any existing old heating systems.
- Installation:
- Install the furnace or boiler in the chosen location, ensuring it is level.
- If it’s a forced-air system, install ductwork, ensuring all joints are properly sealed.
- Install any other components like thermostats or zone control systems if necessary.
- Connecting Utilities:
- Connect the system to its power source, whether electricity or gas.
- Testing:
- Turn on the system and check for proper operation.
Remember, installing a new heating system is generally not a DIY project due to its complexity and potential risks involved (like dealing with natural gas).
Always consider hiring an HVAC professional who can ensure everything is installed safely and efficiently.
Lastly, local codes often require permits for this type of work, so make sure to check with your local permitting office before starting this project!
Repairing an Old Heating System
If your heating system is old and needs repair, you may want to consider replacing it entirely. While it’s possible to repair older systems, doing so can be costly and time-consuming, and it may not be worth the trouble.
If your heating system is over ten years old, you may want to consider replacing it with a newer, more efficient one.
Newer systems are much more energy-efficient than older models, which can save you money on your monthly bills and make your home safer.
If you decide to repair your old system, be sure to follow these steps:
- System Evaluate – Before you begin to repair your old heating system, you need to evaluate it to determine what’s wrong and what needs to be fixed. One of the best ways to do this is to hire a professional to inspect thoroughly. They can identify any issues with your system and tell you what repairs are necessary.
- Clean and Replace Parts – If your system is broken, you can probably fix it by replacing damaged or broken parts. Before you go out and buy new parts, though, make sure they’re compatible with your system. If you’re unsure whether parts are compatible, call an HVAC contractor. They’ll be able to tell you what parts you need to replace and help you navigate any warranty and safety concerns.
Here are some steps for basic troubleshooting and repair of an old heating system:
- Safety First:
- Ensure the power is turned off at the main circuit breaker before starting any work.
- Inspect the Thermostat:
- Check if the thermostat is working correctly; it’s often the cause of many heating issues.
- Inspect Filters:
- Dirty or clogged filters can affect your system’s performance. Clean or replace as necessary.
- Check Fuel Supply:
- If you have a gas or oil system, ensure there’s enough fuel and that supply lines aren’t blocked.
- Clean Components:
- Clean blower components to ensure proper airflow.
- For boilers, check and clean water levels and pressure gauges.
- Inspect Electrical Connections:
- Tighten any loose connections and replace any frayed wires.
- Lubrication:
- Some systems may require lubrication to reduce friction in motors.
- Check System Controls:
- Make sure the system starts, operates, and shuts off correctly.
- Professional Help:
- If problems persist after these steps, it’s likely time to call in a professional.
Please note older systems may contain outdated or hazardous parts (like asbestos). Always take precautions when working with old systems, and consider hiring a professional if you’re unsure about anything.
How to Install a New Air Conditioning System
Installing a new air conditioning system is a major project that requires planning and preparation.
Before you begin installing a new AC system, make sure to check with your local building department to see what requirements and permits you need.
AC System Types
There are three main types of AC systems:
- Central AC
- Mini Split
- Ductless
Central AC and ductless AC are very similar; both use a system of ducts to circulate and cool air throughout a home.
Mini split AC systems, on the other hand, use the outside walls of a building to cool the indoor environment.
Central AC systems are the most common, but mini-split AC systems are growing in popularity. Depending on your needs and home, you may want to consider a mini-split or ductless AC system.
Here’s an overview of the general steps involved in installing a new air conditioning system:
- Selecting the Appropriate System:
- Choose between options like central air, window units, or split systems based on your home’s structure and cooling needs.
- Determine your space’s correct size and capacity, typically done by a professional using a Manual J calculation.
- Purchasing Equipment:
- Once you’ve selected a system, purchase the necessary equipment, including any required ductwork.
- Removing Old System (if applicable):
- Safely disconnect and remove any existing old AC systems.
- Installation:
- Install the outdoor unit (condenser) in a suitable location outside where it can properly dissipate heat.
- If necessary, install ductwork throughout your home to distribute cool air.
- Connect indoor units (like evaporator coils or air handlers), ensuring they are level and have proper drainage for condensation.
- Connecting Utilities:
- Connect the system to its power source (electricity).
- Refrigerant Charging:
- The refrigerant should be charged to the manufacturer’s specifications; this step often requires professional expertise.
- Testing:
- Turn on the AC system and check for proper operation.
Installing an air conditioning system is generally not a do-it-yourself project because it involves handling refrigerants which require certification to handle in most locations, electrical work, and potentially complex installation tasks depending upon your home’s design.
Always consider hiring an HVAC professional who can ensure everything is installed safely and efficiently.
As always, check local codes before starting this project, as permits may be required.
Repairing an Old Air Conditioning System
If your old AC system needs repair, you have a few options: you can replace the whole system, replace the AC unit itself, or repair the system you have.
It all depends on the extent of the damage and the cost of each option. Depending on the severity of the damage, repairing your old AC system may not be worth it.
If you have an old system that’s in disrepair, it may be more cost-effective to replace it with a new AC unit entirely.
Before you make a final decision, getting a few estimates from contractors may be a good idea to ensure you have all the information you need.
Here’s a general guide on how to troubleshoot and repair an old air conditioning system:
- Safety First:
- Always turn off the power at the main circuit breaker before starting any work.
- Check the Thermostat:
- Confirm that it’s set correctly and working properly.
- Inspect Filters and Coils:
- Dirty filters or condenser/evaporator coils can greatly affect AC efficiency. Clean or replace as necessary.
- Check Circuit Breakers and Fuses:
- Ensure that your AC system is receiving power.
- Inspect External Unit:
- The outdoor unit should be free of debris for proper heat dissipation.
- Check Vents:
- Ensure all vents are open and unblocked for correct airflow.
- Examine Ductwork (if any):
- Look for any leaks that could be causing loss of cool air.
- Refrigerant Level:
- Low refrigerant can cause poor cooling performance, but checking this often requires professional help due to handling requirements.
- Professional Inspection:
- If the system still isn’t working properly after these steps, you may want to have it inspected by a professional, as more complex issues could be at play, such as compressor problems or control board failures.
Please remember safety is paramount when working with electrical systems and machinery, so if you’re unsure about anything during this process, consider contacting a professional..
- HIGH QUALITY&STANDARDS:Forged from high-quality steel and finished in high-polish chrome,strength, durability, anti-corrosion protection.All the tools meet or exceed ANSI critical standards
- COMPLETE VARIETIES:Contains tools needed for most small repairs and basic DIY projects around the house.Perfect for Handyman’s, repairmen, construction workers, mechanics, body shops etc. also a great tool set to have at home, garage and the workshop
- INCLUDES:Comprehensive assortment of professional-grade wrenches, ratchets, a complete range of 1/4 inch and 3/8inch metric-sized sockets and precision screwdriver, hammer, tape measure, pliers, wrench,and etc. The 72-tooth ratchet easily shift to change direction by flick of 5-degree switch.Variety of 1/4-inch screwdriver bits: Phillips, slotted, square, star and pozi.Also includes soft-grip handle on screwdriver, plier, srtipper and hammer provides excellent comfort and control
- EASY TO CARRY&STORAGE:Housed in a handy blow-molded case for easy tool storage and portability. Its sturdy interior and organizer keeps tools in place
- DESIGN OF GREAT ORGINALITY:Black case makes it dirt-resistant.Diamond shape design makes it unique and fashion .Case size:17.5″*13.5″*3.94″.Net Weight 12.78 lb
Last update on 2026-07-23 / Affiliate links / Images from Amazon Product Advertising API
Overview
Installing a New Heating System: This involves planning and choosing the right system, purchasing the necessary equipment, removing the old system if applicable, installing the new unit and any necessary ductwork or other components, connecting to power sources, and testing for proper operation.
Repairing an Old Heating System: Repair steps include ensuring safety first by switching off power at the main circuit breaker, inspecting the thermostat and filters, checking the fuel supply for gas or oil systems, cleaning components, checking electrical connections, lubricating parts if needed, verifying control operations, and seeking professional assistance if problems persist.
Installing a New Air Conditioning System: The process includes selecting an appropriate system based on your home’s needs and structure, buying required equipment, including potential ductwork, safely removing any old AC units if present, installing outdoor units (condensers), indoor units (like evaporator coils/air handlers) as necessary along with any ductwork throughout your home.
The refrigerant should be charged to the manufacturer’s specifications, followed by testing the system.
Repairing an Old Air Conditioning System: The repair procedure ensures safety as a priority by turning off the power before starting work.
Checking thermostat settings and working conditions is vital. Inspecting filters and coils for cleanliness affects efficiency. Verifying that circuit breakers/fuses provide power to AC systems is crucial.
Checking vents for blockages alongside examining ductwork helps in maintaining airflow. A professional may need to check refrigerant levels since it requires safe handling.
If issues persist after these steps, a professional inspection may be advised.
Each of these tasks can be complex depending upon specific circumstances but understanding the general steps involved can help you make informed decisions about whether it is a DIY job or if professional help is more suitable.