Fixing a Shutoff Valve: DIY Tips and Tricks
Are you tired of dealing with leaky pipes and water damage?
One of the most common culprits is a faulty shutoff valve, which controls water flow to a specific area. Fixture valves, including faucets, are crucial for any plumbing system.
If your shutoff valve or fixture valves are not working correctly, it can cause significant problems for your home. It’s best to call a plumber who can assess the issue and replace any damaged copper tubing as needed.
The main shutoff valve, which is one of the fixture valves, is usually located near the water meter, and the inlet side connects to the copper pipe.
To open the shutoff valve, you can use channel locks or push the lever. However, sometimes these fittings can become damaged or corroded over time, causing leaks and other issues. In such cases, it’s best to call a plumber to fix the problem before it affects your faucets.
Fixing fixture valves shut off valve may seem daunting for a homeowner, but with some basic knowledge and tools, you can do it yourself without the help of a plumber.
The shut-off valve is an essential component of your plumbing system that controls the water flow to your faucets.
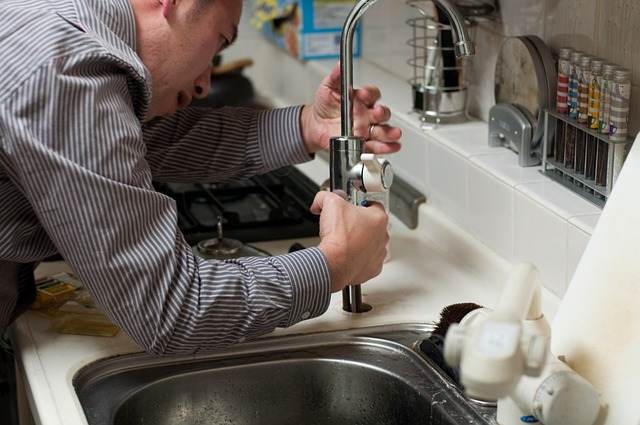
To fix it, you’ll need to locate the valve, turn off the water supply, remove the handle, and use a screwdriver to tighten or replace the screw that controls the valve’s function.
So if you’re ready to take control of your plumbing system with the help of a professional plumber and prevent future water damage in your home, keep reading!
Make sure to regularly check your faucet, toilet valve, and copper pipes to ensure they function properly.
Types of Water Shutoff Valves and Which Is Best for Your Home
The Importance of the Main Water Shutoff Valve in Your Home
The main water shutoff valve, along with the compression fittings and tube, is a crucial component of your home’s plumbing system.
It controls the flow of water into your house, and it can be used to turn off the water supply in case of an emergency or when you need to make repairs or upgrades to your plumbing system.
It can also be used to control the water supply to your toilet and faucet.
If you don’t know where your main water shutoff valve is located, take some time to locate it now. It’s usually located near the water meter or where the main water line enters your home.
Knowing its location can save you time and money in case of an emergency involving a leaking faucet, burst pipe, compression fittings, or a malfunctioning toilet.
Types of Water Shutoff Valves
Several types of water shutoff valves are available on the market today, including gate valves, ball valves, and globe valves. Each type has advantages and disadvantages, so choosing the right one for your home’s faucet and pipe is important.
Compression fittings and copper tubing may also be used when installing these valves.
Gate Valves
Gate valves are one of the oldest types of shutoff valves still in use today for controlling water flow. They’re typically made from brass or bronze and have a round handle that turns a gate inside the valve body.
These valves are commonly used in pipe systems, copper tubing, and supply tubes. In addition, they can be controlled using a curb stop.
One advantage of gate valves is their low cost compared to other shutoff valves used in water line systems.
However, they are prone to leakage over time due to wear and tear on their internal components, especially in high-pressure pipe systems. This can make them unreliable during emergencies when quick valve compression is necessary to prevent water damage.
Globe Valves
Globe valves are similar in design to gate valves but have a more complex internal structure that allows for greater control over the flow rate of water lines.
They’re commonly used in commercial pipe applications but can also be found in residential plumbing systems, including toilets and tubing.
One advantage of globe valves is that they provide better control over the flow rate in a pipe or water line than gate valves.
However, they can be more expensive in terms of cost and may require compression fittings for installation.
Ball Valves
Ball valves are the most popular type of water shutoff valve for home use. They’re made from brass or stainless steel and have a lever handle that rotates a ball inside the valve body to control the water flow.
These valves can be used with various types of pipe, tubing, and compression fittings. In addition, they are often used in conjunction with curb stop valves for main water shutoff in emergencies.
One advantage of ball valves is that they’re very reliable and durable for pipe systems. They’re less likely to leak over time than other types of shutoff valves, making them ideal for emergency situations when you need to turn off your water supply quickly.
Ball valves are also compatible with compression fittings and tubing and can be used as curb stop valves for municipal water lines.
Which Water Shutoff Valve is Best for Your Home?
There are several factors to consider.
These include:
- The age and condition of your plumbing system
- The location and accessibility of your main water shutoff valve is crucial in emergencies involving your pipe system. It is important to know the exact location of the curb stop valve that controls the water flow into your home’s tubing system. In some cases, compression fittings may connect the tubing to the valve.
- Your budget for purchasing and installing a new shutoff valve on the water line pipe near the curb stop is the main cost to consider.
If you have an older plumbing system, replacing your existing gate or globe valve with a newer ball valve may be more cost-effective. This will provide better reliability and durability in case of an emergency for your water line and tubing.
A new ball valve will also ensure a more efficient water shut-off process for your pipes.
If you’re building a new home or doing major renovations on your existing plumbing system, it’s worth investing in a high-quality ball valve from the start.
This will ensure that you have reliable and long-lasting protection against leaks and other plumbing emergencies. Also, consider using compression fittings for your tubing and pipes to ensure a tight seal and easy installation.
And don’t forget to install a water shut-off valve for easy access in an emergency.
Difference Between Rebuilding and Replacing a Shutoff Valve
What is Rebuilding a Shutoff Valve?
Rebuilding a shutoff valve involves repairing the existing valve by replacing its internal components. The process involves taking apart the valve, removing any damaged or worn-out parts, and replacing them with new ones.
This can include replacing the pipe system’s stem, disc, seats, packing, and other internal components. Compression fittings are used to connect the tubing and ensure a secure fit within the system.
One of the main advantages of rebuilding a shutoff valve is that it is typically less expensive than replacing it. It also allows you to keep the original valve body in place, which may be important if you have an older or unique valve that is difficult to replace.
Rebuilding the valve can help you save on pipe or tubing replacement costs and avoid compression issues.
However, rebuilding a shutoff valve connected to a damaged or corroded pipe or tubing in a compression system may not always be possible or practical.
If the valve body itself is damaged or corroded beyond repair, then rebuilding may not be an option. In some cases, rebuilding may only provide a temporary fix, and the valve may need to be replaced eventually to ensure the system’s proper functioning.
What is Replacing a Shutoff Valve?
Replacing a shutoff valve in a plumbing system typically involves removing the old valve and installing a new one in its place. This can be done by cutting into pipes to remove the old valve and then soldering or threading in a new one.
Alternatively, a compression fitting may be used to install a new valve, which can reduce the cost of the replacement process.
Replacing a shutoff valve may be necessary if the existing valve is severely damaged or corroded beyond repair, which can cause problems with the pipe.
It can also be an opportunity to upgrade to a newer model with better features or performance that will benefit the pipe’s overall function.
While replacing a shutoff valve can be more expensive than rebuilding it, it can also provide long-term benefits in terms of improved reliability and performance of the pipe.
Which Option Should You Choose?
The decision to rebuild or replace a shutoff valve depends on several factors, including the pipe’s condition.
- The severity of the damage: If the damage is minor and limited to internal components such as seals or washers of a water shut valve, then rebuilding may be sufficient. However, if there are cracks or corrosion on the body of the valve itself or the pipe, replacement may be necessary.
- Cost-effectiveness: Rebuilding a shutoff valve is generally less expensive than replacing it, but this may not always be the case, depending on the damage extent and the replacement parts cost. In addition, the condition of the pipe connected to the valve should also be considered.
- Long-term reliability: While rebuilding a shutoff valve can provide a temporary fix, it may not be as reliable or long-lasting as a new valve. If you rely on your shutoff valve for critical applications such as preventing water damage in your home’s pipe system, then replacing it may be the better option.
Identifying Leaks in a Shut-off Valve
Shut-off valves are an essential part of any plumbing system, allowing you to control the flow of water or gas to specific fixtures or areas through the pipe.
However, over time, these valves can develop leaks that can cause significant damage if left unattended.
Fixture Valves and Types of Shut-Off Valves
Fixture valves are commonly used as shut-off valves for sinks, toilets, and other plumbing fixtures connected to pipes. They come in various types, such as ball, gate, and globe valves.
Ball valves are a popular type of shut-off valve that uses a ball to control the flow of water through the pipe. These types of valves have a lever handle that is turned 90 degrees to open or close the valve.
Isolation valves are used to isolate a specific section of pipe or tubing for maintenance or repair. These types of shut-off valves come in many different configurations but usually have some form of wheel handle that is turned clockwise or counterclockwise to open or close the valve.
Causes of Leaks in Shut-Off Valves
Several factors, such as a damaged valve body, worn seals or sleeves, or a loose gland nut, can cause leaks in pipe shut-off valves.
A damaged valve body may occur due to corrosion from prolonged use or exposure to chemicals.
Worn seals may also result from prolonged usage, while loose gland nuts may occur due to improper installation.
To check for leaks in shut-off valves and pipes, one method is using a flame protection cloth that detects escaping gas or water when placed around the suspected area where leaks could occur.
How To Fix A Shut-Off Valve Leak
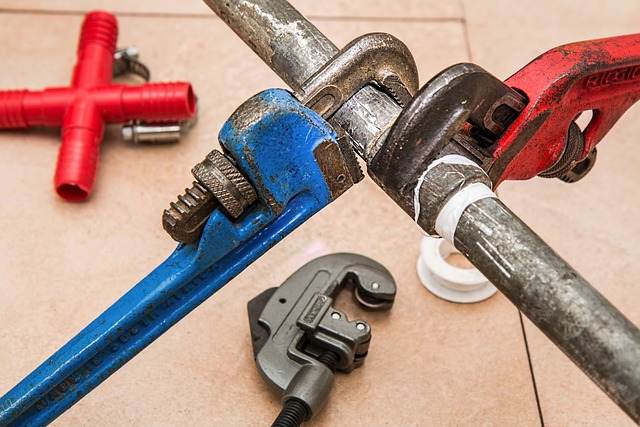
Fixing leaky shut-off valves connected to a pipe is not rocket science but requires some basic plumbing knowledge and tools such as wrenches and pliers, among others.
Here are the steps to follow when fixing a shut-off valve leak:
- Turn off the main shutoff valve connected to the pipe leading to the affected area, whether the toilet valve or ball valve, before you start any repair work. This will ensure the water supply is cut off and prevent further damage or accidents.
- Drain the water from the pipes – drain all standing water from the pipes by opening all faucets and valves connected to it.
- Disassemble the shut-off valve – using wrenches and pliers, and remove the handle, packing nut, gland nut, and stem assembly from the pipe.
- Inspect for damages – check for any visible damages, such as cracks or corrosion on the valve body, seals or sleeves of the water-shut pipe.
- Replace damaged parts – if any damages are found in step 4 above, replace them with new ones of similar size and quality. This includes any damaged pipe, old valve, toilet valve, or valve stem that may need replacing.
- Reassemble the shut-off valve – put back all components removed in step 3 above in reverse order of removal, ensuring that they fit correctly and tightly onto the pipe.
- Test for leaks – turn on the water supply and test if there are any leaks in the toilet valve, pipe, compression valve, or isolation valve by checking for dripping or running water.
Where Are Shut-Off Valves Located?
Shut-off valves can be located in various places depending on their use, such as under sinks, behind toilets, near washing machines, and along the pipe.
In most cases, gas shut-off valves are located outside buildings where the pipe carrying gas enters a property. In contrast, inside buildings, they may be located near appliances that require gas, such as cookers.
Step-by-Step Guide to Fixing a Shutoff Valve
Using a Pipe Wrench to Turn Off the Curb Stop Valve
The first step in fixing a shutoff valve is turning off the curb stop valve. The curb stop valve is usually located near the street, and it controls the water supply to your home.
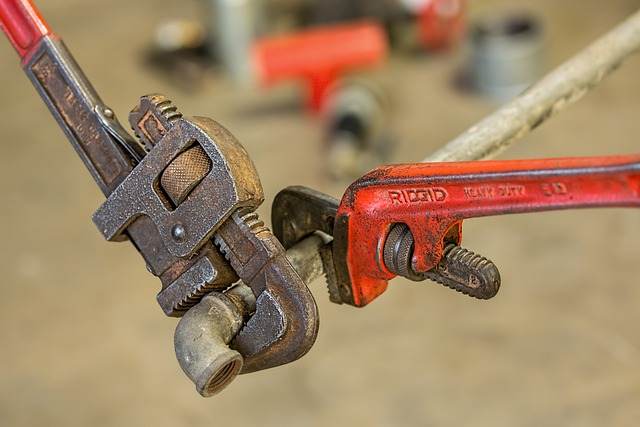
To turn off this valve, you will need a pipe wrench.
Start by locating the curb stop valve and removing any dirt or debris around it. Next, place the pipe wrench over the valve’s handle and turn it clockwise until it stops. This action should cut off the water supply to your home.
It’s essential to make sure that you turn off the main water supply before attempting any repairs on your shutoff valve or pipe. Failure to do so can lead to flooding and other damages.
Loosening the Valve Stem with an Adjustable Wrench
After turning off your home’s main water supply, locate your shutoff valve. It’s usually found near sinks, toilets, or appliances that use water pipes.
The next step is loosening its stem using an adjustable wrench to access the pipe.
Place the adjustable wrench over the nut at the base of your pipe shutoff valve stem and turn it counterclockwise gently.
If you encounter resistance or find that you cannot loosen it easily, apply some penetrating oil to the pipe and wait for several minutes before trying again.
Once you’ve successfully loosened up your shutoff valve stem nut, remove it entirely from its housing using pliers or by hand if possible.
Make sure to disconnect the pipe connected to the valve before removing the nut.
Removing Screws and Replacing Damaged Parts
Now that you have access to your shutoff valve’s interior parts, carefully inspect them for any damages or leaks. You may find that some screws are loose or missing altogether; replace them as necessary.
If there are damaged parts, such as washers or gaskets, inside your shutoff valve assembly, remove them carefully using pliers or screwdrivers as appropriate. Replace them with new parts that match the old ones in size and shape.
Once you’ve replaced damaged parts, reassemble your shutoff valve by following the steps in reverse order. Tighten all nuts and bolts snugly but not too tight, as this can cause damage to your shutoff valve’s threads.
Turning Off the Main Water Supply
Locate the main water valve to turn off the main water supply.
Before attempting any plumbing repairs, it’s crucial to know where the main water valve is located. The main water valve controls the water flow into your home and is typically located near your water meter or in a utility room.
If you’re unsure where your main water valve is located, contact a plumber or check with your local utility company.
Turning off the main water valve stops water flow to all faucets and outlets.
Turning off the main water supply will stop all incoming water flow to your home. This means that no matter which faucet or outlet you turn on, there will be no running water until you turn the main valve back on again.
It’s important to remember this when performing any plumbing repairs or maintenance, as it can impact other areas of your home.
Shutting off the main water supply is crucial in emergency plumbing situations.
In case of an emergency like a burst pipe or a major leak, turning off the main valve is essential to prevent further damage.
Water leaks can cause significant damage to walls, floors, and ceilings if left unchecked for even a short period of time.
By shutting off the main valve quickly, you can minimize potential damage and save yourself from costly repairs.
Use pliers to turn the main water valve clockwise to shut off the water supply line.
Once you’ve located your main valve, shutting it off is relatively simple. Use pliers or a wrench if necessary to grip the handle of the valve and turn it clockwise until it stops moving.
This will shut off all incoming water flow into your home.
If there is a clog in the tubing, turning off the main water supply can prevent further damage to the sink or faucet.
If you notice slow-draining sinks or showers in your home, there may be a clog somewhere in your plumbing system. In this case, turning off the main water valve can prevent further damage to your sink or faucet.
By shutting off the water supply, you can prevent any additional water from entering the clogged area and causing more damage.
Removing the Old Toilet Shutoff Valve and Sweat Valve
If you have a faulty shutoff valve, it’s important to replace it as soon as possible.
Turn off the water supply to the toilet valve before starting any work.
Before you remove the old toilet shutoff valve and sweat valve, make sure that you turn off the water supply to the toilet valve.
This is essential for your safety and will prevent any accidental leaks or damage to your plumbing system.
To turn off the water supply, locate the main shut-off valve in your home. It’s usually located near your water meter or where your main water line enters your home.
Turn it clockwise until it stops turning. This will cut off all water supply to your home.
Use a wrench to loosen and remove the old sleeve and escutcheon from the sweat valve.
Once you’ve turned off the water supply, use a wrench to loosen and remove the old sleeve and escutcheon from the sweat valve.
The sleeve is a metal tube that covers part of the sweat valve, while an escutcheon is a decorative plate that covers up any unsightly gaps between pipes and walls.
Loosen both parts by turning them counterclockwise with a wrench until they come free from their fittings. Be careful not to damage any surrounding pipes or fittings while doing this.
This applies to all valves except for the main water shutoff valve, compression valve, new valve, and isolation valve.
Clean the joint of any debris using a brush, grit cloth, or paper towel.
After removing both parts of the old sweat valve assembly, clean out any debris or corrosion from around its joints using either a brush, grit cloth, or paper towel.
Make sure there are no obstructions around this area before installing new rubber washers onto its ball. It is important to ensure that the water shut is turned off before starting any work on the valve assembly.
This step ensures that there are no particles left on either side of the isolation valve, curb stop valve, or main water shutoff valve where they were removed, which could cause a leak or damage the new parts.
Fit the new rubber washers onto the ball of the sweat valve before attaching it to the toilet valve.
Once you’ve cleaned out any debris, fit the new rubber washers onto the ball of your sweat valve. The rubber washers help create a watertight seal between your plumbing fixtures and prevent leaks from occurring.
Make sure that you fit them securely onto their respective balls before attaching them to your toilet valve, ensuring a proper water shut. You can do this by pressing down on top of each washer until it fits snugly into place.
Installing the New Compression Valve and Removing the Old One
Removing the Old Compression Valve Using a Wrench and Pliers
The first step in replacing a shutoff valve is to remove the old compression valve. To do this, you will need to use a wrench and pliers. Start by shutting off the water supply to your home or building.
Then, locate the old valve and use a wrench to loosen it from the pipe.
Once it’s loose enough, you can use pliers to twist it off completely.
Sliding The Compression Nut And Sleeve Onto The New Valve
Once you have removed the old compression valve, it’s time to install the new one. Before inserting it into place, slide the compression nut and sleeve onto the new valve.
This will ensure that they are in position when inserting it into the water-shut pipe.
Inserting The New Valve Into The Pipe And Tightening The Compression Nut
With everything in place, please insert the new compression valve into its designated spot on your plumbing system. Ensure that it is securely inserted so there are no leaks later on.
Once in position, tighten up your compression nut until there is no wiggle room left.
Before turning on the water shut, double-check that the valve is properly installed to avoid any potential leaks.
Using A Wrench To Secure The New Valve In Place
To ensure that your new shutoff valve stays securely in place over time, use a wrench to secure it tightly. This will prevent any future leaks or damage caused by loose fittings.
Turning On The Water Supply To Test The New Valve’s Functionality
Finally, turn on your water supply again and test your newly installed shutoff valve! If everything has been done correctly, there should be no leaks or other issues with its functionality.
Replacing an old shutoff valve with a new one can seem daunting at first, but following these simple steps can make all of the difference!
Remember to take things slowly and carefully while working so as not to cause any damage to your plumbing system.
With a little bit of patience and effort, you can have a fully functional shutoff valve that will last for years to come!
Conclusion: Fixing a Shutoff Valve Made Easy
Fixing a shutoff valve may seem daunting, but with the right information and tools, it can be done easily. We also explained the difference between rebuilding and replacing a shutoff valve and how to identify leaks in a shut-off valve.
We provided you with a step-by-step guide on how to fix a shutoff valve, including turning off the main water supply, removing the old toilet shutoff valve and sweat valve, installing the new compression valve and removing the old one.
By following these simple steps, you can fix your shutoff valve without having to call in a professional.
Remember that safety should always come first when working with plumbing systems. Make sure to turn off all power sources and locate the main water shutoff valve before attempting any repairs.
Wear appropriate protective gear and consider installing a new valve or curb stop valve for added convenience and peace of mind.
In conclusion, fixing a shutoff valve is not as difficult as it may seem.
With the right knowledge and tools at hand, anyone can do it.
Don’t hesitate to tackle this project yourself and save some money on professional plumbing services.
FAQs
Q: What are some common signs that indicate I need to fix my shutoff valve?
Some common signs include low water pressure or no water flow when turning on faucets or appliances requiring water. You may also notice leaks around the base of your toilet or under sinks. If you suspect a problem with your water supply, it may be caused by a faulty new valve or curb stop valve.
Q: Is it better to rebuild or replace my shutoff valve?
A: It depends on the severity of damage to your existing shutoff valve. If there are only minor leaks or issues with functionality, rebuilding may be sufficient. However, if significant damage or corrosion is present, replacing the entire unit may be necessary.
Q: Can I use any water shutoff valve for my home?
A: No, it’s important to choose the right type of valve for your specific plumbing system, especially when it comes to the water shut. Consult a professional plumber or research which valve best suits your home’s water shut needs.
Q: Do I need any special tools to fix my shutoff valve?
A: Before beginning any plumbing work, it is important to locate and turn off the main water shutoff valve or curb stop valve. You will also need a few basic plumbing tools, such as pliers, a wrench, and Teflon tape. You may also need a tubing cutter if you are replacing copper pipes.
Q: How long does it take to fix a shutoff valve?
The time required depends on the repair’s complexity and your experience level. It can take anywhere from 30 minutes to several hours. Make sure to shut off the water before beginning the repair.
Q: What should I do if I encounter unexpected problems while fixing my shutoff valve?
A: If you encounter unexpected problems while fixing your shutoff valve, it’s best to stop and call in a professional plumber. Attempting repairs beyond your skill level can lead to further damage or injury.
Q: Can I save money by fixing my shutoff valve instead of hiring a professional plumber?
A: Fixing your shutoff valve can save you money on professional plumbing services. However, it’s important to have some knowledge and experience working with plumbing systems before attempting any repairs yourself.