How To Refinish A Hardwood Floor
Preparing your hardwood floor for refinishing
Follow this guide to prepare your hardwood floor for refinishing with clear steps and less chaos. Clear the area, remove the existing finish, sand the floor, and fill gaps and holes in the floor. These are the sub-sections that will help you achieve a seamless hardwood floor.
Clear the area
When preparing to refinish your hardwood floor, it is important first to create a clear space free of any obstacles that may interfere with the refinishing process. This will ensure the best possible results and make the job easier.
Here are three simple steps to prepare your space for refinishing your hardwood floor:
- Remove all furniture and accessories from the room.
- Use a vacuum cleaner or a broom to remove any dust, dirt, or debris on the floor.
- Cover vents, doorways and windows with plastic sheets to prevent dust from circulating into other areas of the house.
In addition, consider covering up shelves or anything else in the room that dust could affect. Taking these steps will allow you to work more effectively and efficiently while ensuring a successful refinishing job.
It is also important to be cautious when removing larger items like bookcases or wardrobes as these can leave scratches on your floors if not properly handled. It may even be necessary to enlist the help of others when moving larger items around.
I once attempted to refinish my own hardwood floors but neglected to clear the space properly beforehand. As a result, I ran into issues with dust settling onto newly applied sealer which had disastrous effects. Now I know just how crucial it is to take all necessary measures in order to prepare your space for any home renovation project.
If your hardwood floor’s finish is harder to remove than a bad Tinder match, these tips will come in handy.

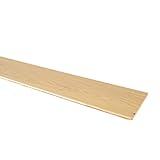
- One case covers 33 square feet.
- Premium quality real hardwood with smooth surface and micro-beveled edges.
- For residential use, planks feature a 5-ply balanced engineered construction for superior strength.
- UV cured semi-gloss polyurethane with aluminum oxide finish for maximum abrasion resistance.
- Glueless click-lock installation system that tightly holds the planks together for years of use.
Last update on 2026-06-24 / Affiliate links / Images from Amazon Product Advertising API
Remove the existing finish.
To start preparing your hardwood floor for refinishing, you must remove the current surface layer. This process is crucial as it helps in removing any deep scratches and stains and provides a clean base for refinishing.
To remove the existing finish, follow these five simple steps:
- Strip the old coating: Using a chemical stripper or sander, strip off the finish until you reach bare wood.
- Sand off remaining spots: A hardwood floor buffer can help remove any residue left behind by the stripper or sander.
- Clean up debris: Vacuum or sweep up all the dust particles and debris left behind from sanding.
- Repair any damages: Inspect your flooring for any damages, including cracks and holes, and repair them before moving forward with refinishing.
- Wipe down floorboards: Finish this step by wiping the floors with a damp microfiber mop.
It’s essential to be meticulous while removing old coatings as it will impact how well your flooring takes on new layers of coating later.
Before moving ahead, it’s also important to note that some types of finishes require different stripping methods like chemicals or sanding machinery.
Make sure your flooring is adequately prepared before refinishing; this can be achieved by carefully following these steps mentioned above to create an ideal foundation.
Don’t miss out on achieving beautiful-looking floors due to skipping over this fundamental process – take time and effort into necessary preparation instead of rushing through without adequate equipment or knowledge.
Get ready to feel like a beach bum as you sand your floor to the perfect smoothness.
Sand the floor
Creating a Smooth Surface for Refinishing Hardwood Flooring
Preparing your hardwood floor for refinishing involves several steps with sanding being the most crucial. Sanding the floor helps to remove scratches, dents and other damages from the wood surface, creating a smooth, even base for staining or finishing. Here is a simple guide on how to sand your hardwood floor.
- Start with coarse-grit sandpaper: Begin by using 36-grit sandpaper attached to a belt sander. Sand along the grain of the wood until all scratches and imperfections are removed.
- Change to medium-grit paper: Replace the grit paper with an 80-grit one and continue sanding in the same direction as before.
- Vacuum or sweep: Clean up all dust and debris in preparation for finer grit papers.
- Use fine-grit sandpaper: Install 120-grit paper on the belt sander and make another pass over the entire floor surface.
- Final vacuum or sweep: Gather all remaining dust and debris before doing one more round of sanding.
- Polish with extra-fine-grit pollen: Use 180-220 grit polisher to give a final polish to your hardwood floor.
Remember that proper preparation is essential, including ensuring no nails or screws protruding from the surface; otherwise, they could get caught in the sandpaper causing significant damage.
Finally, don’t forget safety measures like wearing protective eyewear and masks when working around sawdust and using heavy equipment.
By now you can see that sanding is quite delicate and needs skills and patience; if not done correctly, the results won’t be satisfactory to you.
Take your time during this step to avoid missing anything important.
In summary, perfectly refinished hardwood floors enhance overall beauty and increase home value significantly.
By following these simple tips on preparing your hardwood floor for refinishing should give you excellent results, making your guests envy your home. Think of the gaps in your hardwood floor like the space between your teeth – unsightly and potentially damaging if ignored.
Fill gaps and holes in the floor
To restore your wooden surface, cover gaps and hollows in the floor. Repairing holes in a hardwood floor is crucial as they collect debris and ruin the flooring’s natural grace.
Here’s how to Fill gaps and holes in the floor:
- Clean the Floor: Thoroughly clean the area of dust, dirt or debris using a vacuum cleaner or damp cloth.
- Prepare Wood Filler: Create enough wood filler for the area to be repaired by mixing sawdust with a resin-based wood filler.
- Apply Filler on Gaps: Using a putty knife, apply an even amount of filler into gaps or hollows. Leave it to dry naturally according to manufacturer instructions.
Although filling gaps sounds quick, it demands hands-on expertise about choosing the right type of sealant and understanding how to mix glue adequately.
Wood fillers are not permanent solutions and can reduce real-estate value if not done correctly.
According to Flooring America, It’s crucial to identify whether floors need sanding or buffing before repairing any holes.
Choosing the right finish for your hardwood floor is like picking a partner – it takes time, research, and a lot of commitment.
- EYE-CATCHING DESIGN & PANACHE – Elevate your home’s ambiance with SimpleFLOORS’ engineered hardwood flooring, featuring bespoke colors and textures curated by elite interior designers. Unleash your inner design guru and transform your space with flair!
- UNRIVALED STRENGTH & RESILIENCE – Indulge in the perfect fusion of luxury and durability with our European Oak Wire Brushed hardwood floors. Defend your home’s beauty with our scratch-resistant, high-performance flooring designed to stand the test of time!
- PREMIUM WEAR LAYER SUPERIORITY – Seize the gold standard of flooring longevity with our robust, high-quality wear layer. Outclass competitors, and savor the unparalleled sturdiness of SimpleFLOORS engineered hardwood. ADD TO CART now and prepare to be wowed!
- EMPOWERING SAMPLE EXPERIENCE – Banish uncertainty with our generous sample sizes, allowing you to envision the perfect fit for your home. Feel confident and excited about your choice, as you explore the stunning look and feel of our hardwood flooring. #hardwoodfloor
- COLOR: EU-1028-30-RL Pisa II, PLANKS MEASURE: 48″(RL) x 6-1/2″ x 3/8″
Last update on 2026-06-24 / Affiliate links / Images from Amazon Product Advertising API
Choosing the appropriate finish
To choose the appropriate finish for your hardwood floor, you need to consider the types of finishes available, weigh the pros and cons of each type, and factor in certain considerations before making a decision. This section presents you with solutions for each of these sub-sections to help you make an informed choice.
Types of hardwood floor finishes
Hardwood floors come with a range of finishes. Each finish provides its unique appearance and durability. Some common hardwood floor finishes are described in the table below:
| Finish | Description |
|---|---|
| Lacquered | A hard, durable surface finish that is water-resistant and easy to maintain. |
| Oiled/Waxed | A natural-looking finish that brings out the wood’s grain and is easy to repair. |
| Penetrating Oil Sealer | A deep-penetrating finish that highlights the wood’s natural features while providing long-lasting protection. |
To choose the right finish for your hardwood floor, consider factors such as level of foot traffic, exposure to sunlight, and ease of maintenance. For example, lacquered finishes are ideal for high-traffic areas, whereas oiled/waxed finishes require more frequent maintenance.
Pro Tip: It’s always good to consult with a professional before choosing a finish for your hardwood floor.
Are you struggling to choose the right finish? Don’t worry, we’ll break it down for you like a pro and con artist.
Pros and cons of each type
When deciding on the appropriate finish, it’s essential to consider the advantages and disadvantages of each type. A thorough understanding of the pros and cons can help you make an informed decision that aligns with your objectives.
| Finish Type | Pros | Cons |
|---|---|---|
| Matte | Hides imperfections, less glare | Less durable, can look flat |
| Glossy | Durable, vibrant color reproduction | Shows imperfections, glaring highlights |
| Satin | Intermediate durability, attractive sheen | Can be difficult to clean |
In addition to the above-discussed finishes, it’s worth noting that semi-gloss has high durability and provides a subtle shine, while low-sheen is easy to maintain but doesn’t offer as much defense against wear and tear.
A crucial tip for choosing the appropriate finish is to test the options in your space first before making a final decision. The lighting conditions and room decor can impact how a finish looks and performs. Choosing the right finish is like choosing the perfect outfit – it needs to match, complement, and make a statement.
Considerations when choosing a finish
When it comes to selecting a proper finish, there are several important factors to consider. The right finish can make a significant difference in the longevity and appearance of a surface. Here are some key considerations to keep in mind:
| Considerations when choosing a finish | Columns |
|---|---|
| Durability | Environmental impact |
| Appearance | Ease of application |
| Maintenance | Cost |
It’s important to note that each consideration is crucial in determining the ultimate choice of finishing product. Durability must be considered when selecting a finish for surfaces exposed to high traffic or harsh weather conditions. Additionally, the environmental impact should be considered, as some finishes emit harmful chemicals during application and drying.
Lastly, an anecdote – I once chose the cheapest finishing option for my outdoor patio furniture. However, after only a few months of use, the furniture was damaged by weathering and required costly repairs. Ultimately, investing in higher-quality finishes proved more cost-effective in the long run.
Time to channel your inner artist and slap on that finish like it’s a Jackson Pollock painting.

- Efficient Flooring Installation-The Flooring Jack Tool is designed to simplify the installation of hardwood and laminate flooring. It allows you to easily pull or push flooring strips into place, ensuring a tight and secure fit. This tool is perfect for both DIY enthusiasts and professionals, making the installation process faster and more efficient
- Versatile and Durable Design-Crafted from high-quality carbon steel, the Flooring Jack Tool is built to last. Its non-slip plastic handles provide a comfortable grip, while the sturdy construction ensures it can handle most flooring thicknesses without causing damage to the surface. Whether you’re working with wood or laminate flooring, this tool is up to the task
- Perfect for Tight Spaces-This ratchet floor jack is ideal for working in confined areas such as closets, corners, and other tight spots. Its compact design allows you to maneuver easily, ensuring that every board is perfectly aligned and securely in place. No more struggling with traditional tools like crowbars or pry bars
- Easy-to-Use Ratchet Mechanism-The Flooring Jack Tool features an easy-to-use ratchet mechanism that makes installing hardwood floors a breeze. Simply position the tool, engage the ratchet, and pull or push the flooring strips into place. This innovative design saves time and effort, making the installation process smoother and more enjoyable
- Straighten and Secure Flooring-The Flooring Jack Tool is perfect for straightening crooked, warped, or bowed flooring strips. It holds them securely in place during installation, ensuring a flawless finish. Whether you’re a DIYer or a professional, this tool will help you achieve a professional-quality floor with ease
Last update on 2026-06-25 / Affiliate links / Images from Amazon Product Advertising API
Applying the finish
To apply the finish for your hardwood floor to achieve a smooth and shiny surface with durability, you need to follow some essential steps. These steps include applying the first coat, sanding between coats, applying subsequent coats, and buffing and polishing the floor. Each step is important to achieve the desired finish, let’s now explore these steps in detail.
Applying the first coat
Begin the finishing process by applying the initial layer of coating. This step is crucial as it lays the foundation for your desired outcome.
Follow these five steps to apply the first coat:
- Ensure that you have a clean and well-ventilated workspace.
- Use a high-quality brush or roller to apply the coating.
- Apply an even layer of coating in long, smooth strokes, ensuring that there are no bumps or ridges.
- Allow sufficient drying time before applying any additional coats or moving on to the next step.
- Clean all equipment thoroughly after use, freeing them from any residual paint or lacquer.
It is important to note that different types of coatings may require differing application methods. Therefore, it is recommended to follow manufacturer guidelines while carrying out this process.
Remember to assess and correct any imperfections before proceeding with subsequent coats, as it can be challenging to fix mistakes once they have dried.
Pro Tip: Wear protective clothing and gear such as gloves and goggles while applying coatings to ensure safety for oneself.
Sand like you mean it, or be prepared to watch your finish peel away like a bad sunburn.
Sanding between coats
Sanding for Fine Finishing
The sanding process is a crucial step in applying the finish. Sanding between coats helps smooth out imperfections and create a uniform surface for the next application.
Follow these four steps for a successful sanding experience:
- Allow sufficient drying time before sanding; typically, 24 hours per coat is required.
- Begin by using fine-grit sandpaper, such as 220-grit, and lightly sand the entire surface.
- Clean off any dust or debris from the sanded surface with a dry cloth or vacuum.
- Repeat the process with increasingly finer paper, ending with 400-grit for an ultra-smooth finish.
Once the final coat has been applied and sanded, buff the surface with #0000 steel wool for an added level of smoothness.
For additional tips on achieving a professional-looking finish, consult trusted sources such as ‘Fine Woodworking magazine.
Remember to take your time during this critical step to ensure your project looks its best. When it comes to applying subsequent coats, remember: it’s all about adding depth, not drowning your project.
Applying subsequent coats
Applying Additional Coats of Finish
To achieve a smooth and polished surface, it is necessary to apply additional coats of finish to the surface. The quality of the final look depends on the careful application of each coat.
Here is a 3-step guide for applying additional coats of finish:
- Sanding – Before adding another coat, lightly sand the previous layer with a fine grit sandpaper or steel wool. This will remove any excess gloss or bumps and allow the next layer to adhere better.
- Cleaning – After sanding, remove all dust and debris with a clean cloth or vacuum. Any leftover particles can cause imperfections in the finished product.
- Application – Apply a thin layer of finish using a brush, foam roller or sprayer, making sure to cover evenly without leaving any drips or bubbles. Allow drying time before applying subsequent layers according to manufacturer guidelines.
Finally, ensuring that each coat fully dries before applying another one is vital. Rushing this process can result in uneven coverage and damage the project’s overall appearance.
One essential suggestion is always to keep your workspace clean and free from debris throughout the process. Additionally, avoid shaking the container before use as this can create bubbles in the solution leading to air pockets within the coating material itself.
Puts a whole new spin on ‘smooth as a baby’s bottom’.
- PROFESSIONAL WOOD FLOOR RESTORER: Restores wood floors, leaving them with a beautiful glossy finish
- 1-COAT APPLICATION: A single, easy-to-apply coat fills in scratches, shines & protects
- REVITALIZING FORMULA: Revitalizes wood floors throughout the home for long-lasting protection
- FOR BEST RESULTS: Use with Rejuvenate Wood Floor Cleaner to gently clean & enhance your floor’s natural hardwood beauty
- SAFE FOR PETS & KIDS: When used per directions on product label. For additional details, visit rejuvenateproducts.com/safe.
Last update on 2026-06-25 / Affiliate links / Images from Amazon Product Advertising API
Buffing and polishing the floor
Achieving a flawless finish on the floor involves the procedure of perfecting its surface by means of ornamental touches. This process is known as “Buffing and polishing the floor,” in which the surface of the flooring material is made smoother, glossier and much more lustrous.
Here is a 4-step guide to achieve this at ease:
- Dust off the floor with a good-quality vacuum.
- Use a right-sided scrubber and an accommodating scrubbing pad to remove any embedded dirt and ground-in marks from your flooring material.
- Move around your place in small portions, cleaning and rubbing each section separately to prevent overflow or messy working surfaces.
- Finally, add a layer of shine by applying polish over your newly refined floors.
Paying attention to every detail you perform while carrying out this operation equally is important to ensure perfection during buffing and polishing the floors. Over-buffering or over-polishing may lead to scratching on the surface that will be hardy evident immediately but shows up gradually.
This cosmetic agenda has been in practice for years now but rose into popularity after World War II when military men spare their extra time practicing it for liberation and meticulousness purposes virtually everywhere they go, thereby rendering formal maintenance finally become pivotal amongst them irrespective of terrain & climate conditions, soiled cloths, dusty fields or sub-par equipment provided for duty purposes.
You’ve got a beautifully refinished hardwood floor, now, don’t mess it up! Maintenance is key, unless you prefer the rustic, ‘I live in a cabin in the woods‘ look.
Maintaining your refinished hardwood floor
Regular cleaning and maintenance are essential to maintain the quality of your refinished hardwood floor. To prevent scratches and damage, you need to be mindful of certain practices. However, if the floors do become damaged over time, reapplying the finish as needed can restore them to their original condition.
Regular cleaning and maintenance
Regularly maintaining your newly refinished hardwood floor is critical to maintaining its elegance and beauty. Here are five essential steps to keep your floor looking stunning for years to come:
- Vacuum or sweep the floor regularly to remove dirt, dust, and debris.
- Wipe any spills immediately using a dry or damp cloth.
- Use only recommended cleaning products to maintain the finish on your floor.
- Place mats at all entry points to trap dirt and protect the wood surface from scratches.
- Trim pet nails regularly to avoid scratching the surface.
In addition, ensure that you avoid exposure of your hardwood floors to direct sunlight and any large amounts of water, as this can cause significant damage over time.
True History: Did you know that hardwood floor maintenance has been practiced since ancient times? In historic castles, waxing and oiling were used on wooden floors to make them shine bright and stay in better condition for longer periods.
Protect your floors from harm like you would your ex’s number in your phone – delete any potential threats.
Preventing scratches and damage
Preventing wear and damage to your newly refinished hardwood floor is essential in maintaining its luxurious appearance and longevity. Here are six tips to consider:
- Place floor protectors under furniture legs and avoid dragging heavy objects across the floor.
- Use area rugs or runners in high-traffic areas, and make sure they have a non-slip backing.
- Avoid wearing high heels on the floor, as they can scratch the surface easily.
- Clean up spills immediately to prevent water damage or warping of the wood.
- Maintain a consistent temperature and humidity level in the room to prevent the wood from expanding or contracting.
- Regularly sweep or vacuum to remove dust, dirt, and debris that can cause scratches over time.
It’s important not to forget small details that can still cause wear and tear. For example, using a soft-bristled broom instead of a hard-bristled one may seem insignificant but it can go a long way in preserving your hardwood floors.
Pro Tip: Consider getting felt pads for furniture legs as they provide additional protection against scratches caused by movement.
Avoid waiting until your hardwood floor screams ‘HELP’ before reapplying the finish.
Reapplying finish as needed
The process of refreshing the finish on your refinished hardwood floors is crucial in maintaining their shine and durability. Ensuring that you reapply finish as needed will increase the longevity of your floor’s lifespan.
Follow this 6-step guide to reapply finish as needed:
- Begin by thoroughly cleaning the floor with a mild cleaner and water
- Sand down any rough or worn spots until smooth
- Apply a new coat of finish, starting from one corner and working your way out
- Allow the finish to dry for at least 24 hours before walking on it
- If necessary, apply a second coat of finish, following the same steps as before
- Wait an additional 24 hours before moving furniture or rugs back onto the refinished floor
Remember to inspect your refinished hardwood floors regularly, particularly in high-traffic areas, to assess whether they need reapplication. Doing so will ensure that your floors remain well-maintained for years to come.
Finally, don’t miss out on the benefits of regularly maintaining your refinished hardwood floors. By committing to this important process, you’ll avoid costly replacements down the line and enjoy beautiful, durable floors for longer.
Frequently Asked Questions
Q: What materials do I need to refinish my hardwood floor?
A: You will need sandpaper, a sander, a sealant, a varnish or urethane finish, a paintbrush, a vacuum, and a dust mask.
Q: How long does it take to refinish hardwood floors?
A: It typically takes 3-4 days to refinish hardwood floors, depending on the job’s size and the floor’s condition.
Q: Do I need to move furniture out of the room before refinishing the hardwood floor?
A: Moving all furniture out of the room before refinishing the hardwood floor is best. This will give you more space to work and protect your furniture from dust and debris.
Q: Can I refinish a hardwood floor that has been painted?
A: Yes, you can refinish a hardwood floor that has been painted. You will need to sand off the paint before you can apply the sealant and finish.
Q: How often do I need to refinish my hardwood floor?
A: It depends on the amount of use and traffic your floor gets, but generally, hardwood floors should be refinished every 7-10 years.
Q: Can I refinish a hardwood floor without sanding?
A: No, sanding is a necessary step in the refinishing process. It removes the old finish and smooths out the surface of the floor so that the new finish can be applied evenly.