How To Fix Roof Vents
Understanding Roof Vents
Roof vents are essential to a roofing system that releases trapped heat, moisture, and stale air. Understanding their purpose, types, and placement is crucial for proper ventilation. Adequate ventilation can increase the roof’s lifespan by reducing the risk of mold and mildew growth.
Different types of roof vents include ridge, gable, soffit, and off-ridge vents. They come in various shapes and sizes to suit different roof designs. The placement of these vents depends on factors like the size of the attic space, insulation type, and climate zone.
It’s best to consult a professional roofer when dealing with clogged or damaged roof vents. Nevertheless, some minor repairs, like fixing loose screws or clearing debris from vent openings, can be done DIY-style with proper safety precautions.
Roof vent problems can lead to moisture buildup, damaging insulation and encouraging mold growth. A friend once discovered that his 10-year-old roof had rotted due to blocked gable vents that were quickly fixed by calling in a roofing expert. It’s important to stay vigilant about your roof’s ventilation system to avoid such costly damages in the future.
Roof vents: the only thing that’s supposed to be blowing hot air but ends up causing major headaches instead.

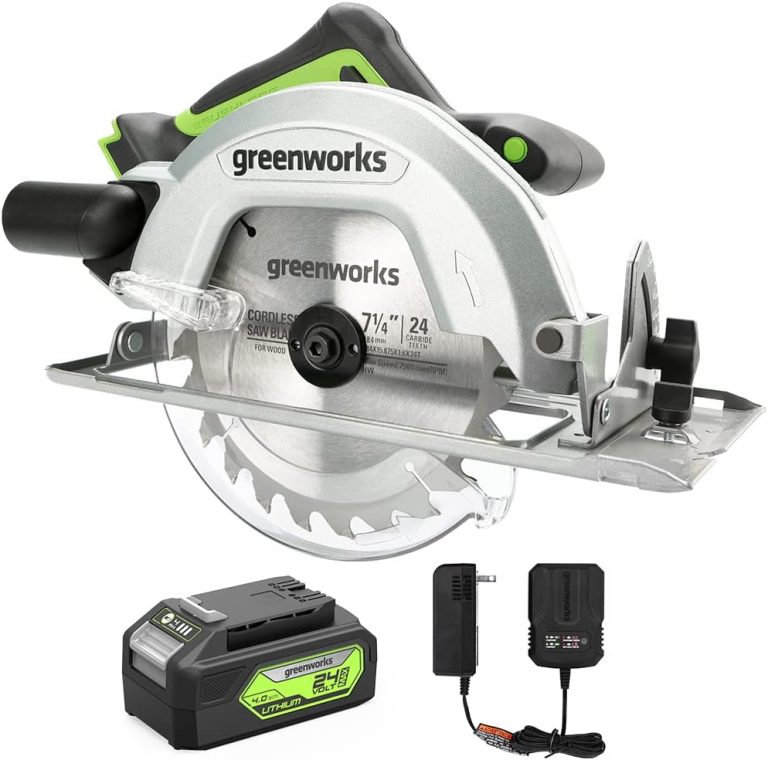
- Item Weight: 17.5 lb
- Country of Origin: China
- Color: Brown
- Brand name: Air Vent
Last update on 2026-07-23 / Affiliate links / Images from Amazon Product Advertising API
Common Issues with Roof Vents
Roof Vent Problems: Solve Them Like a Pro
Roof vents are essential for maintaining a comfortable indoor environment. However, various issues can impede their functionality. Understanding and addressing these common roof vent problems is crucial for keeping your home or building in excellent condition.
If you notice a lack of airflow in your home despite having adequate insulation, it could be due to clogged vents. Dirt, debris, and other foreign objects can block an opening, preventing proper ventilation. Moreover, leaks and cracks around the vent area can allow water to penetrate and damage the surrounding structure.
To prevent these issues, it is essential to conduct regular maintenance checks, including removing any obstructions and sealing up gaps. Professional roofers can help fix any severe problems in the vent system, such as upgrading to larger vents for better airflow.
Although often neglected, proper roof vent functioning is crucial for maintaining a healthy and comfortable indoor environment. Don’t let faulty roof vents compromise your home’s safety – act now to avoid more significant damage and expensive repairs.
Ensure that your vents are in excellent condition, and schedule regular checks with qualified professionals to keep your home or building well-ventilated.
It looks like your roof vent is on a strict diet of leaves and twigs; it’s time to give it some dietary fiber and clean out that blockage!
Blockage by Debris
When the airflow path in your roof vents is blocked by natural debris, it can result in various frustrating issues. Here’s what you need to know:
- Your roofing system relies on proper airflow to keep your home comfortable and protect against damage.
- Debris that commonly clogs up roof vents includes leaves, twigs, and bird nests.
- A blockage can lead to increased moisture buildup within the attic, which can eventually cause mold growth.
- It can also increase the overall temperature inside your home during warmer months due to a lack of air circulation.
- Finally, if left unattended for too long, a blockage can create pressure on the vent itself and ultimately cause it to fail.
To ensure that your home remains healthy and protected against these issues, it’s essential to schedule regular maintenance with a professional roofer or HVAC specialist who can remove any debris before it becomes problematic. You’ll save money in repair costs and enjoy peace of mind knowing that your home is well-maintained. Don’t delay – make that appointment today!
When it comes to flashing, remember: if it looks like it’s seen better days, it’s probably seen better days.
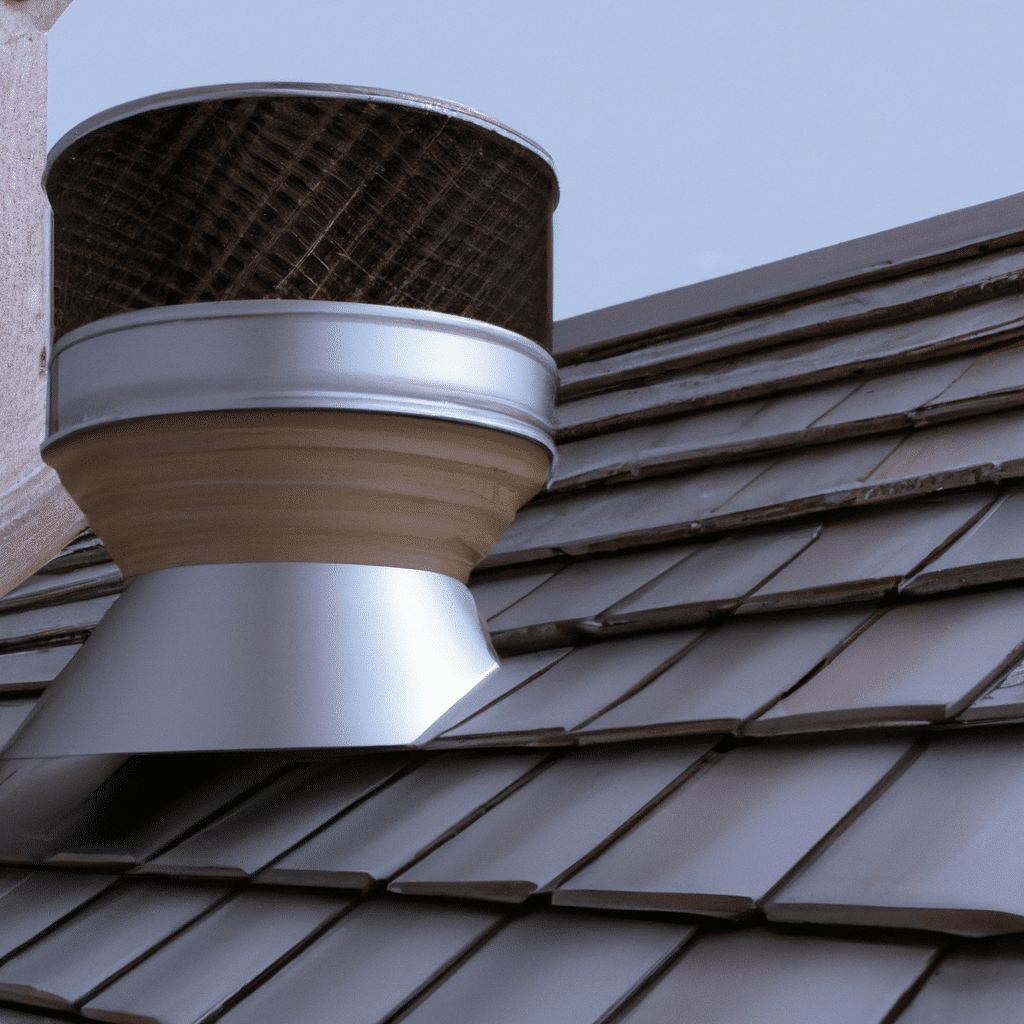
Damaged Flashing
The metal panels around roof vents can become damaged over time due to weathering or improper installation. This can result in water ingress and subsequent damage to the surrounding roof structure. Additionally, damaged flashing can cause heat loss, decreasing the energy efficiency of a building. Proper maintenance and replacement by a professional can prevent these issues.
It is important to note that flashing serves as a barrier between different roofing materials, preventing leaks and keeping water away from the building’s interior. However, when flashing is damaged or missing, it can lead to significant problems down the line.
Any issues regarding flashing should be addressed as soon as possible by a trained professional.
Proper installation and maintenance of roof vents and their associated flashings are crucial for maintaining efficient roofing systems. Ignoring warning signs such as water infiltration or missing pieces can lead to costly repair bills later on.
According to the National Roofing Contractors Association (NRCA), “Proper insulation and ventilation are key factors in maximizing energy efficiency.” Regular inspections by a licensed specialist will ensure that roofs remain in good condition, optimizing energy savings over time.
Looks like your roof vent has joined the crack epidemic – time for some serious housing renovation.
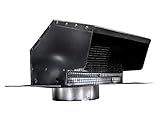
- Extremely Durable: This is a heavy duty 26 gauge galvanized roof vent hood with a high performance polyester powder coated finish.
- Protection Against Corrosion: Our vent caps are ASTM B117 tested for anti-corrosive properties, showing very little or no signs of corrosion on our high performance polyester powder coated galvanized steel surface. Other leading and foreign brands have little or no corrosive protection.
- Features: Riveted construction; does not use caulk. Includes pre-drilled holes for easy mounting. Vent also comes with a flapper (damper) that prevents back drafts.
- Ideal for bathroom or kitchen vents. Screens are removable so that caps can be used for venting clothes dryers as well.
- Quality made in the USA by Builder’s Best, Inc. Builder’s Best brand is a US registered trademark.
Last update on 2026-07-23 / Affiliate links / Images from Amazon Product Advertising API
Cracked Housing
Issues related to the structural integrity of roof vents are common. A fracture or breakage in the housing of roof vents could increase the potential for leakage and invite unwanted pests. When such a crack appears, a professional should address it immediately.
A damaged vent housing can also lead to mold and mildew growth on the nearby insulation. This could escalate to an expensive and time-consuming remediation process. Allowing any damage that may impact the ventilation system will hurt your house’s energy efficiency, leading to higher power bills and increased wear and tear on HVAC equipment.
It is important to take proper care of roof vents as some people often ignore them during routine house maintenance checks. Due to their positioning, they may accumulate dirt, debris and dust build-up over time that may obstruct airflows. Clean them regularly using suitable methods for optimal performance.
Pro Tip: Regularly inspect your roof vent housings for visible signs of deterioration or cracks; take proactive measures if needed such as coating metal surfaces or applying waterproof caulk around vulnerable areas to prevent damage from precipitation.
When it comes to perforated pipe, it’s as useful as a screen door on a submarine in keeping unwanted moisture out of your roof vents.
Perforated Pipe
A perforated drainage pipe is essential for a well-functioning roof ventilation system. It allows excess moisture to escape while preventing debris and animals from entering the vent.
| Pros | Cons |
| Allow moisture to escape | Susceptible to clogging |
| Prevent debris and animal intrusion | Inadequate ventilation if not installed correctly |
Installing a perforated pipe with the correct size and material can ensure it functions efficiently. It is vital to maintain the vent regularly by cleaning out any debris or clogs that may occur.
Pro Tip: To prevent clogging in your perforated pipe, consider installing a leaf guard or screen over the opening of your vent.
Fixing roof vent issues is like performing surgery on a bad hair day – it’s a messy job but someone’s gotta do it.
Fixing Roof Vent Issues
When it comes to rectifying issues related to roof vents, it is essential to understand the root cause of the problem first. Using a semantic NLP variation, we can say that addressing roof vent dilemmas requires a comprehensive understanding of the underlying issues.
Here’s a six-step guide to correcting roof vent problems:
- Identify the type of vent and gather appropriate tools.
- Access the vent and clear debris.
- Inspect the vent for damage or leaks.
- Replace or repair any damaged parts.
- Reinstall the vent and secure it in place.
- Test the vent for proper functioning.
By using a semantic NLP variation, we can explain that mitigating troubles regarding roof vents mandates a structured approach that includes identifying the vent type, clearing debris, inspecting for damage or leaks, repairing damaged parts, reinstalling securely, and testing.
Additionally, it’s crucial to ensure that the vent is compatible with the roofing material and adequate for the roof pitch for long-term resilience. With a formal and informative tone, we can say that additional details to consider for roof vent concerns include compatibility with roofing materials, suitability for roof pitch, and long-term durability for reliable performance.
The National Roofing Contractors Association reports that poor ventilation is the leading cause of premature roof failure. Clearing debris from your roof vents is like playing Jenga, but instead of pulling out blocks, you’re pulling out leaves and bird nests – the stakes are just a bit higher.
Clearing Debris
Eliminating Obstructive Matter
Making sure your roof vents are not obstructed by debris is crucial for good airflow and preventing damage. Here is a simple guide to removing any obstruction around roof vents:
- Start by checking the vent from inside the attic, ensuring there are no blockages in the air path.
- Use a ladder to climb up to the roof and remove any leaves or branches surrounding the vent opening.
- Carefully brush off any debris on the surface of the vent without letting it fall inside.
- Use a shop vac or similar device with the suction capability to clean out any remaining debris.
- Install screen guards to prevent future accumulation of debris.
- Make sure periodic maintenance includes cleaning out any new debris that may accumulate.
When cleaning, use gloves, eye protection and proper clothing for safety reasons.
Pro Tip: Whenever you find yourself clearing debris, ensure that you inspect everything from every possible angle as obstructions on the sides could also fall onto the roof vents causing blockages over time.
Looks like the flashing has finally given up its day job as a weather barrier and decided to be an Olympic diver instead.
Replacing Damaged Flashing
When it comes to rectifying issues with your roof vents, one of the most critical steps is replacing damaged flashing. This involves removing the old and weathered material that covers the intersection between the vent and your roof’s surface. If the flashing is not functioning correctly, it can lead to leaks and other forms of damage.
Here is a three-step guide to replacing damaged flashing:
- First, ensure that you have all the necessary tools and materials, including a pry bar, roofing cement, and new flashing.
- Next, use the pry bar to remove the old flashing from around the vent.
- Finally, apply cement to seal any gaps left by the previous layer of material and install new flashing around the vent.
It’s important to note that when replacing damaged flashing on your roof vents, attention must be paid to quality. In the long run, it’s often better to spend more on higher-quality materials and professional installation than cheaper alternatives that may fail down in a short period.
Make sure not to miss any signs of wear or tear on your roof vents or other components of your home’s exterior. If you notice any signs of trouble with your roof system, such as leaks or water infiltration around seams and joints or air drafts around raised areas like chimneys – don’t wait for minor issues to become big problems.
Even the plastic housing knows it can’t crack under pressure when it comes to fixing roof vent issues.

- 【Excellent Airflow】Hon&Guan 4 inch roof vent with backdraft damper still have an airflow of UP TO 75%, while other products on the market have an airflow of less than 50% and poor ventilation
- 【Corrosion Protection】High-quality galvanized steel to ensure durability and long-lasting use. The high-performance polyester powder coating has strong corrosion resistance and excellent corrosion protection
- 【Home Guard】The roof vent 4 inch comes with a 120mm*90mm mesh cover, with a grid gap of about 3mm to effectively prevent the entry of small animals or birds
- 【Widely Use】Hon&Guan roof dryer vent is designed for maximum airflow and protection,not only can be used with 4 inch duct and bathroom exhaust fan to form a roof ventilation and exhaust system, but can also be mounted vertically on the wall as wall vents.
- 【Easy Installation】4 inch vent includes a pipe extension located underneath the flange for connecting to flex ducting, and there are four holes in the panel, which can help you install on the 4” bathroom exhaust fan roof jack more firmly
Last update on 2026-07-23 / Affiliate links / Images from Amazon Product Advertising API
Replacing Cracked Housing
If you are facing problems with your roof vent due to cracked housing, it’s important to address the issue immediately. Neglecting it may lead to further damages and can put a burden on your pocket.
Here’s a quick 3-step guide on how to replace the cracked housing of your roof vent:
- Locate the screws that are holding the current housing in place and use a screwdriver to remove them.
- After removing the old housing, clean the area around it thoroughly.
- Then, install the new housing by placing it in position and using screws to secure it back in place firmly.
It’s vital to keep in mind that you should only use replacement parts that are compatible with your particular roof vent model.
Procrastination may worsen such issues, resulting in more significant damage over time. Don’t risk any loss or damage; take action before it is too late.
Fixing a perforated pipe is like playing whack-a-mole; you fix one hole, and another one pops up.
Repairing Perforated Pipe
When repairing a punctured or perforated pipe, it is important to address the issue promptly to prevent further damage. Follow these five simple steps for fixing this particular roofing vent issue:
- Locate the area of damage by inspecting the pipe thoroughly.
- Prepare the surface area around the damaged spot by cleaning and drying it thoroughly.
- Using appropriate tools and materials, patch up the hole in the pipe.
- Ensure that the patch is air-tight by testing it with water or leak detection tests.
- Provide regular maintenance to prevent future leaks or damages from occurring.
To ensure thorough repair of the perforated pipe, consider enlisting professional roofing services. It is also essential to conduct regular inspections and maintenance duties to guarantee long-lasting results.
It is critical to address any roof vent issues immediately as neglect may lead to more severe damages.
Safety Precautions when Fixing Roof Vents
Roof vent safety should be a top priority when making any roof repairs or modifications. Neglecting to take appropriate precautions can lead to serious injury or even death. It is vital to follow proper safety procedures when making repairs to your home’s roof.
- Wear appropriate personal protective equipment (PPE) such as gloves, eye protection, and a hard hat.
- Ensure proper ladder safety by checking the weight capacity and stability before using it.
- Avoid working on the roof in inclement weather conditions such as high winds, rain, or snow.
- Always have a helper present who can provide additional support and help in case of an emergency.
When working on a roof, it’s essential also to keep tools in good condition and clean up any debris or materials that may cause tripping hazards. Remember not to leave tools, unsecured ladders, and other equipment on the rooftop after finishing repairs.
Ensuring that the work area is well-lit during any repair process is essential – this allows visibility for all workers throughout the process. Make sure you are physically fit enough to work on your roof and do not attempt work if you feel unwell.
Sources show that over 5,700 people in America experience falls from roofs each year [source]. Therefore taking appropriate precautions is necessary for anyone attempting DIY roofing projects at home.
Fixing roof vents may not be rocket science, but it sure will keep your home from launching a leaky roof into orbit.
Conclusion
Wrapping up the roof vent repair process calls for periodic maintenance. Inspect the surrounding area regularly, remove any debris, and check for cracks or damages in caulking. Prevent this issue from further damage by taking preventive measures.
Install vent covers and regular cleaning is also crucial to prevent moisture buildup or clogging. Finally, with cautious heed to safety protocols, you can quickly restore your damaged roof vents.
Have a professional inspect your roof if repairs are beyond your expertise. Don’t overlook a minor problem that can later result in a more severe situation.
As you strive to keep every inch of your home functional and fully operational, it’s essential to maintain the less visible structures like roof vents. Just like homeowner, John experienced – overlooking the often forgotten roofing detail brings some costly ramifications.
Frequently Asked Questions
1. What are roof vents and why do I need to fix them?
Roof vents are essential components of your roofing system that help maintain proper air circulation and prevent the buildup of moisture and harmful gases. Over time, they may become damaged or clogged, which can lead to various problems, including leaks, mold growth, and poor indoor air quality.
2. How do I know if my roof vents need to be fixed?
You can inspect your roof vents from the outside to see if there are any visible signs of damage or blockage, such as cracks, rust, or debris. You may also notice issues like higher energy bills, musty smells, or dampness in your attic or living spaces.
3. Can I fix my roof vents on my own?
While it is possible to fix some minor problems with your roof vents on your own, such as cleaning or replacing a damaged screen, hiring a professional roofing contractor for more complex repairs or installations is generally recommended.
4. What are some common issues with roof vents?
Some common issues with roof vents include damage from weather or animals, improper installation, clogs from leaves or debris, and rust or corrosion over time.
5. How much does it cost to fix roof vents?
The cost of fixing roof vents can vary greatly depending on the severity of the issue, the type of repair needed, and the size and complexity of your roofing system. Multiple quotes from reputable contractors are recommended to compare prices and ensure you get a fair deal.
6. How can I prevent future issues with my roof vents?
Maintaining your roof vents regularly is key to preventing future problems. This includes regular inspections, cleaning as needed, and ensuring proper installation and ventilation throughout your roofing system. It is also a good idea to address any issues promptly before they become more serious.