Fix Cabinet Doors: Easy DIY Solutions
Cabinet doors are an essential part of any cabinet, and they can become loose or misaligned over time due to wear and tear. The most common cause of cabinet door problems is faulty hinges, which can be fixed by tightening or replacing them.
There are two types of cabinet hinges: face frame hinges and frameless hinges, and the method of fixing them may vary depending on the type of hinge used.
To fix cabinet doors, you need first to identify the problem. If your cabinet doors are loose, the screws holding the hinges in place have likely become loose over time.
To fix this issue, tighten the screws using a screwdriver.
If your cabinet doors are misaligned, you may need to adjust the hinges themselves. This can be done by loosening the screws on the hinge and adjusting its position until the door is aligned properly. Once you’ve made these adjustments, tighten up all screws again.
If your cabinet doors are not closing properly or rubbing against each other when closed, then it’s likely that your cabinets’ drawers or shelves have shifted out of alignment. You can realign them by adjusting their positions until they sit correctly in their tracks.
When fixing kitchen cabinet doors with face frame hinges, make sure to remove all hardware before making any adjustments, as this will make it easier for you to work with them. On the other hand, if your cabinets use frameless hinges, then you don’t need to remove any hardware before making adjustments.
If you’re unsure about how to fix your cabinet doors yourself or if there’s damage beyond what we’ve discussed here like chipped MDF Cabinet Doors – there are many resources available online such as Wikihow website which offers step-by-step instructions and video tutorials on how to fix them.
Common Problems with Cabinet Doors
Cabinet doors are often the first thing people notice when they enter a kitchen or bathroom. They play an important role in keeping your cabinets organized and clean, but they can also be a source of frustration if they don’t work properly. In this section, we will discuss some common problems with cabinet doors and how to fix them.
Cabinet Doors That Won’t Close Properly
If you have cabinet doors that won’t close properly, there could be several reasons why. One common reason is that the hinges are loose or worn out. This can cause the door to sag or not line up correctly with the cabinet box. To fix this problem, you may need to tighten or replace the hinges.
Another reason why cabinet doors might not close properly is that the screws holding the hinges in place have come loose. If this is the case, you can try tightening them with a screwdriver. If that doesn’t work, you may need to replace the screws with longer ones.
Cabinet Doors That Won’t Stay Closed
If your cabinet doors won’t stay closed, it’s likely because the latch isn’t working correctly. The latch is what keeps the door closed when it’s shut. If it’s not working properly, it could be because it’s dirty or worn out.
To fix this problem, you’ll need to remove the latch from the door and clean it thoroughly with soap and water. You should also check for any signs of wear and tear on the latch itself. If it looks damaged or broken, you may need to replace it.
- Set I includes: 2 x 30″ Upper storage cabinet, 2 x 3-Drawer base cabinet & 2 x 30″ Large storage cabinet
- Set I Total product weight: 570 lbs.; 58 cubic feet; satin nickel finished handles; Light Gray laminate finish
- Tools required for installation: drill, stud finder, level and tape measure
- Constructed from carb-2 compliant, laminated composite woods with a Sturdy MDF backer; ships ready to assemble and includes an instruction booklet for easy assembly
- Manufactured in Canada and meets all North American safety standards; 5-year Manufacturer’s limited on parts
Last update on 2026-07-23 / Affiliate links / Images from Amazon Product Advertising API
Cabinet Doors That Are Misaligned
Misaligned cabinet doors can be frustrating because they make your cabinets look uneven and unprofessional. There are several reasons why this might happen, including loose hinges or warped cabinet boxes.
To fix misaligned cabinet doors caused by loose hinges, you’ll need to adjust them so that they line up correctly with the cabinet box. This may involve loosening the screws on the hinges and moving them slightly until they’re in the right position.
If your cabinet boxes are warped, you may need to replace them entirely. This can be a more expensive and time-consuming process, but it’s often necessary if you want your cabinets to look their best.
Cabinet Doors That Are Loose or Wobbly
Finally, if your cabinet doors are loose or wobbly, it’s likely because the screws holding them in place have come loose. To fix this problem, you’ll need to tighten the screws with a screwdriver.
If tightening the screws doesn’t work, you may need to replace them with longer ones. You should also check for any signs of damage or wear on the hinges themselves. If they look damaged or worn out, you may need to replace them as well.
Step-by-Step Guide: Repairing a Pulled-Off Cabinet Door
Remove the Drawer to Access the Back of the Door
The first step in repairing a pulled-off cabinet door is to remove the drawer from the cabinet. This will give you access to the back of the door, where you can see what caused it to come off in the first place. Once you have removed the drawer, examine the hinges on both sides of the cabinet and check for any damage or wear and tear. If there are no visible issues with the hinges, move on to removing any remaining screws from the closing edge of the door.
Use a Screwdriver to Remove the Remaining Screws
Using a screwdriver, carefully remove any remaining screws from the closing edge of the door. Be sure not to strip or damage them as you do so. Once all screws are removed, place them aside in a safe place where they won’t get lost or mixed up with other hardware.
Insert Wood Glue into Screw Holes and Reattach Screws Counterclockwise
Next, it’s time to reattach your cabinet door using wood glue and screws. Start by placing your door back in its original position and insert wood glue into each screw hole using a toothpick or small brush. Then, reattach each screw counterclockwise into its corresponding hole until they are snug but not over-tightened. Finally, wipe away any excess glue that may have seeped out during this process.
Allow Glue to Dry Completely Before Reattaching Drawer
Once you’ve reattached all screws and wiped away excess glue, allow your newly repaired cabinet door ample time to dry completely before reattaching your drawer and testing its stability. Depending on how much wood glue was used during this process, it may take anywhere from several hours to overnight for it to set properly.
Solution 1: Adjust Depth and Side Screws for Proper Alignment
Adjusting the Depth and Side Screws for Proper Alignment
Adjusting the depth screw is an easy solution to fix cabinet doors that are too far in or out. The depth screw is located on the hinge, and it controls how far the door sits inside or outside of the frame. To adjust this screw, use a Phillips head screwdriver to turn it clockwise or counterclockwise until you achieve the desired alignment.
If your cabinet door is too close to the center, you can turn the side screw counterclockwise to fix it. Alternatively, turning the side screw clockwise can fix doors that are too close to the right side. The side screws are located on each hinge and control how much space there is between the door and frame on either side.
Another solution for misaligned cabinet doors is adjusting the bottom screw. If your door is too high or low, you can use a Phillips head screwdriver to turn this screw until it aligns with other doors in your cabinetry set. This adjustment can be made by turning it clockwise or counterclockwise until you reach your desired height.
Creating space between the door and frame can be achieved by adjusting the depth screw. This will help prevent damage caused by rubbing against each other when opening and closing cabinets frequently. It’s important not to over-tighten any of these screws as this could cause further damage.
Solution 2: Replacing Broken Hinges and Handles
New Hinges: A Solution to Fix Cabinet Door Problems
Replacing broken hinges and handles is a great solution. New hinges can provide the necessary support and stability that your cabinet doors need. However, before you start replacing your old hinges with new ones, it’s important to understand the different types of door hinges available in the market.
Door Hinges Come in Different Types
Various types of door hinges are available, including European hinges, butt hinges, pivot hinges, and concealed hinges. European hinges are commonly used in modern kitchens as they offer a sleek look and allow for full access to the inside of the cabinet.
Butt hinges are more traditional and visible on the outside of cabinets. Pivot hinges are best suited for heavy or oversized doors while concealed hinges are hidden from view when the door is closed.
Replacing Hinges Involves Removing Old Ones
To replace your old hinge with a new one, you will first need to remove the old hinge from your cabinet door. This involves unscrewing any screws that attach the hinge plate to both your cabinet frame and door. Once you have removed all screws holding your old hinge in place, you can then install your new hinge by attaching it to both the frame and door using screws.
Using the Correct Size of Hinge Screw Is Important
It’s important that you use screws with the correct size when installing new hardware onto your kitchen cabinets. Using a screw that is too long may cause damage to your cabinet while using one that is too short may not hold up well over time.
European Hinges Require Drilling New Holes
If you’re installing European-style hinges onto your kitchen cabinets, keep in mind that this requires drilling new holes into both the frame and door of each cabinet. You will also need to attach a bracket to the inside face of each cabinet door so that it aligns properly with its corresponding hinge joint.
Solution 3: Adjusting Cabinet Door Springs
Adjusting Cabinet Door Springs: A Solution to Doors That Won’t Stay Closed
If you’re tired of your cabinet doors swinging open on their own, adjusting the cabinet door springs might be your solution. This simple fix can help increase or decrease tension in the hinges, allowing doors to close more tightly or softly, depending on your preference. Here’s how to adjust cabinet door springs and get those doors back in working order.
Locating and Adjusting the Screws
The first step in adjusting cabinet door springs is to locate the screws on the hinge. These screws are usually located near the base of the hinge and can be turned clockwise or counterclockwise with a screwdriver. Turning them clockwise will increase tension and make the door close more tightly while turning them counterclockwise will decrease tension and make the door close more softly.

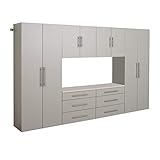
- Add storage to your unused wall space with the Systembuild Evolution Kendall 54″ Wall Cabinet.
- Made of laminated MDF and particleboard, the water resistant white finish can easily be wiped clean with a damp cloth.
- Two shelves, 1 adjustable, behind the 3 doors provides optimal storage for cleaning supplies, office supplies, or crafting tools. EZ Hang system gives you a level and sturdy hang on the first try. Soft closing hinges prevent slamming doors.
- Complete your room with the entire Kendall collection (each sold separately).
- The Wall Cabinet ships flat to your door and 2 adults are recommended to assemble. Each shelf will hold up to 30 lbs. Assembled dimensions: 20.3125″H x 54″W x 12.4375″D.
Last update on 2026-07-23 / Affiliate links / Images from Amazon Product Advertising API
It’s important to make small adjustments when turning these screws, as over-tightening or loosening can cause further issues with your cabinets. After each adjustment, test the door to see if it closes properly. If not, continue making small adjustments until you find the right tension for your needs.
Depth Adjustment for Realignment
Sometimes adjusting cabinet door springs isn’t enough to fix doors that won’t stay closed. In these cases, a depth adjustment may be necessary to realign doors with their frames. To do this, locate the screws that hold the hinge plate onto the frame and loosen them slightly with a screwdriver.
Once these screws are loosened, use a hammer or mallet to gently tap on either side of the frame until it lines up evenly with the door. Then tighten up all screws again and test out whether this has fixed any alignment issues.
When Adjusting Isn’t Enough
While adjusting cabinet door springs is often an effective solution for fixing doors that won’t stay closed, there may be instances where it doesn’t solve all problems. In some cases, replacing the hinges altogether may be necessary to ensure proper function. It’s also important to note that if you’re not comfortable making these adjustments yourself, seeking professional help is always an option.
Fix Squeaky Cabinet Doors
Tighten Screws on Hinges
Squeaky cabinet doors can be a huge annoyance, especially if you’re someone who’s sensitive to sound. The good news is that fixing the issue is usually easy and doesn’t require any special skills or tools.
Most of the time, squeaks are caused by loose hinges or worn-out screws. Start by tightening all the screws on the hinges using a screwdriver to fix this.
If you’re not sure which screws to tighten, try opening and closing the door while listening for where the noise is coming from. Once you’ve identified the source of the squeak, use your screwdriver to tighten those screws until they’re snug. This should help reduce or eliminate the noise.
Replace Stripped or Damaged Screws
Sometimes, even after tightening all of the screws on your cabinet door’s hinges, it may still squeak when opened or closed. If this happens, it could be because some of the screws are stripped or damaged. In this case, replacing them with longer or thicker screws can help solve the problem.
To do this, remove one of the problematic screws from its hinge and take it with you to a hardware store so that you can find a replacement that matches its size and threading. Once you have new screws in hand, use your screwdriver to remove each old screw and replace it with a new one.
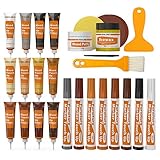
- KIT INCLUDES our most powerful wood repair compounds, so you can repair all levels of damage to wood furniture by yourself. Includes 12 touch up fillers, 8 touch up markers, 1 wood putty, 1 beewax, 2 brushes, 2 sandpaper, 1 sponge and 1 scraper
- RESTORE ALL KINDS OF DAMAGES such as scratches, chips, cracks, holes and discoloration on wooden floors, doors and furniture like desks, chairs, beds, wardrobes, bookcases, cabinets, wooden crafts and many more
- EASY TO USE: Apply the filler into the cracks, and then smooth the surface with scraper. The markers can be used to touch up the superficial scratches or to draw wood grain
- UNIQUE COLORS: The touch up fillers are available in 12 colors: White, Black, Light Gray, White Maple, Yellow Maple, Deep Pine, Earthy Yellow, Yellow Teak, Red Cherry, Cedar, Dalbergia, Walnut. The touch up markers come in 8 colors: White, Gray, Oak, Maple, Cherry, Walnut, Mahogany, Black
- Tips for mixing colors: You can mix the desired wood filler color according to the color chart. When mixing colors, first add the lighter repair filler, then gradually add the darker wood repair filler, observing the color changes until you achieve the desired shade
Last update on 2026-07-23 / Affiliate links / Images from Amazon Product Advertising API
Fill Screw Holes with Wood Filler
If tightening existing screws and replacing them doesn’t work, then your cabinet door’s hinges may be loose because their screw holes have become stripped over time. In this case, removing them completely and filling in these holes with wood filler before reattaching them can help restore stability to your cabinet doors.
To do this effectively:
- Remove all of your cabinet door’s hinges.
- Use a putty knife to apply wood filler into each hole where a hinge was attached.
- Let these areas dry completely before sanding them down.
- Once the filler is sanded smooth, reattach the hinges using new screws.
Lubricate Hinges with Silicone Spray
Another way to fix squeaky cabinet doors is to lubricate their hinges with silicone spray. This can help reduce friction between the metal parts of your cabinet’s hinge system and make it easier for your door to move smoothly.
To do this, open your cabinet door and spray a small amount of silicone spray onto each hinge. Then, open and close the door a few times to work in the lubricant. Avoiding too much spray is important, as excess liquid can cause more problems than it solves.
Replace Hinges Altogether
If none of these methods work, then it may be time to replace your cabinet door’s hinges altogether. While this may seem like an intimidating task, it’s actually quite simple if you have some basic tools and DIY experience.
To replace a hinge:
- Remove all screws holding the old hinge in place.
- Hold the new hinge up against where you want it installed.
- Use a pencil or marker to trace around its edges on both sides of the cabinet.
- Use a chisel or screwdriver to remove any wood that’s in this area so that the new hinge can fit flush against its surface.
- Attach new screws into place on both sides of each hinge so that they’re secure.
Tips for Fixing Loose Cabinet Doors Yourself
Tighten the Screws
The first step in fixing loose cabinet doors is to check if the screws holding the door are loose. If they are, you can easily tighten them using a screwdriver. However, if the screws have become stripped or damaged, you may need to replace them with new ones.
To tighten the screws on your cabinet door, open the door and locate the screws on the hinges. Use a screwdriver to turn each screw clockwise until it is snugly in place. Be careful not to overtighten as this could cause damage to both the hinge and door.
If tightening the screws does not solve your problem, move on to our next tip.
Use Wood Glue
If your cabinet door is still loose after tightening all of its screws, applying a small amount of wood glue can help fix it. First, remove any old glue or debris from around the joints of your cabinet door using sandpaper or a scraper.
Next, apply a small amount of wood glue onto one of the surfaces that will be joined together. Then clamp both sides together tightly for at least an hour while allowing ample time for drying. Once dry, remove any excess glue with a scraper or sandpaper.
Replace Hinges
If neither tightening nor gluing works for your loose cabinet doors, it may be time to replace their hinges altogether. This may sound daunting but changing out hinges is actually quite simple and only requires basic tools like a drill and screwdriver.
Start by removing all of the screws holding your current hinges in place using a screwdriver. Then take off each hinge carefully to avoid damaging either side of your cabinet’s frame or door surface area.
Once removed, line up new hinges with their corresponding holes and use a drill bit slightly smaller than each hole size before attaching them securely using new screws provided with purchase.
Adjust Hinges
Sometimes even properly installed hinges need adjustment due to cabinet construction variances or natural wear and tear. Locate the screws on each hinge to adjust hinges and loosen them by turning counterclockwise.
Next, move the door up or down to align it properly with its frame. Then retighten screws in a clockwise direction until snugly in place.
Use a Magnetic Catch
If your cabinet door still won’t stay closed after all of these fixes, consider installing a magnetic catch. A magnetic catch is an inexpensive device that uses magnets to keep your cabinet doors securely closed.
To install a magnetic catch, start by measuring where you want it placed on your cabinet door before drilling holes using a drill bit slightly smaller than the provided screws’ diameter. Then attach each part of the magnetic catch using screws provided with purchase.
DIY Repairs for Loose Screws and Worn-Out Wood
Tightening or Replacing Loose Screws
Loose screws can be a frustrating issue to deal with, but fortunately, they’re relatively easy to fix. The first step is to determine if the screw is simply loose or if it’s stripped. If it’s just loose, you can usually tighten it up by turning it clockwise with a screwdriver.
If the screw won’t tighten, you may need to replace it with a new one. In some cases, you may be able to use a longer screw that will grip into fresh wood and hold more securely. Just make sure that the new screw is the same diameter as the old one so that it fits in the existing hole.
Filling Screw Holes in Worn-Out Wood
Over time, screws can wear out the wood around them, causing them to become loose and wobbly. Fortunately, there are several ways to repair this issue and restore your furniture or cabinets’ stability.
One option is to fill in the screw holes with wood glue or epoxy and let them dry before re-screwing. This method works best for small holes where the wood hasn’t been completely worn away.
Another option is using toothpicks soaked in glue or epoxy to fill larger holes before re-screwing. To do this, break off pieces of toothpick and insert them into the hole until it’s filled up. Then apply glue or epoxy over top of everything and wait for it to dry before re-screwing.
Temporary Fixes Using Duct Tape
Sometimes you need a quick fix while waiting for glue or epoxy to dry properly. In these cases, duct tape can be used as a temporary solution until you have time for a more permanent repair.
For example, if part of your cabinet door has come apart at a joint due to worn-out screws, you can apply duct tape on both sides of the joint while holding everything together tightly until the glue dries. This will help keep the joint in place until you can do a more thorough repair.
Covering Up Scratches
Scratches on wood furniture or cabinets can be unsightly, but they’re also relatively easy to fix. If the scratch is shallow, you can often cover it up with paint or filler to make it look like new.
To do this, apply a small amount of paint or filler over the scratch and smooth it out with a putty knife. Allow it to dry completely before sanding down any rough spots and applying another coat if necessary.
How to Keep Cabinet Doors Closed: Diagnose the Problem
Check the Hinges: Tighten Loose Screws or Replace Worn-Out Hinges
If your cabinet doors won’t stay closed, the first thing to check is the hinges. Over time, hinges can become loose or worn out, causing doors to sag or not close properly. To diagnose this problem, inspect the hinges and tighten any loose screws with a screwdriver. If that doesn’t solve the issue, you may need to replace the hinges altogether.
Replacing cabinet hinges is a straightforward process that requires only basic tools. First, remove the old hinge by unscrewing it from both the door and frame. Then, line up the new hinge with the existing holes and screw it in place. Make sure to use screws of an appropriate length and thickness for your specific cabinets.
In some cases, you may need to adjust the position of your new hinge slightly to ensure that it lines up correctly with both the door and frame. This can be done by loosening or tightening its screws until everything lines up perfectly.
Look for Obstructions: Remove Anything Blocking Door’s Path
Another common reason why cabinet doors won’t stay closed is that something inside is blocking their path. To fix this issue, simply open each cabinet door fully and look inside for any objects that might be getting in their way.
If you spot anything blocking a door’s path – like a misplaced dish or utensil – remove it immediately. Then try closing your cabinets again to see if they now shut properly.
Adjust The Catch: Tighten Or Loosen Its Screws Until It Holds The Door Securely
The catch is a small metal piece on your cabinet frame that holds each door in place when it’s closed. If this piece becomes misaligned or too loose over time, it won’t keep your doors shut as tightly as they should be.
To adjust your catch and make sure it’s holding your doors securely in place when closed, grab a screwdriver and tighten or loosen its screws as needed. This will allow you to fine-tune the tension on your catch until it’s holding each door just right.
Consider Magnetic Catches: Install Them To Help Keep Doors Closed
Consider installing magnetic catches if none of the above solutions work for your cabinet doors. These devices use magnets to hold doors in place when they’re closed, preventing them from swinging open accidentally.
Magnetic catches are easy to install and can be purchased at most hardware stores or online. Simply attach them to your cabinet frame and door using screws, ensuring they’re lined up correctly before tightening everything down.
Maintaining Your Cabinet Doors for Longevity
Now that you have successfully fixed your cabinet doors, it’s important to maintain them for longevity. Regular maintenance will prevent future problems and save you time and money in the long run.
One way to maintain your cabinet doors is by cleaning them regularly. Use a soft cloth and mild soap to clean the surface of the doors. Avoid harsh chemicals as they can damage the finish. Wipe off any excess water with a dry cloth.
Another way to keep your cabinet doors in good condition is by avoiding excessive force when opening and closing them. Slamming or pulling too hard on the handles can cause damage to the hinges or screws, leading to loose or misaligned doors.
It’s also important to check for loose screws periodically. Use a screwdriver to tighten any loose screws on the hinges or handles. Loose screws can cause misalignment, leading to further damage if not addressed promptly.
If you notice any signs of wear and tear, such as cracks or chips in the wood, address them immediately before they worsen. Sand down any rough spots and apply a fresh coat of paint or varnish as needed.
Finally, consider upgrading your cabinet hardware every few years. New handles and hinges can give your cabinets a fresh look while also ensuring they function properly.