How To Get Dents Out Of Wood Like An Expert
Minor dents on wood can be easily removed with simple techniques. Dents on wood can be unsightly and affect the overall appearance of furniture.
Fortunately, there are various methods to remove dents from wood, depending on the severity of the damage.
For small dents, try using a damp cloth and an iron. Place the damp cloth over the dent and use the iron to apply heat to the area for a few seconds at a time. The steam from the damp cloth will cause the wood fibers to expand and fill in the dent.
Another method is to use a combination of water and heat. Wet a clean cloth with water and place it over the dent. Use an iron set to medium heat to apply pressure onto the cloth for 10-20 seconds at a time. Repeat until you see improvement.
If these methods do not work, try using a hairdryer instead of an iron. Apply heat directly onto the dent until it expands, then use your fingers or a spoon to gently push it back into place.
Consider using wood filler or putty for larger dents or more severe ones. Sand down any rough edges around the dent before applying filler or putty with a putty knife. Allow it to dry completely before sanding it down again until smooth.
In some cases, you may need to resort to professional help if none of these methods work or if you are dealing with antique furniture that requires special care.
Removing minor dents from wood is easy with just a few household items and some elbow grease. With patience and persistence, you can restore your furniture’s appearance without spending too much money on repairs.
Always test any method in an inconspicuous area before attempting on visible areas, as some methods may cause discoloration or damage your furniture further.
Now that you know how to remove minor dents from wood using simple techniques like water, steam, heat application, and wood filler, you can easily restore your furniture’s appearance to its former glory.

- PREMIUM ROTARY TOOL KIT: Dremel rotary tool kit includes 4300 high performance rotary tool, 5 attachments, 40 high-quality Dremel accessories, and storage bag (may vary)
- HIGH PERFORMANCE MOTOR: This corded rotary tool features our most powerful motor for maximum performance even in the most demanding applications
- VARIABLE SPEED: Dremel tool kit with a rotary tool providing 5,000-35,000 RPM with electronic feedback for consistent performance and accurate tool control
- UNIVERSAL 3-JAW CHUCK: For Dremel tools, allows the use of all Dremel accessory shank sizes, making it compatible with the entire line of our high quality accessories
- PIVOT LIGHT: The pivot light attachment in this Dremel tool kit rotates to illuminate your projects even in hard-to-reach spaces
Last update on 2026-07-24 / Affiliate links / Images from Amazon Product Advertising API
Essential Tools for How To Get Dents Out of Wood
Heat Gun: Softening the Wood Fibers
A heat gun is an essential tool making them more pliable and easier to manipulate. Using a heat gun with caution is important, as it can be dangerous if not used properly. When using a heat gun, hold it at least six inches away from the surface of the wood and move it in a circular motion. This will help to distribute the heat evenly. Once the wood has been heated, use a rubber mallet to gently tap the dent back into place.
Damp Cloth: Protecting the Surface
When working with wood, it’s important to protect the surface from further damage. A damp cloth can be used to do just that. Before using any tools on your wooden surface, dampen a cloth with water and wring out any excess moisture. Place the damp cloth over the dent and apply pressure for several minutes. This will help to raise any compressed fibers in the surrounding area and prepare them for manipulation.
Rubber Mallet: Tapping Wood Back into Place
Once you’ve softened the wood fibers with a heat gun and protected your surface with a damp cloth, it’s time to start tapping your wooden surface back into place with a rubber mallet. Use gentle taps with your mallet until you see improvement in your wooden surface. If necessary, repeat these steps until your wooden surface is smooth again.
Family Handyman: How to Remove Dents in Wood
How to Apply Steam to Remove Dents in Wood
Using Steam to Remove Dents in Wood
Steaming wood is a technique that can be used to remove dents, scratches, and other imperfections from wooden surfaces. By applying steam directly to the affected area, the fibers of the wood are caused to swell and regain their original shape. This method is particularly effective for removing small dents and scratches on flat surfaces such as tabletops, cabinets, and floors.
Applying Steam Directly to the Dent
To use steam for dent removal, first, clean the surface of the wood with a soft cloth or brush. Then dampen a clean cloth or paper towel with water and place it directly over the dent.
Using an iron or steamer set to low heat, apply steam directly onto the damp cloth or paper towel. Hold this in place for several minutes until the wood is heated through.
As you apply steam, check periodically to ensure you are not damaging the surrounding area of the wood. Once you have applied enough heat for several minutes, remove the damp cloth or paper towel from over the dent.
Drying and Finishing
After steaming your wooden surface to remove dents, use a clean cloth to wipe away any excess moisture from around the affected area. Allow your wooden surface to dry completely before sanding or refinishing.
If there is still some visible damage after steaming your wooden surface, consider using fine-grit sandpaper to buff out any remaining imperfections gently. Be sure not to oversand or damage your wooden surface further.
Using an Iron to Remove Dents in Wood
A clothes iron is not just for pressing clothes; it can also be used to remove dents in wood. Whether it’s a dent on your wooden floor, table, or door, a hot iron can help make the dent less noticeable. Here are some tips on how to use an iron to remove dents in wood.
Firstly, get a damp cloth and place it over the dent. Then, turn on the clothes iron and set it to medium heat. Once the iron is heated up, place it on top of the damp cloth covering the dent. Leave it there for about 5-10 seconds before removing the iron. Repeat this process several times until you notice that the wood has started swelling up and filling out the dent.
It’s important to note that you should not touch the hot metal part of the iron directly onto the wood, as this could cause further damage. Always ensure that you have a damp cloth between the iron and wood surface.
The heat from the iron causes moisture in the damp cloth to transfer onto and penetrate into the wood fibers around the dented area. This results in swelling of these fibers, which then fills out and reduces the visibility of dents.
Remember that while using an iron effectively removes small dents, larger dents may require additional treatment, such as sanding or even replacing damaged boards. Using an iron works best when dealing with shallow dents rather than deep ones.

- Made of high-hardness chrome-molybdenum steel and high-speed steel for superior durability. Engineered for high torque output without expansion to prevent breaking or jamming
- All left hand drill bit set extractors are precision-engineered to easily remove seized or broken studs, bolts, socket screws, and fittings
- The aggressive left-hand design provides extra grip. Easy-out style spiral flutes embed themselves to increase grip as resistance increases
- Drill bit guide and long extractor pins for hard-to-reach and tight areas. Fit where others won’t and can’t
- The heavy-duty plastic blow-molded carrying case keeps the stripped screw extractors organized, with easy storage and carrying
Last update on 2026-07-25 / Affiliate links / Images from Amazon Product Advertising API
Step-by-Step Process for How To Get Dents Out Of Wood
Identify the Dent and Determine its Depth
Before you start removing dents from wood, it is important to identify the dent and determine its depth. This will help you decide which method to use for removing the dent. If the dent is shallow, you can use a simple method such as steaming or using a damp cloth. However, if the dent is deep, you may need to use more advanced techniques, such as sanding or filling.
To identify the dent, run your fingers over the surface of the wood. You should be able to feel any indentations or bumps on the surface. Once you have identified the dent, determine its depth by looking at it closely.
If it is a shallow dent, it will only affect the top layer of wood and won’t go too deep into it. On the other hand, if it is a deep dent, it will have penetrated deeper into the wood.
Apply Moisture to The Affected Area
Once you have identified and determined the depth of the dent in your wooden furniture or table, apply moisture to that area. This will help to expand and soften up fibers in that area so that they can be easily manipulated back into place.
To apply moisture, take a damp cloth and place it over the affected area for about 15 minutes. Alternatively, you can also spray water onto that area using a spray bottle until it becomes moist enough.
Use A Hot Iron Or A Heat Gun To Steam The Wood
After applying moisture to your wooden furniture or table’s affected area, use a hot iron or heat gun to steam up that particular spot on wood gently.
Place a wet towel over this spot on your wooden table or furniture piece before running an iron over that spot with medium pressure for several seconds until steam comes out from underneath; this process helps raise fibers back up into their original position without damaging them further.
If using a heat gun instead of an iron: hold heat gun about 2 inches away from the affected area and move it back and forth until steam comes out.
Sand The Area And Apply the Finish
After steaming your wooden furniture or table’s affected area, let it dry completely. Once dry, use a fine-grit sandpaper to sand down any rough edges or bumps that may have formed during the steaming process.
Before applying any finish, clean the surface of the wood thoroughly. You can use a damp cloth or a vacuum cleaner to remove any debris left behind by sanding. Then apply wood filler if necessary before finishing with paint or stain.
Watch Videos on How To Get Dents Out Of Wood
Effective Learning with Video Tutorials
Watching a video tutorial can be an effective way to learn the process. Various video tutorials are available online that provide step-by-step instructions on removing dents from wood. These videos offer clear visuals of the process, making it easier for learners to understand and follow along.
One benefit of video tutorials is that they allow you to pause, rewind, and replay specific parts of the process as many times as needed. This means you can take your time learning each step without feeling rushed or pressured.
Video tutorials often come with subtitles or captions, which can be helpful for those who have difficulty hearing or understanding spoken language.
Another advantage of using video tutorials is that they often include tips and tricks from experienced professionals. These experts have years of experience working with wood and have learned valuable techniques for removing dents without causing further damage.
Following their advice can avoid common mistakes and achieve better results.
Step-by-Step Instructions
Video tutorials typically provide step-by-step instructions on how to remove dents from wood.
Here are some general steps you might expect to see in a typical tutorial:
- Clean the area around the dent: Before starting any repairs, it’s important to thoroughly clean the surface around the dent. Use a soft cloth or sponge dipped in warm water and mild soap to gently wipe away any dirt or debris.
- Apply heat: Using a heat source such as an iron or hairdryer, apply heat directly to the dent for several minutes until it becomes pliable.
- Use compressed air: Once heated, use compressed air (such as a can of compressed air used for cleaning keyboards) to blow into the dent while pressing down on the surrounding area with a cloth-covered block of wood until it pops out.
- Sand and refinish: Once the dent is removed, sand the area with fine-grit sandpaper until it’s smooth. Then, apply a wood finish to match the surrounding area.
While these steps are general guidelines, different tutorials may offer variations on this process based on their specific techniques and tools used.
Avoiding Mistakes
One benefit of video tutorials is that they often provide tips for avoiding common mistakes when removing dents from wood. For example, some videos recommend using a soft cloth or sponge to clean the surface around the dent instead of abrasive materials that could cause further damage.
They might suggest testing any heat source on an inconspicuous area first to avoid burning or scorching the wood.
By following these tips and tricks, you can achieve better results when fixing and repairing dents in the wood. Video tutorials offer clear visuals and step-by-step instructions that make it easier to learn the process effectively.
With practice and patience, you can become skilled at removing dents from wood without causing further damage.
Build Direct: How to Remove Scratches and Dents from Hardwood Flooring
Fixing and Repairing Dents in Wood
Step-by-Step Guide for Fixing Wood Dents
Repairing wood dents can be intimidating, but with the right tools and techniques, it can be a straightforward task. Here is a step-by-step guide to help you fix those unsightly dents in your wooden furniture:
- Assess the damage: The first step is to determine the extent of the damage. If it’s just a small dent, you may be able to fix it with some basic tools and materials. However, if the dent is deep or has caused cracks in the wood, you may need to seek professional help.
- Gather your materials: To repair a small dent in the wood, you’ll need some sandpaper (220-grit), a damp cloth, and some wood filler. For larger dents or cracks, you may also need clamps and glue.
- Sand the area: Use sandpaper to smooth out any rough edges around the dent.
- Apply wood filler: Apply wood filler over the dent using a putty knife or spatula. Make sure that it’s level with the surrounding surface.
- Let it dry: Allow the wood filler to dry completely before proceeding further.
- Sand again: Once the filler has dried, use sandpaper again to smooth out any rough spots and make sure that it’s flush with the rest of the surface.
- Stain or paint: If necessary, stain or paint over the repaired area to match its surroundings.
Tips and Tricks for Fixing Dents in Wood
Here are some tips and tricks that can make repairing dents in wood easier:
- Use a toothpick or needle-nose pliers to remove any debris from inside deep dents.
- Don’t apply too much pressure when applying wood filler, as this could cause more damage.
- Be patient – allow each filler layer to dry completely before adding another layer.
- Use a hairdryer to speed up the drying process of wood filler.
- If you’re unsure about how to proceed, seek professional help.
Comprehensive Video Tutorial for Repairing and Fixing Wood Dents
If you’re a visual learner, there are many video tutorials available online that can guide you through the process of repairing dents in the wood. These videos offer step-by-step instructions and often include tips and tricks that can make the task easier.
Some popular video tutorials include:
- “How to Repair Dents in Wooden Furniture” by DIY Pete
- “How to Remove Dents from Wood Furniture” by This Old House
- “Fixing a Dent on a Wooden Table” by The Samurai Carpenter
Tips on Removing Dents from Finished Wood Surfaces
Using an Iron and Damp Cloth to Steam Out Small Dents
Small dents in finished wood surfaces can be easily removed with the help of a damp cloth and an iron. Start by wetting the cloth with water and placing it over the dent. Then, heat up your iron to a medium setting and place it on top of the damp cloth. Hold it there for about 30 seconds, making sure not to keep it too long in one spot.
The steam generated by the damp cloth will cause the wood fibers to expand, effectively removing the dent. Once you remove the iron, use a dry cloth to wipe away any excess moisture.
Filling Larger Dents with Wood Filler
For larger dents that cannot be steamed out, filling them with wood filler is a great option. Begin by cleaning out any debris or loose wood from inside the dent. Then, apply a small amount of wood filler into the dent using a putty knife or scraper.
Make sure to fill in all areas of the dent until it is level with the surrounding surface. Allow time for the filler to dry completely before sanding down any rough edges or excess material.
Applying Heat and Reshaping Wood
Heat can also be used to reshape dented wood surfaces back into their original form. Start by heating up your hairdryer on high and directing it towards the affected area for several minutes until it becomes pliable.
Then, gently use a damp cloth or your fingers to reshape the wood back into its original shape. Hold it there until it cools down and hardens again.
Trying Vinegar and Olive Oil Mixture
Another method that works well for minimizing dents in finished wood surfaces is using vinegar and olive oil. Mix equal parts white vinegar and olive oil together in a bowl.
Dip a soft cloth into this mixture and rub it onto your wooden surface along with the grain direction until you have covered the entire surface. The vinegar will help to raise the wood grain, while the olive oil will moisturize and protect it.
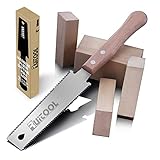
- An Idea Gift for Woodworker, Carpenter and Craft Man
- Optimal Blade Size: Through numerous manual tests, We found that the 6″ Japanese saw blade is the ideal size for precise cutting, enabling easy flush and finish cuts.
- Durable and Flexible Saw Blade: The hand saw blade is made of SK5 high-carbon steel. The Japanese pull saw teeth are processed by a high-frequency hardening machine imported from Japan, and the hardness can reach HRC60-63 degrees.
- Double Edged: One side of Japanese hand saw is 17 TPI for cutting hardwood, and the other side is 14 TPI for cutting softwood. Also can seen as Rip cut and Cross cut.
- Hardened 3-Edge Teeth: The hand saw has three-sided grinding gear design, sharp edge, faster chip removal, and smoother cutting.
Last update on 2026-07-24 / Affiliate links / Images from Amazon Product Advertising API
Use Visual Aids: Pictures and Videos to Demonstrate the Process
Show Circular Motions When Working on The Affected Area
One of the most important aspects of removing dents from wood is using circular motions when working on the affected area. Doing so allows you to distribute pressure evenly across the surface and avoid creating new dents or scratches. It’s also important to take your time during this process and not rush through it, as this could result in further damage.
Repeat The Method As Necessary Until The Dent Is Removed
Removing a dent from wood takes time and patience, which is why it’s important to repeat the method as necessary until the dent is completely removed. Depending on the dent’s severity, this may require multiple pressure and heat application rounds.
Achieving a Flawless Finish on Your Wooden Surfaces
Sand the Wood Surface with Fine Grit Sandpaper
Achieving a flawless finish on your wooden surfaces requires a proper preparation. One of the first steps is sanding the wood surface with fine-grit sandpaper to remove any roughness or imperfections. The type of sandpaper you use will depend on the condition of your wood surface. If there are deep scratches or gouges, start with a coarser grit and work your way up to a finer grit for a smoother finish.
When sanding, make sure to follow the direction of the wood grain to avoid damaging it. Use even pressure and keep the sandpaper flat against the surface. Be sure to wear protective gear such as gloves and a mask to avoid inhaling sawdust.
Clean the Wood Surface with a Damp Cloth
After sanding, clean the wood surface with a damp cloth or washcloth to remove any dust or debris. This will ensure that your varnish or paint adheres properly and no bumps or particles are trapped under it.
Ensure that you wring out excess water from your cloth before wiping down the surface. Too much moisture can cause swelling in hardwood floors and furniture, leading to warping over time.
Apply Varnish or Paint for Protection
Once your wood surface is sanded and cleaned, it’s time to apply varnish or paint for protection against future damage. Varnish provides a durable protective coat that enhances natural wood grain, while paint adds color and coverage.
When applying varnish or paint, use long strokes in one direction along the grain of the wood fibers for an even finish. Avoid going over areas that have already been covered, as this can create streaks and uneven patches.
Use a Paper Towel or Cloth for a Smooth Finish
To achieve a smooth finish on your wooden surfaces after applying varnish or paint, gently use a paper towel or cloth to rub along the grain of the wood fibers. This will help to remove any excess varnish or paint and create a smooth, even finish.
Make sure that your paper towel or cloth is clean and dry before using it. You can also use fine-grit sandpaper between coats for a smoother finish.
Tips on Finishing and Protecting Wood
Tips on Finishing and Protecting Wood:
Achieving a flawless finish on your wooden surfaces is not only about removing dents. It also involves protecting the wood from further damage and maintaining its natural beauty for years to come. Here are some tips to help you finish and protect your wood:
- Sanding: Before applying any finishing product, thoroughly sand the surface of the wood. This will remove any rough spots or imperfections that may be visible after applying the finish.
- Staining: Staining is a great option to add color to your wood. However, make sure to choose a stain that matches the natural color of your wood and apply it evenly with a brush or cloth.
- Sealing: Once you have applied your stain (if desired), it’s time to seal the wood. A quality sealer will protect your wood from moisture and other elements that can cause damage over time.
- Varnishing: Varnish is another popular option for finishing wood surfaces. It provides a hard, protective layer that is resistant to scratches and other forms of damage.
- Waxing: If you want to add an extra layer of protection to your finished surface, waxing is a great option. It will give your wood a beautiful shine while also protecting it from moisture and other elements.
- Maintenance: To keep your finished surfaces looking their best, it’s important to maintain them regularly. This includes dusting them regularly, wiping up spills immediately, and avoiding harsh cleaning products that can damage the finish.