25 Home Repairs You Can Safely Handle Yourself
Small projects can save you a service call, shorten your to-do list, and teach you how your home works. Accessible, low-risk fixes are practical DIY home improvement tasks and part of routine home maintenance.
These 25 tasks include minor repairs and preventive maintenance, not work on wiring, gas lines, structural parts, or hazardous roof areas. Follow product instructions and local rules, and start with a job you understand.

- Comprehensive tool set: Includes all the tools you need for most small repairs and DIY projects, from a hammer, pliers and screwdrivers to a tape measure and many more.
- Sturdy and reliable: Heat treated and chrome plated to resist corrosion
- Easy organization: Comes with a plastic toolbox storage case to keep all your tools organized and securely stored.
- Portable and lightweight: The tool kit is lightweight and comes with a carrying handle, making it easy to take with you wherever you go.
- Great for Gifting: This tool kit is a fantastic choice for friends and family, ideal for birthdays, holidays, housewarmings, and special occasions.
Last update on 2026-10-27 / Affiliate links / Images from Amazon Product Advertising API
Key Points
- Start with accessible tasks such as cleaning an aerator, tightening hardware, or replacing a compatible filter.
- Use the correct replacement parts and follow manufacturer instructions rather than forcing fittings or improvising repairs.
- Stop when you find persistent leaks, damaged pipes, rot, recurring cracks, or an attachment that won’t hold securely.
- Leave gas connections, electrical faults, structural concerns, and roof work requiring a climb to qualified professionals.
- Keep maintenance separate from system alterations, which may require permits, licensing, and can affect warranties.
25 DIY Home Repairs You Can Handle Without Calling a Pro
Some jobs prevent breakdowns rather than fix broken parts. Both belong in a regular maintenance routine, as the federal healthy-home checklist illustrates.
Take care of five common plumbing annoyances
- Clear a simple sink clog. Remove hair from an accessible stopper or use a sink plunger to clear clogged drains. Don’t plunge a drain containing chemical cleaner, which could splash back.
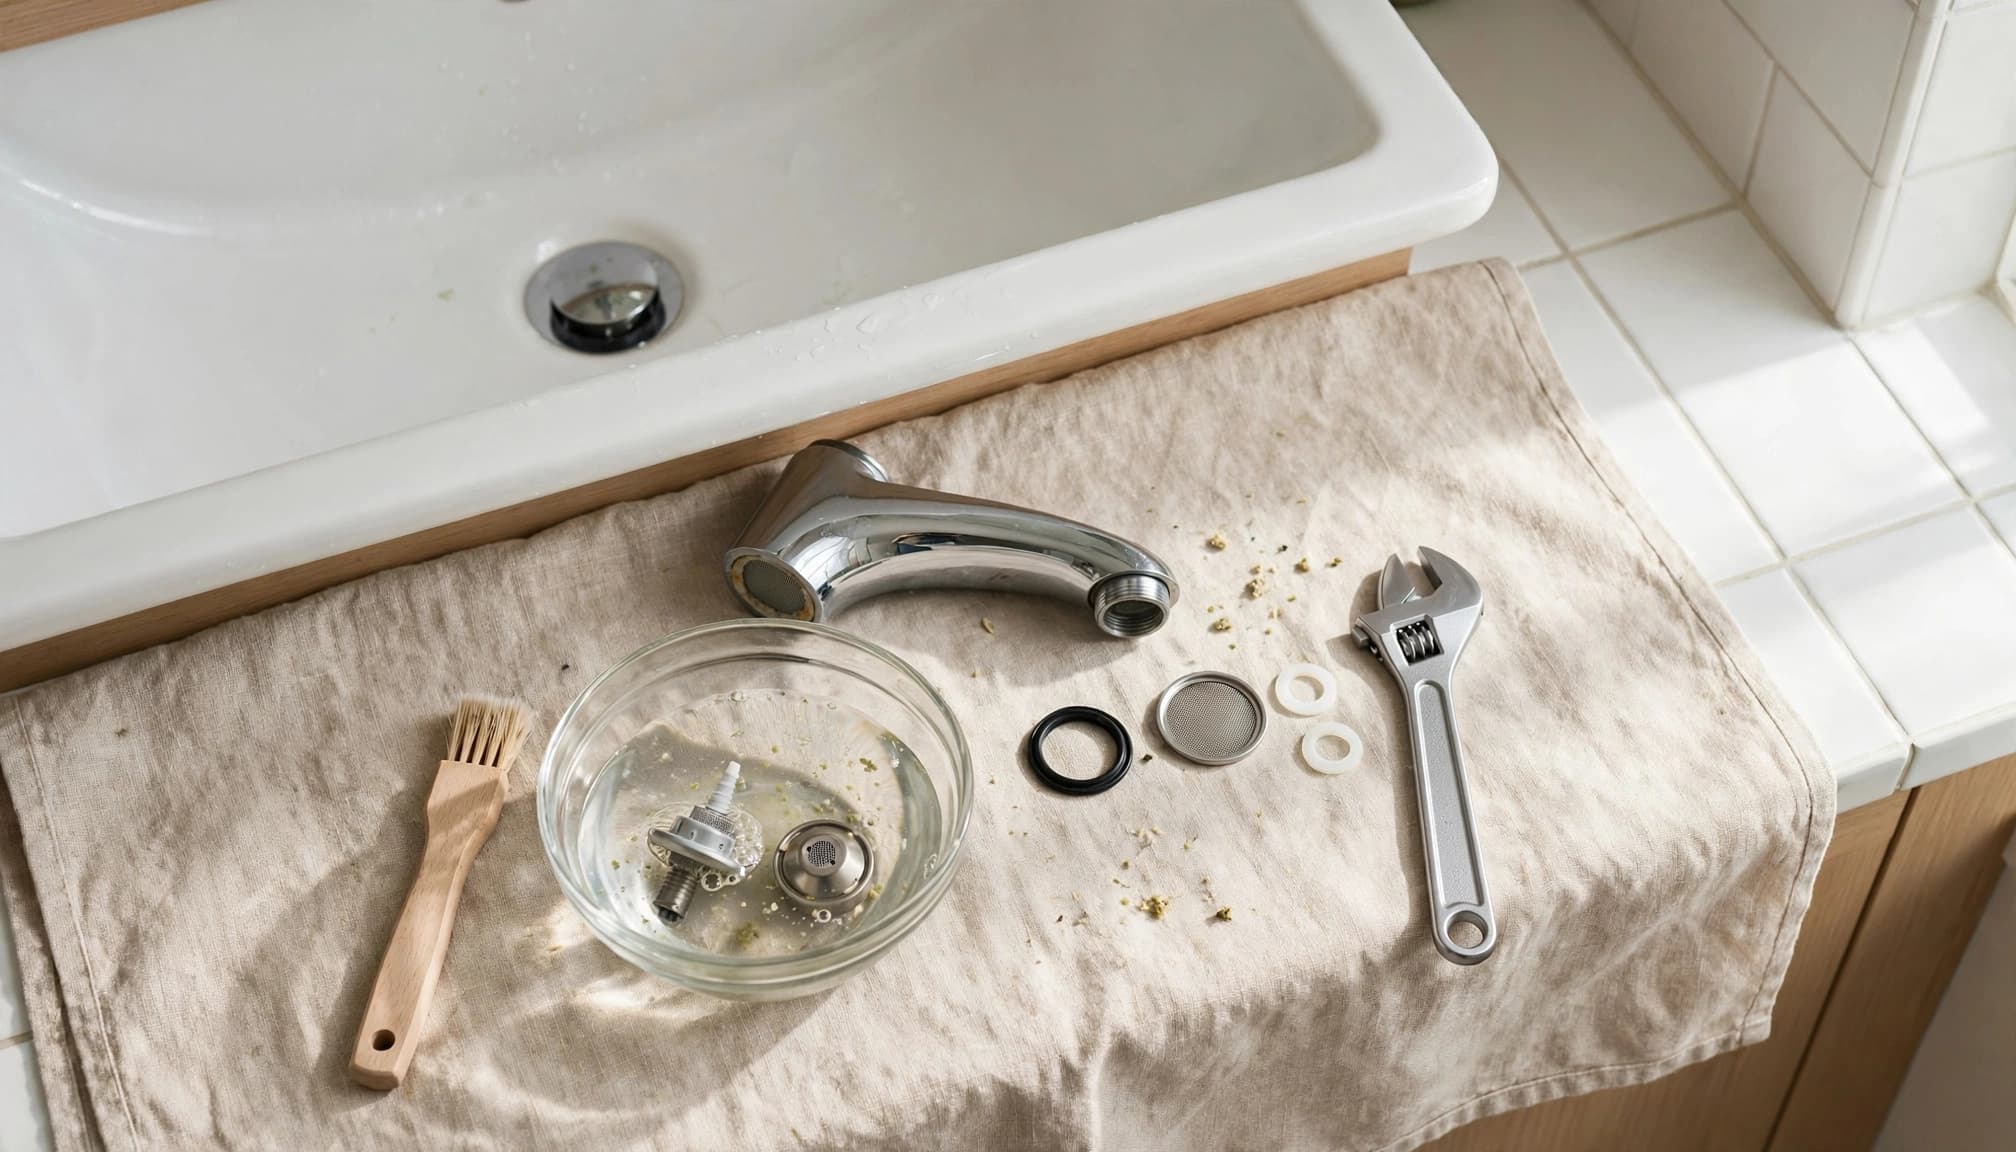
- Clean a faucet aerator. Close the drain before removing small parts. Keep components in order, protect the faucet finish, and clean deposits using a finish-compatible method.
- Replace a showerhead. Choose a compatible replacement and follow its connection instructions. Avoid twisting the shower arm, especially where it enters the wall.
- Stop a chain-related or flapper-related toilet run. Look for a tangled chain or poor flapper seal. Shut off the water before installing a compatible replacement flapper.
- Tighten a loose toilet seat. Use the correct screwdriver while holding the retaining nut beneath the bowl. Tighten gently, as excessive force can damage the seat or porcelain.
These common DIY plumbing repairs depend on sound components. For a leaky tap, you may need a compatible washer or cartridge. Close the water shutoff valve before opening the fixture. Stop if the valve sticks, piping looks damaged, or the leak continues after the basic fix.
Fix five small problems with doors, windows, and walls
- Tighten a loose door hinge. Support the door and snug existing door hinges with the right screwdriver. A screw that spins freely needs more than repeated tightening.
- Ease a sticking interior door. For squeaky doors, inspect the hinges and use only a manufacturer-compatible lubricant. For a sticking door, first locate the rubbing point. Cleaning away debris or correcting a loose hinge may restore movement without removing wood.
- Replace worn door weatherstripping. Match the existing profile and attachment style. Clean the contact surface, then fit the replacement so the door still latches easily.
- Free a sticking vinyl window. Clean the track, then apply a manufacturer-compatible dry lubricant. Avoid oily products that attract dirt or can damage vinyl.
- Patch a small drywall hole. Use a drywall repair product sized for the hole. Keep the repair cosmetic, and avoid cutting into walls with unknown contents.
Assess rot, damaged frames, broken glass, and recurring wall cracks before cosmetic work. Sudden sticking across several doors can also indicate a broader problem.
Make five quick fixes to hardware and walkways
- Tighten a cabinet knob or handle. Hold the hardware steady while tightening its screw from inside. Stop once snug so you don’t crush the cabinet face.
- Adjust a loose cabinet door. Identify the hinge’s mounting and adjustment screws before turning anything. Small adjustments usually work better than several full turns at once.
- Clean sticking drawer slides. Remove the drawer as designed, wipe away debris, and use a slide-compatible lubricant. Bent tracks or damaged rollers may need replacement parts.
- Secure a loose handrail attachment. Tighten existing fasteners only when the brackets and backing are sound. If the rail still moves, stop using it and arrange repairs.
- Secure a loose rug or runner. Use a floor-compatible nonslip pad or rug tape. Flatten curled edges and keep the rug clear of door swings.
A surface-level fix won’t correct damaged framing or missing handrail backing. Keeping walkways uncluttered supports the same fall-prevention goal emphasized in Mississippi State Extension’s healthy-home checklist.
Keep five household appliances and vents working well
- Replace an HVAC air filter. Turn the system off as directed, match the specified size and type, and follow the airflow arrow. ENERGY STAR recommends checking filters monthly.
- Clean a range-hood filter. Wash a removable metal grease filter according to its manual. Disposable charcoal filters generally need replacement, so don’t assume every filter is washable.
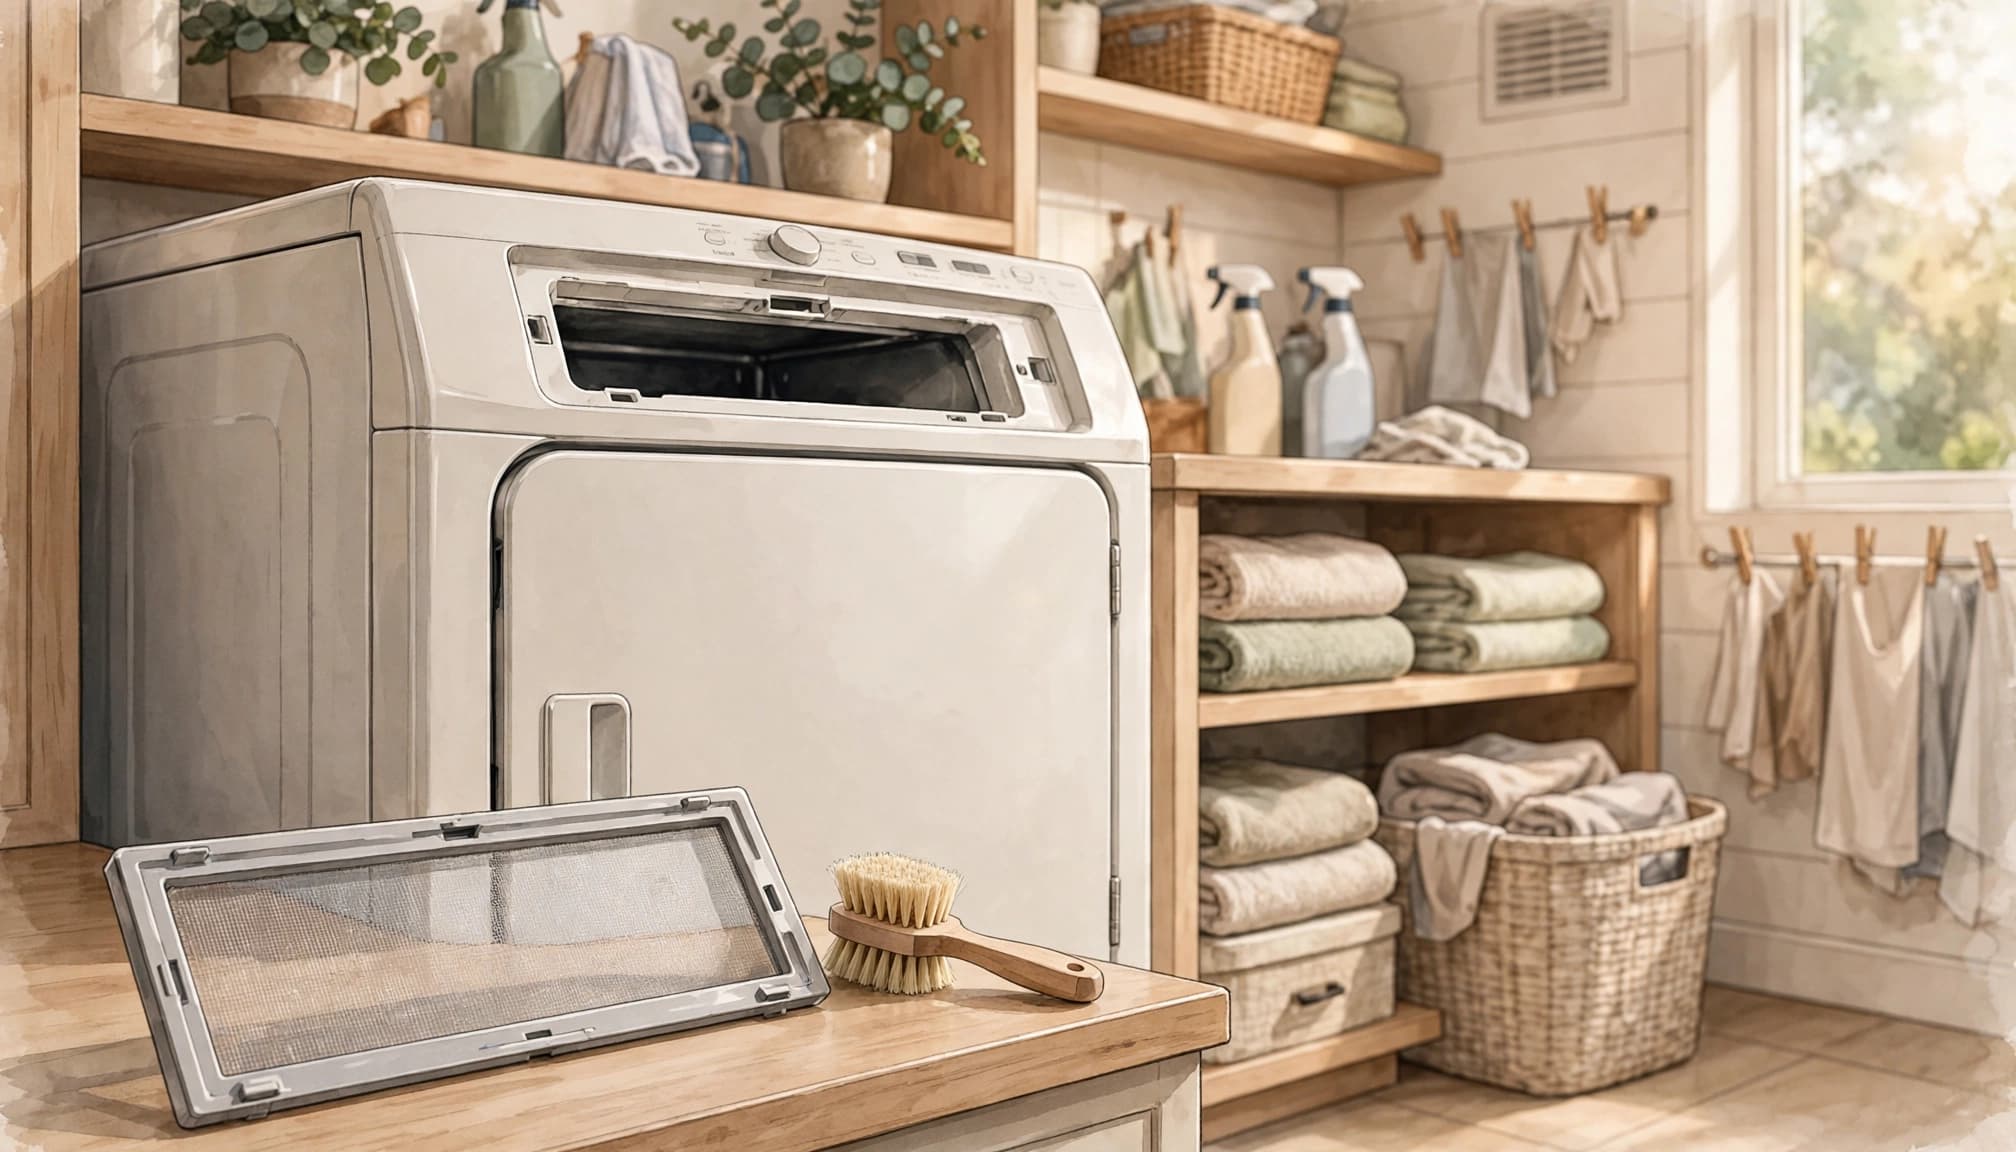
- Clear dryer lint buildup. Whirlpool advises cleaning the lint screen before or after every load. Clean only safely accessible vent parts, and don’t disturb gas connections.
- Clean the refrigerator drip pan. Unplug the refrigerator before cleaning an accessible pan. Inspect visible ice-maker connections for moisture without disconnecting tubing or moving a heavy appliance alone.
- Clean a washer gasket or run its cleaning cycle. Use the manufacturer’s recommended product and method. Never mix cleaning chemicals, and keep fingers clear of moving parts.
Damaged hoses, inaccessible dryer ducts, and faults that persist after basic maintenance need qualified service. Don’t open appliance housings or modify electrical or fuel connections.
Refresh five surfaces and simple safety items
- Renew a small tub or shower caulk seam. Limit this to clean, sound surfaces without signs of hidden moisture damage. Follow the sealant’s preparation and curing instructions.
- Touch up chipped interior paint. Clean the area and use a compatible coating with a matching sheen. Before you paint a room, check that the surface is sound and the coating is suitable. Avoid sanding suspect old paint because it may contain lead.
- Replace a torn window screen. Work on a removable screen at ground level. Match the mesh and spline, and use a screen roller where the frame requires one.
- Clean dirty window screens. Remove them only when safe, then brush or gently wash away buildup. Let them dry before reinstalling, without bending the frames.
- Test smoke and carbon monoxide alarms. Test each smoke detector monthly and replace a user-serviceable smoke detector battery as directed. Sealed-battery units need replacement at their stated service life, rather than a battery swap.
The CDC’s healthy-home safety guide recommends testing smoke alarms monthly. CPSC also recommends replacing smoke alarms older than 10 years. Follow each CO alarm’s stated replacement schedule.
- Lightweight design fits into tight areas
- High performance motor delivers 300 unit watts out (UWO) of power ability completing a wide range of applications
- High speed transmission delivers two speeds (0-450 & 1,500 rpm) for a range of fastening and drilling applications
- 1/2′ single sleeve ratcheting chuck provides tight bit gripping strength. Ergonomic handle delivers comfort and control

Last update on 2026-10-27 / Affiliate links / Images from Amazon Product Advertising API
Know when a home repair is safer to leave to a pro
DIY home repairs make sense when the task is accessible, the cause is clear, and you understand any required shutoff. Concealed systems and uncertain damage change that decision.
Stop when a small fix points to a bigger problem
Widening cracks, rot, water stains, mold, and leaks that continue after a basic fix deserve diagnosis by a licensed professional. Paint and caulk can hide symptoms while moisture continues to damage materials.
HUD’s safe and healthy home guide identifies moisture as a risk in poorly maintained homes. Leave recurring leaks and damaged framing exposed for assessment rather than covering them.
Repeated trips at a circuit breaker or a GFCI outlet that won’t reset can indicate a fault. Don’t keep resetting it or open the outlet. If you smell gas, leave immediately and call the utility or 911 from outside.
Check safety, instructions, and local rules first
Use the right tools, protect nearby surfaces, and isolate water or power only when you know how to do so safely. A shutoff alone doesn’t make unfamiliar work appropriate.
Hire qualified help for gas work, energized or damaged wiring, light fixtures with damaged or unfamiliar wiring, panel or circuit changes, structural concerns, and roof work requiring a climb. These are repairs best left to professionals.
Permit and licensing rules vary by location, especially for plumbing, wiring, HVAC, and structural alterations. Manufacturer instructions and warranty terms can also limit what owners can do.
Essential Tools for DIY Home Repairs
You do not need a large workshop to handle basic home repairs.
Start with a claw hammer, a set of screwdrivers, an adjustable wrench, slip-joint pliers, a tape measure, a utility knife, and a spirit level.
A cordless drill with assorted drill and driver bits is also extremely useful for assembling furniture, hanging shelves, tightening hardware, and making small repairs.
Keep a flashlight, work gloves, safety glasses, and a small step ladder nearby.
A few inexpensive specialty tools can make common jobs much easier.
A plunger and drain snake help with minor clogs, while a caulk gun, putty knife, wall filler, and sanding sponge help seal gaps and repair small holes.
For basic electrical checks, a polarity plug tester can identify certain outlet problems, but turn off power at the circuit breaker before working near wiring.
If a repair involves gas lines, major plumbing, structural damage, or unfamiliar electrical work, stop and call a licensed professional.

- ACCURATE CIRCUIT BREAKER IDENTIFICATION: Quickly locate the correct breaker with precision using the transmitter and receiver of the circuit breaker finder, ensuring efficient electrical troubleshooting
- CLEAR INDICATIONS: The Receiver provides visual and audible cues when the correct breaker is found, ensuring a hassle-free locating process on 90-120V AC circuits
- BUILT-IN GFCI TESTER: The Transmitter includes a GFCI outlet tester, enabling you to inspect wiring conditions and test GFCI devices for added safety
- LIGHT SOCKET AND GROUNDING ADAPTERS: Easily find the correct circuit for a lighting fixture with the light socket adapter, and use the included 3-prong to 2-prong grounding adapter for added convenience
- ALLIGATOR CLIP ADAPTER: Enables testing on bare wires, providing versatile usage options
Last update on 2026-10-27 / Affiliate links / Images from Amazon Product Advertising API
Frequently Asked Questions
Do small home repairs need a permit?
Permit requirements depend on your city or county and the work involved. Cosmetic maintenance often gets treated differently than changes to plumbing, electrical systems, HVAC, or structure. No nationwide exemption covers every small repair.
What basic tools are useful for home repairs?
A starter kit includes screwdrivers, an adjustable wrench, pliers, a tape measure, a utility knife, a flashlight, a small level, and a plunger.
Add eye protection and suitable work gloves.
A polarity plug tester can screen some outlet issues, but it can’t diagnose every electrical fault or replace professional help.
Use a cordless drill for suitable hardware tasks, with the correct bit, and don’t drill where wiring or other hidden contents are unknown. Specialized repairs require the right tool, not an improvised substitute.
Can renters make minor repairs themselves?
Your lease determines which renter-friendly repairs you can handle without permission. Routine cleaning differs from changing fixtures, drilling holes, or altering building components. Report leaks, electrical concerns, and safety defects promptly, and get landlord approval before going beyond permitted upkeep.
What should I do if a repair reveals water damage?
Stop the cosmetic work and limit further water exposure if you can do so safely. Photograph the damage and address its source before patching or painting. Hidden leaks, rot, or widespread damage need professional assessment.
Can DIY repairs affect a home warranty?
Yes, some warranty terms restrict unauthorized repairs or modifications. Routine owner maintenance and covered service work may follow different requirements. Avoid opening or modifying covered equipment when its terms require authorized service, and keep records of permitted maintenance.
How much do DIY home repairs cost?
Costs vary with the parts and tools a repair requires. A misdiagnosed cause can make the work more expensive, so identify the problem before buying supplies or starting repairs.
Build Confidence With One Small Repair
Use this list as a starting point for low-risk DIY projects. Begin with one manageable task, such as tightening a cabinet handle or cleaning an aerator. This helps you learn your home’s components without taking unnecessary risks.
Keep clear stopping points in every project. When hidden damage, gas, electricity, structure, hazardous heights, or regulated alterations come into play, qualified help is the safer next step.